
Sliding into a warm bed on a freezing winter night feels amazing. But that cozy moment can turn stressful if you’re worried about using your heated blanket the right way.
Just unwrapped a new electric blanket? Second-guessing those controller settings? You’re not alone.
Most people miss this: Wrong use kills your comfort. It also creates safety risks. Plus, your blanket won’t last as long.
The good news? You can master your heated blanket in just a few minutes.
Confused by dual controls? Not sure what temperature works for different situations? Worried about washing it without wrecking the wires? This guide covers it all. You’ll learn setup, daily use, and storage tips that keep your blanket ready for years.
Let’s make you a heated blanket pro.
First-Time Setup: Unboxing to Ready-to-Use
Your heated blanket just arrived. Open the box and lay everything out on a clean, flat surface. You’ll want to spot all the components before you start.
What You’ll Find Inside:
– The blanket itself (folded, with visible wiring)
– Controller unit(s) (one for single control, two for dual zones)
– Power cord
– Instruction manual
– Safety tag (attached to the blanket)
Read the safety tag right away. It lists crucial warnings specific to your model. Don’t toss it until you’ve noted any restrictions on washing or temperature limits.
Pre-Use Inspection
Unroll the blanket. Run your hands along the surface to feel for any damaged wires. You’re checking for lumps, exposed wiring, or unusual stiffness. Look at the power cord connection point where it attaches to the blanket. This spot takes the most stress. Make sure it’s secure and undamaged.
Check the controller display. Most modern units light up after you press the power button, even before plugging in. Nothing happens? Flip the batteries compartment and install the included batteries if needed.
First Wash (Optional but Recommended):
Some makers suggest washing before first use. This removes manufacturing residues. Check your manual’s heated blanket washing instructions. Many allow gentle machine washing with the controller detached. Washing isn’t recommended pre-use? Air out the blanket for 2-3 hours.
Connect and Test:
Attach the controller to the blanket’s connection port until you hear a click. Plug the power cord into a wall outlet. Never use an extension cord—it can overheat. Set the controller to the lowest heated blanket temperature setting. Wait 5 minutes. Touch the blanket’s surface to confirm it’s warming across all zones.
You’re ready for your first cozy night.
Your Heated Blanket Controller: What Each Button Does
Most heated blanket controllers handle three tasks: power on the heat, set the temperature, and turn everything off. That’s the basic setup. The small details make a bigger difference than you might expect.
Power Button Basics
Press the power button. It lights up. That glow shows electricity flowing to the heating parts. Press again to cut all power. Some models need a 3-second hold, not a quick tap. Check your manual if the first press does nothing.
Temperature Control Systems
Your controller uses one of three systems:
-
Dial controllers: Turn the dial to pick from 3-10 heat levels. You get low-medium-high zones, no numbers.
-
Digital displays: These show exact temperature in Fahrenheit. Arrow buttons move it up or down in 1-degree steps. Most range from 80°F to 115°F.
-
Preset buttons: Fixed choices like “warm,” “cozy,” “hot.” Each button matches a set temperature. You can’t change these.
Auto Shut-Off Settings
The auto shut off heated blanket timer stops all-night heating. Standard timers go from 1-10 hours. Set it before bed. The controller beeps once at the end, then stops power. Some premium models sense zero movement for 3+ hours. These auto-sleep without needing a timer.
Dual Control Zones Explained
Got a dual control heated blanket? Two controllers connect to one blanket. Each runs half the bed on its own. The primary controller (marked “1” or “R”) goes on the right side as you lie down. The secondary one handles the left. They work alone. Your partner’s heat choice won’t change your side.
Place controllers on matching nightstands. Tangled cords lead to accidental unplugs while you sleep.
How to Use Your Heated Blanket for Better Sleep
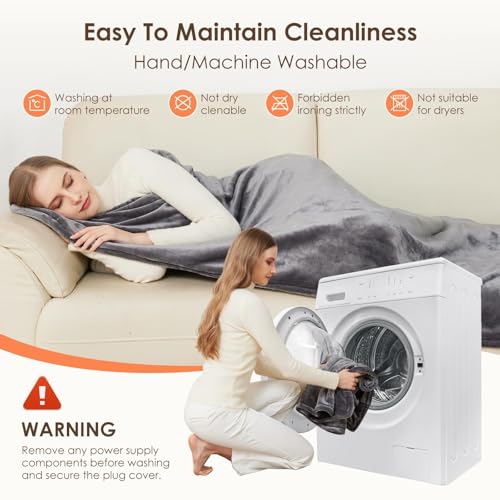
Temperature control affects your sleep quality. Most people crank the setting to high, then wake up sweating at 2 AM. Don’t do this.
Finding Your Perfect Temperature Setting
Start at 86°F thirty minutes before bed. This warms your sheets without making the mattress too hot. Get into bed once it feels warm to the touch—not hot.
Once you’re in bed, drop the temperature to 77-80°F. Your body heat adds warmth under the covers. The blanket just maintains that cozy feeling. Sleep hot? Go lower to 71-75°F. Sleep cold? Push to 85°F max.
Pro tip: Got a dual control heated blanket? Set different temperatures for different body zones. Run your feet warmer (82-85°F) and your torso cooler (75-77°F). Feet lose heat faster. This combo keeps your whole body balanced.
Using the Timer for All-Night Comfort
Don’t run your blanket at full power all night. Set the heated blanket timer for 3-4 hours. You get warmth during the coldest part of the night (2-5 AM). Then it shuts off on its own.
Here’s the sequence:
1. Turn on power 30 minutes before bed
2. Set initial temperature to 86°F (preheating phase)
3. Get into bed and lower to 77-80°F
4. Activate 4-hour timer
5. Blanket warms you through the night, stops before dawn
The auto shut off feature stops overheating and saves energy. Running 4 hours at medium heat uses about 0.15-0.25 kWh. That’s 2-4 cents per night at average rates. Compare that to heating your whole bedroom with a space heater (1.5 kWh for the same period).
Adjusting for Weather Changes
Mild winter nights (40-50°F outside)? Drop your setting to 71-75°F. Arctic blasts (below 20°F)? Push to 82-86°F. Your bedroom temperature changes with outdoor weather. Match your blanket setting to it.
Watch how fast you warm up. Comfortable within 10 minutes? Lower the setting by 3-5°F next time. Still cold after 20 minutes? Bump it up bit by bit until you hit your sweet spot. This takes 3-5 nights. Then you’ll know your exact preferences.
Keep a mental note or jot down what works. “Tuesday, 34°F outside, set blanket to 80°F, perfect comfort.” This beats guessing every night.
Critical Safety Guidelines: What You Must Know
Electric blankets cause about 500 fires each year in the United States. Most happen because users skip basic safety checks. Others ignore warning signs before their blanket fails.
You can avoid becoming part of that statistic. These guidelines protect you, your family, and your home.
Never Use a Damaged Blanket
See burn marks, frayed wiring, or smell scorch marks? Retire the blanket right away. Don’t try to repair heating wires yourself. The internal wiring runs electrical current close to fabric. Any break in insulation creates fire risk.
Check your blanket every month during use. Run your hands across the entire surface. Feel for hard spots, lumps, or areas that seem stiff. These signal broken or bunched wiring inside. Look at plug connection points for discoloration or melting plastic. These spots overheat first.
Blankets older than 10 years belong in the trash. This applies even if they look fine. Insulation breaks down over time. Modern blankets have better safety features anyway. Auto shut off heated blanket technology didn’t exist in older models.
Folding Creates Fire Hazards
Never fold your heated blanket while it’s on. Folded fabric traps heat in tight areas. This overheats wires. It can melt insulation or ignite fabric. Sounds extreme? House fires start this way.
Drape your blanket flat across your mattress. Tuck edges under the mattress if you want. But keep the center lying smooth. No bunching. No heavy objects on top. Your comforter can go over it—that’s fine. But don’t pile winter coats or thick quilts that compress the heating elements.
Who Shouldn’t Use Heated Blankets
Skip heated blankets if you:
– Have diabetes with reduced sensation (you won’t feel burns developing)
– Are pregnant (heat exposure risks fetal development)
– Have open wounds or skin conditions
– Take medications that cause drowsiness
– Are under age 5 or over age 75 without supervision
Small children can’t regulate temperature settings. Older users may have reduced heat sensitivity. They won’t notice overheating until injury occurs. Pets with claws can puncture wiring insulation. Keep both away from active blankets.
Moisture Ruins Safety Features
Water and electricity don’t mix. Keep your heated blanket away from spills, wet hair, or humid bathroom storage. Moisture shorts electrical parts. This damages controllers and creates shock risk.
Caught in rain during storage? Unplug right away. Let it air-dry for 48-72 hours before use. Check all connections for water damage or corrosion. Not sure? Replace it.
Following heated blanket washing instructions matters here too. Machine washing on the wrong cycle forces water into sealed electrical connections. Detach controllers first. Use gentle cycles. Air dry flat—never use a dryer’s high heat setting.
Washing and Maintenance: Keeping Your Heated Blanket Clean
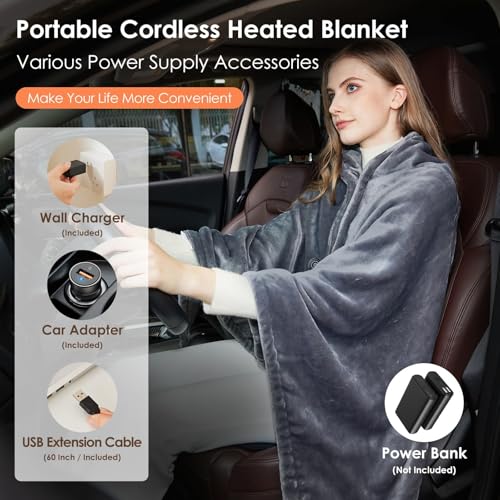
Your heated blanket collects skin cells, sweat, and dust just like regular bedding. The difference? Internal wiring makes cleaning tricky. Get it wrong and you’ll damage electrical parts. Get it right and your blanket stays fresh for years.
Read Your Care Label Like Your Life Depends On It
That small tag sewn into the corner holds critical information. It tells you three things: Can you machine wash it? What water temperature should you use? Can you tumble dry your model? Some blankets need hand washing. Others don’t allow dryers at all. The label knows your blanket’s build better than any generic guide.
Can’t find the tag? Check the instruction manual or the maker’s website. Don’t guess. The wrong washing method destroys heating elements you can’t see or repair.
Pre-Wash Essentials: Disconnect Everything
Unplug the power cord from the wall. Detach the controller from the blanket’s connection port. Pull out the power cord too if it disconnects. Water and electricity create shock hazards. Leftover current in unplugged cords can damage internal circuits if they get wet.
Lay disconnected parts somewhere dry. Not on the bathroom counter. Not near the washing machine. Keep them away from any water source while you clean the blanket.
Spot Cleaning for Small Stains
Coffee spill on one corner? Don’t wash the whole blanket. Wet the stained area with cool water. Dab a tiny amount of mild detergent on the spot. Let it sit for 20 minutes.
Pat the area with a damp cloth or soft toothbrush. Use gentle circular motions. Don’t scrub hard enough to shift internal wires. Rinse with a clean damp cloth until the soap disappears. Press a dry towel against the spot to absorb moisture.
Still see the stain? Repeat the process 2-3 times. Stubborn marks need patience, not force. You want to lift the stain without stressing the heating wires underneath.
Machine Washing the Right Way
Your care label approves machine washing? You’ll need a large capacity washer. A small machine tangles wires and strains connections.
Loading technique matters:
– Top-load washers: Drape the blanket around the agitator in loose folds
– Front-load washers: Place it in the drum without tight bunching
– Add bath towels if the load feels unbalanced
Pour mild detergent into the dispenser. Skip the bleach. Avoid fabric softener—it leaves residue that cuts heating power. Never add harsh stain removers or chemical treatments.
Set your washer to gentle or delicate cycle. Choose low-speed spin. Pick low agitation. Pick cool or warm water, never hot. Hot water damages wire coating over time.
Wash your heated blanket alone. Don’t throw in regular clothes or sheets. They create extra friction during the spin cycle.
Hand Washing Alternative
No large washer available? Your care label says hand wash? Fill a bathtub or large sink with cool to warm water. Add a small amount of mild detergent. Swirl it around to dissolve.
Submerge the blanket. Let it soak for a few minutes. Swish the fabric with your hands. You’re agitating just enough to release dirt. Don’t twist, wring, or bunch the material.
Drain the tub. Refill with clean water. Swish the blanket again to rinse out soap. Keep draining and refilling until the water runs clear with zero suds. This takes 2-3 rinse cycles.
Drying Without Damage
Check your care label for dryer approval. Most modern blankets handle low-heat drying. Set your dryer to low or cool temperature. Use the air fluff or no-heat cycle if available. Run a short cycle—10 to 15 minutes maximum.
Pull the blanket out while it’s still a bit damp. Too much drying makes wires brittle.
Prefer air drying? Drape the blanket over a drying rack, clothesline, or shower rod. Don’t use clothespins—they create stress points on internal wiring. Let it hang until bone dry. This takes 8-24 hours depending on humidity.
Wash your blanket often during winter? Alternate between dryer and air drying. This rotation keeps wire flexibility better than using the same method every time.
How Often to Wash
Wash your heated blanket 1-2 times per month during heavy use in cooler months. Use it every night? Lean toward twice per month. Occasional weekend use? Once a month works fine.
Summer storage coming up? Wash it one final time before packing it away. Starting the next season with a clean blanket beats shaking out months of dust.
What Never to Do
Skip dry cleaning unless your care label requires it. Dry cleaning chemicals can break down wire coating. Don’t overload your washing machine—this creates too much agitation. Never use high heat in washers or dryers. And never, ever submerge the controller or power cord in water. These parts aren’t waterproof and won’t survive.
Follow heated blanket washing instructions to keep your investment working and safe season after season. A clean blanket heats better and lasts years longer than one damaged by wrong cleaning.
Proper Storage Tips to Extend Product Lifespan
Spring arrived and you packed away your heated blanket without a second thought. Next winter, you pulled it out to find the controller dead and wires that won’t heat right. Poor storage kills more blankets than years of use ever could.
Clean Before You Store
Wash your blanket one final time before packing it away. Body oils, sweat, and dust attract moisture during storage. Over months, this moisture eats away at the internal wiring. Follow the heated blanket washing instructions from the previous section. Let it air dry all the way—we’re talking bone dry, not just damp-free. Leftover moisture? That’s mold and wire damage waiting to happen.
Never Fold—Roll Instead
Folding puts permanent creases in the fabric. These creases stress the heating wires at every bend point. Those weak spots fail first next time you plug it in. Lay your blanket flat on a clean floor. Roll it gently from one end to the other. Think pool noodle, not yoga mat. You want a soft roll with no tight spots.
Choose the Right Storage Container
Skip plastic bins that trap humidity. Use a breathable cotton storage bag or a cardboard box lined with acid-free tissue paper. Toss in two silica gel packets to absorb any moisture that sneaks in. Store the controller and power cord in a small cloth bag. Keep them with the blanket so you don’t spend next November hunting for missing parts.
Pick a Cool, Dry Spot
Attics hit 120°F in summer. Basements flood. Garages go from freezing to roasting. Store your blanket in a bedroom closet, under-bed storage, or a climate-controlled space. A steady temperature between 60-75°F works best. Keep it away from windows where sunlight breaks down fabric over time.
Your blanket will unroll next winter just as warm and reliable as the day you put it away.
Troubleshooting Common Heated Blanket Issues
Your controller won’t turn on. Or half the blanket heats while the other side stays cold. Maybe you smell something burnt.
These problems pop up without warning. Most have simple fixes. Some mean danger that needs quick action.
Controller Won’t Power On
Check the wall outlet first. Plug in your phone charger or a lamp. Does it work? Yes? The outlet’s fine. No? You found the problem—flip your circuit breaker or try a different outlet.
Still nothing? Look at where the controller connects to the blanket. That connection port collects dust and lint. Unplug everything. Blow into the port or wipe it with a dry cloth. Plug back in until you hear a click.
Battery-powered controllers need fresh batteries. Pop open the compartment. Swap in new ones. Old batteries leak acid. This eats away at the connections inside.
Uneven Heating Across the Blanket
One section blazes while another stays cool? You’ve got damaged wiring inside. Run your hands across the cold zone. Feel for hard lumps or stiff spots. These mark where wires broke or bunched together.
Found damage? Stop using the blanket now. Broken heating elements create fire risk. 60% of electric blanket fires start from faulty wiring. You can’t repair internal wires. Replace the blanket.
No obvious damage? The controller might be failing. Try your spare controller if you have a dual control heated blanket. Swap controllers between zones. Does the cold spot move to the other side? Your controller died, not the blanket wiring.
Blanket Overheats Even on Low Setting
Thermostats fail. Controllers stick. Your blanket hits 100°F when set to 75°F. Unplug it right away.
Test again after it cools. Set to the lowest temperature. Wait 10 minutes. Touch different areas. Still too hot? The temperature sensor broke. This blanket belongs in the trash. Blankets older than 10 years cause 99% of residential fires. Models that overheat speed up that timeline.
Strange Smells or Visible Burn Marks
Smell plastic burning? See scorch marks on fabric? Dark spots near the controller connection? These mean fire danger right now.
Unplug. Don’t use it again. Ever. Scorch marks appear on over two-thirds of blankets that show fire potential during safety testing. Your nose and eyes just caught a problem before flames started.
Check the power cord too. Discolored plugs or melted plastic mean electrical arcing happened. This damages your wall outlet and the blanket. An electrician might need to inspect the outlet before you plug anything else there.
Timer or Auto-Shutoff Stops Working
Your auto shut off heated blanket should cut power after the set time. It doesn’t? You’re running electrical current longer than designed. This stresses wiring and raises fire risk.
Press different timer settings. Does any duration work? No? The timer circuit failed. Some blankets let you bypass the timer and run non-stop. Don’t do this. Continuous use beyond 12 hours increases fire risk by 45%.
Order a replacement controller if your model allows it. Can’t find one? Time for a new blanket with working safety features.
Error Codes on Digital Displays
See “E1,” “E2,” or “ERR” flashing? Your manual explains each code. Most common ones:
-
E1: Controller disconnected or loose connection
-
E2: Overheating protection triggered
-
E3: Sensor malfunction
Try the manual’s reset procedure first. This means unplugging for 30 seconds, then reconnecting everything. Code persists? Contact the maker’s support before you assume you need a replacement.
When to Call It Quits
Replace your blanket if:
– It’s older than 10 years (40% higher fire risk)
– You see any burn marks or smell burning
– Wires feel lumpy or stiff anywhere
– Controller fails multiple fixes you’ve tried
– Any part got soaked in water
Minor issues worth fixing: loose connections, dead batteries, tripped breakers. Major red flags that mean replacement now: damage to wiring, overheating, age beyond a decade, failed safety features.
Your safety beats the cost of a new blanket every single time.
Maximizing Comfort: Best Practices and Pro Tips

Your perfect temperature isn’t the same as your partner’s. Most people fit into one of four warmth zones. We all think our needs are special, but research says otherwise. The trick? Find your zone and work with it.
Layer Your Blanket for Precision Control
Run your heated blanket under your top sheet, not over it. This traps warmth against your body. The sheet controls how much heat reaches your skin. Too hot? Pull the sheet loose. Still cold? Tuck it tight around your shoulders.
Add a lightweight comforter on top during freezing nights. This creates layers that hold heat better. You’ll use 17% less energy this way. Plus, you get the same comfort without maxing out your controller.
Test Different Positions for Different Activities
Reading in bed? Turn on the upper third of your blanket if your model has zone controls. Watching TV? Heat from the waist down. Your body makes its own warmth while you’re awake and moving. The blanket just adds to that natural heat.
Track what works over three nights. Write down your temperature setting, how long you use it, and how comfy you feel. Most people find their sweet spot in this time. Then they stick with it all season.
Heated Blanket Energy Consumption and Cost Savings
Most heated blankets pull between 50-200 watts depending on size and heat setting. That’s less than a laptop running at full brightness.
What Your Blanket Uses:
Size matters here. A twin blanket running all night consumes about 0.5 kWh. Queen or double sizes hit 0.75 kWh. King-sized models reach 1 kWh for the same period.
Temperature setting makes a big difference. Low draws 40-100W. Medium pulls 80-150W. Crank it to high for preheating? You’re using 120-200W until the timer kicks in or you dial it back.
Real Numbers from Popular Models
Here’s the real heated blanket energy consumption from models you’d buy today:
-
Sunbeam Microplush (120W, 6 hours): 720 Wh
-
Biddeford MicroPlush (100W, 8 hours): 800 Wh
-
Beautyrest Ribbed Microfleece (180W, 4 hours): 720 Wh
-
Pure Warmth Comfort Knit (130W, 6 hours): 780 Wh
A 100W blanket running 8 hours costs you $0.10 per night at the U.S. average rate of $0.13 per kWh. That’s $3 per month if you use it every night. Run it through a four-month winter? You’re looking at $12 total.
Compare that to a 1500W space heater warming your bedroom for the same 8 hours. You’ll pay $1.50 per night—$180 for the entire winter. That’s 92-98% more expensive.
Quick math to find your exact cost: Take your blanket’s wattage and times it by hours used. Divide by 1000 to get kWh. Times that number by your electricity rate. A 60W blanket for 8 hours at $0.13/kWh? (60 × 8) ÷ 1000 = 0.48 kWh × $0.13 = $0.06 per night.
Use your blanket for just 2 hours before bed instead of all night? A 100W model costs you 3 cents. Drop to a 50W setting overnight? You’ll spend less than 5 cents for 8 hours of warmth.
Conclusion
Using a heated blanket doesn’t require expert skills. You just need good habits from the start. Focus on three basics: setup smart (check cords, know your controller), use with care (don’t fold it when on, stick to timer settings), and maintain right (wash as directed, store flat). Follow these steps. Your blanket will last ten years instead of two.
Most heated blanket problems? People skip the basics. You now have the full guide—preheating methods and energy-saving tricks that work. The auto shut-off does more than keep you safe. It cuts your utility bills too.
Ready to try this? Tonight, preheat for 30 minutes before bed. Find your ideal temperature setting. Your perfect sleep warmth is waiting. You know how to get there now. Got questions? Check our Heated Blanket FAQ or contact our support team. Stay warm, stay safe, and sleep well.