
One leaking ice pack can turn a bulk order into a returns nightmare. In high-heat industrial environments, a failed cooling vest isn’t just an inconvenience — it’s a safety liability.
Most buyers finalize purchase decisions without ever seeing the quality control standards behind the product. That gap is where problems start.
This guide breaks down a 5-step inspection process for ice pack cooling vests. It covers seal integrity, stitching durability, phase change material performance, and pre-shipment compliance checks.
You’re a safety manager sourcing for a field crew? Or a distributor vetting a new supplier? Either way, you’ll get a clear, practical framework. Use it to spot reliable personal cooling equipment — and filter out products that look good on paper but fall apart in the field.
Content Framework: Quality Control: 5-Step Inspection For Every Ice Pack Cooling Vest
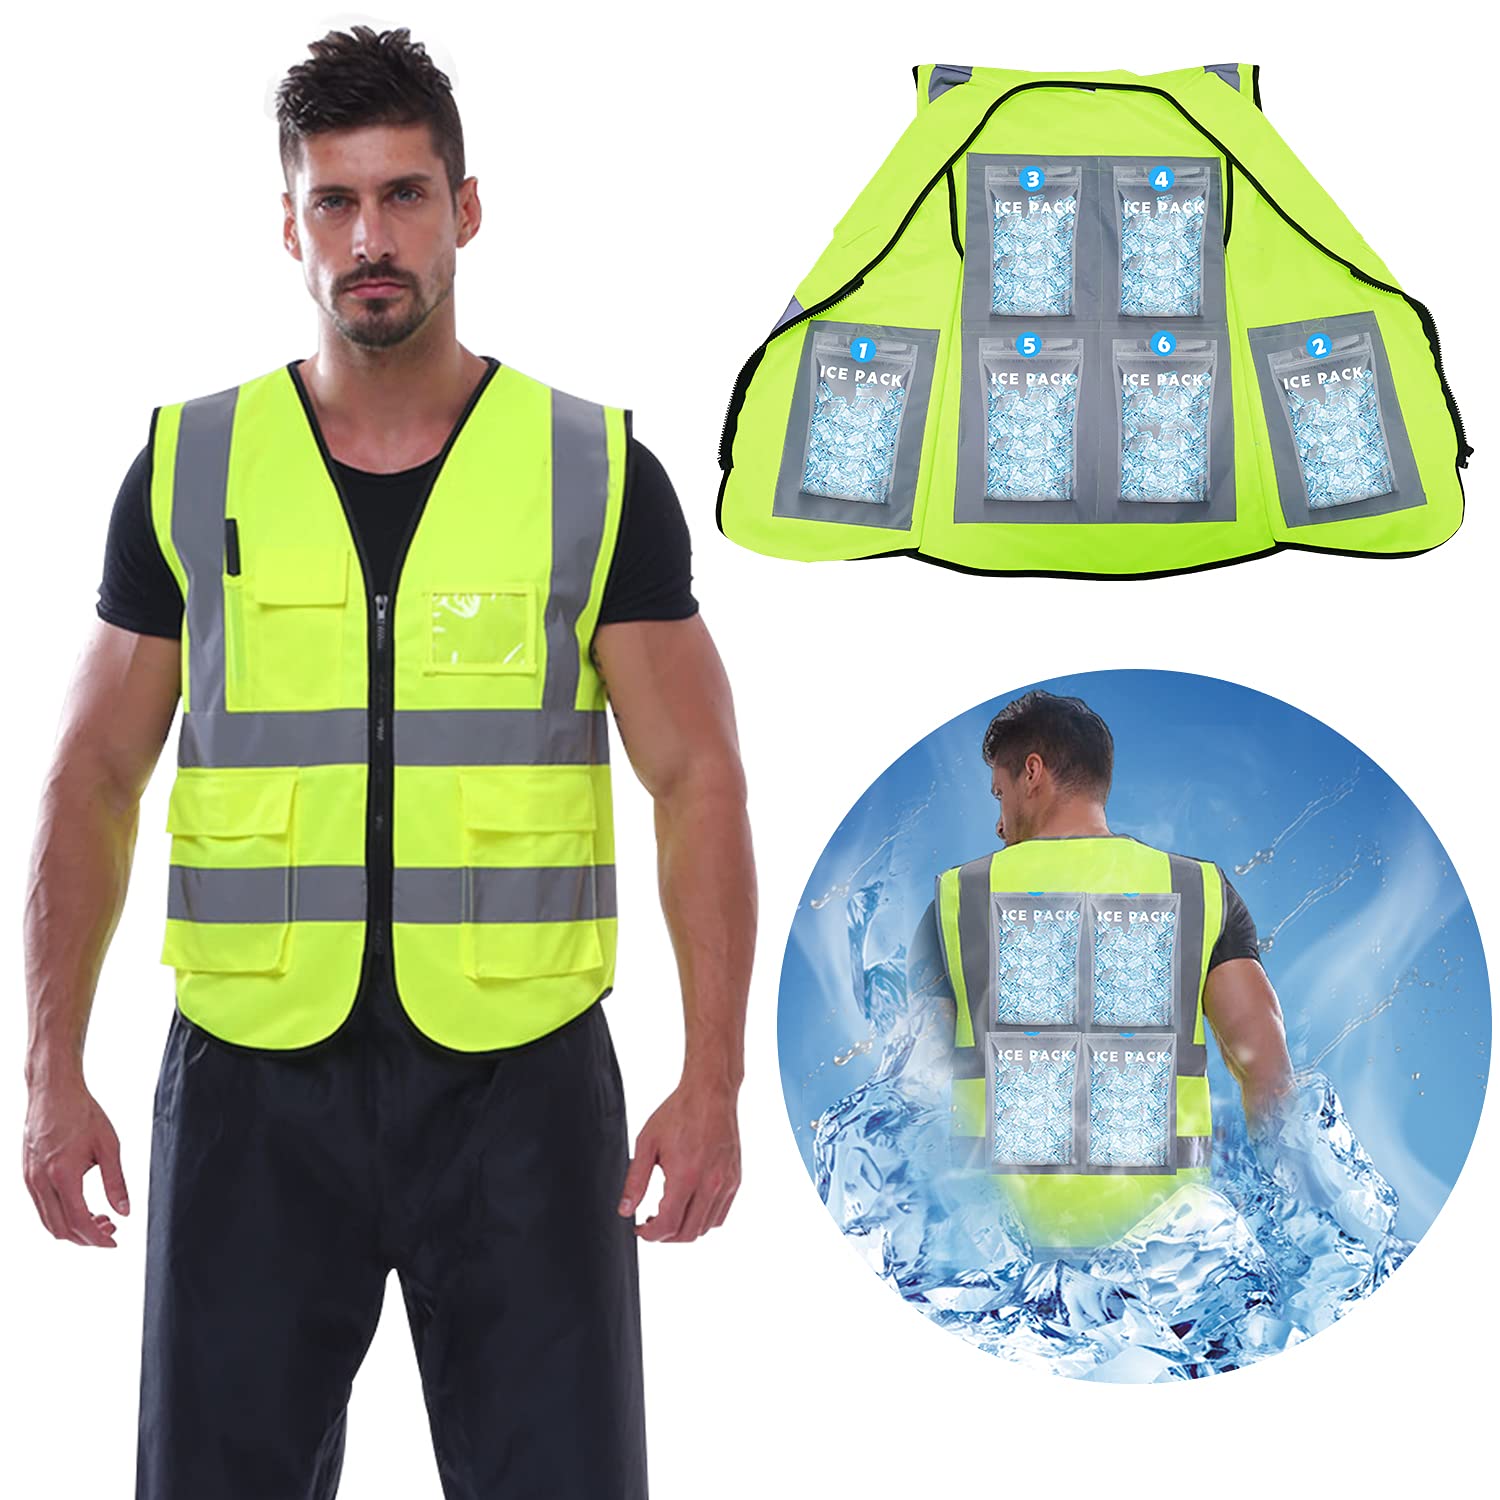
Here’s what this guide covers — and why each piece matters.
This 5-step inspection framework covers the full product lifecycle: material verification, seal integrity, stitching durability, cooling performance, and pre-shipment compliance. Each step targets a real failure point. These are the issues that cause returns, safety incidents, and supplier disputes.
Every section gives you testable benchmarks — AQL 2.5/4.0 standards, ASTM F2371 cooling performance criteria, and FDA-compliant material specifications. You’re working from data, not guesswork.
Why Ice Pack Cooling Vest Quality Control Matters for Bulk Buyers
The global cooling vest market hit $412 million in 2022 — and it’s growing at 6.5% CAGR through 2028. That kind of growth pulls in a lot of suppliers. Not all of them are worth your money.
Here’s the hard reality of bulk purchasing: 60% of budget cooling vest models fail to maintain adequate cooling beyond two hours in real field conditions. For a worker exposed to 95°F heat for a full shift, that’s not a minor inconvenience. That’s an OSHA liability.
The Failure Points That Cost Buyers the Most
Three quality failures show up in bulk orders again and again:
-
Ice pack rupture and leakage — common in low-cost imports, affecting 20–30% of inventory without proper pressure testing
-
Seam detachment — polyester vests without verified seam strength (minimum 20–50 lbs pull force) fail fast in demanding conditions
-
Cooling duration shortfall — without a verified 4-hour minimum at 95°F, vests fall short at the worst possible moment, right when workers need cooling the most
Each failure carries a compounding cost. Field replacements. Downtime. Potential OSHA fines. On top of that, after-sales return rates climb 40% when thermal performance goes untested before shipment.
Why Standards Alone Aren’t Enough
There’s no single dedicated standard for ice pack cooling vests. You need to cross-reference ANSI/ISEA 201 for material durability, EN 342 for thermal insulation benchmarks, and ISO 11079 for cooling efficacy. Then verify CE/MDR compliance for any imported product. That’s a lot of ground to cover before placing a bulk order.
This is why a structured, repeatable QC inspection process isn’t optional. Skip it, and you’re choosing between a reliable bulk order and an expensive lesson.
Step 1: Ice Pack Seal Integrity & Leak Detection Inspection
Seal failure is the single most preventable defect in ice pack cooling vests — and it still ruins more bulk orders than anything else.
A compromised seal isn’t just a wet vest. Leaked coolant contaminates protective gear, creates slip hazards, and puts workers at risk during peak heat exposure. That’s exactly why inspection has to start here.
The Four Detection Methods That Actually Work
Not all leak tests are equal. Here’s how professional QC teams handle seal integrity — and which method fits each situation:
Visual Inspection (ASTM F1886)
Start here. Check every heat-seal weld for wrinkles, incomplete bonding, or channels. The threshold is clear: any channel ≥0.003 inches (0.076 mm) wide is a reject. Use high-contrast lighting. This catches most surface-level defects before you run any other test.
Bubble Emission Test (ASTM F2096 / D3078)
Inflate the ice pack to 10–20 kPa. Submerge it in water for 30–60 seconds. A bubble stream means a leak. Zero bubbles means a pass. This is your go-to for arrival sampling — it’s non-destructive, fast, and needs no special equipment.
Pressure/Vacuum Decay (ASTM F2338)
This one is for factory-level validation. It tracks internal pressure changes without touching the pack. The results are consistent and repeatable. QC teams working under ISO 11607 and USP <1207> standards rely on this method for high-stakes environments.
Dye Penetration (ASTM F1929/F3039)
Put dye on the seal. Check whether it seeps into the weld. This pairs well with visual inspection on porous or non-porous pouches where channels are hard to see with the naked eye.
Acceptance Criteria to Hold Suppliers To
|
Checkpoint |
Minimum Specification |
|---|---|
|
Seal width |
≥8 mm heat-seal weld |
|
Bubble emission result |
Zero visible bubbles (ASTM F2096) |
|
Material thickness (PE/PVC) |
0.1–0.2 mm barrier spec |
|
Channel detection limit |
≥0.003 inches (visual); <1 μm (deterministic) |
Three Failure Modes to Catch Before They Ship
Corner tears show up as ragged edges at pack corners. Stress builds up at those points during handling and distribution (ASTM D4169 simulation). Spot them with a visual check before any immersion test.
Heat-seal bubbles look like air pockets along the weld line. The root cause is trapped air, or the wrong sealing temperature, pressure, or dwell time during production. Flag these right away — don’t let them slide.
Injection port valve failure is the one most buyers overlook. Leaks show up at the fill port after pressurization — not along the seam. Run these through a bubble emission test on their own, separate from the rest.
The Actionable 5-Step Leak Inspection Procedure
-
Visual scan — Check all seals and welds against the ≥8 mm width standard. Reject anything with visible bubbles, wrinkles, or channels.
-
Pull your sample — Use AQL-based sampling at a 1.0–2.5% acceptable defect rate for bulk orders.
-
Run the bubble test — Inflate to 10–20 kPa, submerge for 30–60 seconds. No bubbles = pass.
-
Add dye for borderline cases — Use dye penetration to confirm any suspicious weld areas from step one.
-
Document everything — Log defect type, location, and rate. Reject the lot if results go past your AQL threshold.
This step alone filters out the 20–30% of low-cost imports that break down under real field pressure. It costs almost nothing to run. Skipping it costs far more.
Step 2: Fabric & Stitching Quality Inspection for Cooling Vest Durability
Fabric failure doesn’t announce itself. It shows up without warning — a fraying seam after three weeks of field use, a shoulder strap that gives out mid-shift, an inner lining that stops breathing when workers sweat the most. By then, the return window has closed and the supplier dispute has already begun.
Here’s how to catch those problems before a single unit ships.
Outer Shell: What the Material Spec Really Means
Two fabric specs define quality cooling vests: 600D Oxford cloth for the outer shell and 420D nylon for structural panels.
Neither number is random. 600D Oxford cloth gets verified through ISO 13937 tear resistance testing. 420D nylon proves its value through ASTM D5034/D5035 grab and strip tensile tests. It can stretch up to 40% before breaking. That stretch matters in high-movement jobs. Rigid materials crack under repeated stress. This fabric doesn’t.
The inner layer is a separate requirement. Skin-contact fabric must pass ASTM F3628 evaporative cooling efficiency benchmarks. These cover heat loss rate, drying time, and cooling index — tested across both sweat and no-sweat phases using an 8×8 inch standardized hot plate. Target >20% evaporative cooling efficiency. Anything below that and the vest is just a jacket.
Stitching Standards: The Numbers That Separate Durable From Disposable
|
Stitching Checkpoint |
Minimum Specification |
|---|---|
|
Stitch density (SPI) |
8–12 stitches per inch standard; 10–12 SPI at ice pack insert zones |
|
Seam pull-out force (high-stress zones) |
12–16 lbs/inch minimum |
|
Shoulder strap / ice pack edge tear resistance |
>50N per ISO 13937 |
|
Reinforcement method |
Triple stitching or bartack at stress points |
Standard lockstitch and chain stitch work fine for body panels. Shoulder straps, ice pack slots, and load-bearing edges are a different story. These need reinforced construction — double-needle stitching or bartacks at minimum. Force concentrates at these points during real use. A single-needle seam there isn’t a design choice. It’s a liability.
Long-Term Durability: The Tests That Predict Field Performance
A vest can look solid on day one and fall apart fast. Without verified durability data, you’re guessing. Demand these benchmarks from any supplier:
-
Abrasion resistance: Martindale or ASTM method — minimum 100,000 cycles with no thread breakage, surface wear, or measurable strength loss
-
Pilling resistance: ASTM D3512 — fiber ball formation signals poor yarn quality and faster fabric breakdown
-
Colorfastness: ISO 105-C06 wash rating of Grade 4+, plus perspiration resistance with no visible fading after repeated cycles
-
Laundering shrinkage: Must stay below 5% — a vest that shrinks stops fitting, and a vest that doesn’t fit stops protecting
These tests aren’t theoretical. A supplier who can’t hand over third-party test reports for abrasion and seam strength is running QC by eye only. That’s not a partner. That’s a risk.
What Rejection Looks Like in Practice
Flag any vest that shows:
-
Stitch density below 8 SPI on body seams or below 10 SPI at insert zones
-
Seam pull-out force under 12 lbs/inch at shoulder or strap attachment points
-
Colorfastness below Grade 4 after wash cycling
-
No documented test data for abrasion resistance or tensile strength
Fabric and stitching defects don’t always fail right away — they compound. A seam that tests at 11 lbs/inch today becomes a field failure after 60 wash cycles. Build your inspection criteria around durability over time, not how the vest looks when it arrives.
Step 3: Zipper, Buckle & Closure System Functional Inspection
Closure failures are quiet. A zipper jams at the end of a shift. A buckle won’t release under load. A Velcro strip loses its grip after 200 wash cycles. None of these show up on a product spec sheet. All of them show up in your returns queue.
Zipper Brand & Specification Verification
Start with the brand. YKK, SBS, or verified OEM — anything else is a red flag. For ice pack cooling vests, the standard spec is a #5 or #8 waterproof zipper. Check that it’s first quality: no rust, no corrosion, and colorfast under sweat and wash conditions.
Then check the tape construction. Bar-tacking and backstitching at the zipper tape ends are required at stress attachment points. No exceptions. A zipper sewn with a standard straight stitch will pull apart under field tension.
Functional Testing: The Numbers That Matter
Run every zipper 10 full cycles — open and close, back and forth. You’re checking for:
-
Smooth slider travel with no snagging or wavering
-
Positive locking under tension (the slider shouldn’t creep)
-
Tooth engagement integrity — pull both sides of a closed zipper apart crosswise; the teeth should hold without separating
For slider pull-off resistance, reference ASTM D2061. Top and bottom stop holding strength falls under the same standard. JIS S3015 covers crosswise strength and slider lock — a useful reference for sourcing teams working with Asian manufacturers.
Buckle & Quick-Release Load Testing
|
Closure Type |
Minimum Pass Specification |
|---|---|
|
Quick-release waist/shoulder buckles |
≥50 kg pull strength |
|
Snaps and rivets |
≥90N pull (≥15 lbs minimum retention) |
|
Hook-and-loop (Velcro) adhesion |
Retention verified after 500 open/close cycles |
Quick-release buckles on industrial cooling vests are not a comfort feature. They’re a safety mechanism. A worker who needs to shed the vest fast in an emergency can’t fight a buckle that needs two hands and full finger dexterity to open.
Test Velcro panels on their own. Simulate 500 open/close cycles, then measure the retention rate. Velcro that starts at 100% grip and drops below usable adhesion at cycle 200 has no place on field equipment.
One-Hand Operation & Fit Adjustability Check
Glove the test hand. Then operate every closure — zipper pull, buckle release, Velcro strip — with one hand.
This matters more than most buyers expect. Industrial workers often deal with reduced dexterity: thick gloves, wet hands, physical fatigue. A vest that needs two hands and full finger grip to open is a design failure. Not a user error.
Also verify the adjustment range covers S through XXL body sizing. Buckle and Velcro systems should hold a secure fit under load across that full range — not just at the middle size.
The 7-Point Closure Inspection Procedure
-
Visual spec check — Confirm YKK/SBS #5/#8 waterproof zipper, no rust or corrosion on teeth or slider
-
10-cycle run — Zip and unzip 10 full passes; flag any sticking, wavering, or lock failure
-
Pull test — Buckles at ≥50 kg, snaps at ≥90N; no deformation or release
-
Crosswise zipper test — Pull both tape sides apart on a closed zipper; teeth should hold
-
One-hand gloved simulation — All closures must operate with one hand, no assist needed
-
Velcro fatigue cycle — 500 open/close repetitions; document retention percentage
-
Stop and slider check — Confirm top/bottom stops prevent slider run-off; puller length ≤7.5 cm
Closures touch the vest every single time it’s used. They take more operational stress than any other component. Skip testing these to these benchmarks before shipment, and that stress lands on your after-sales team instead.
Step 4: Ice Pack Cooling Performance & Phase Change Material Validation
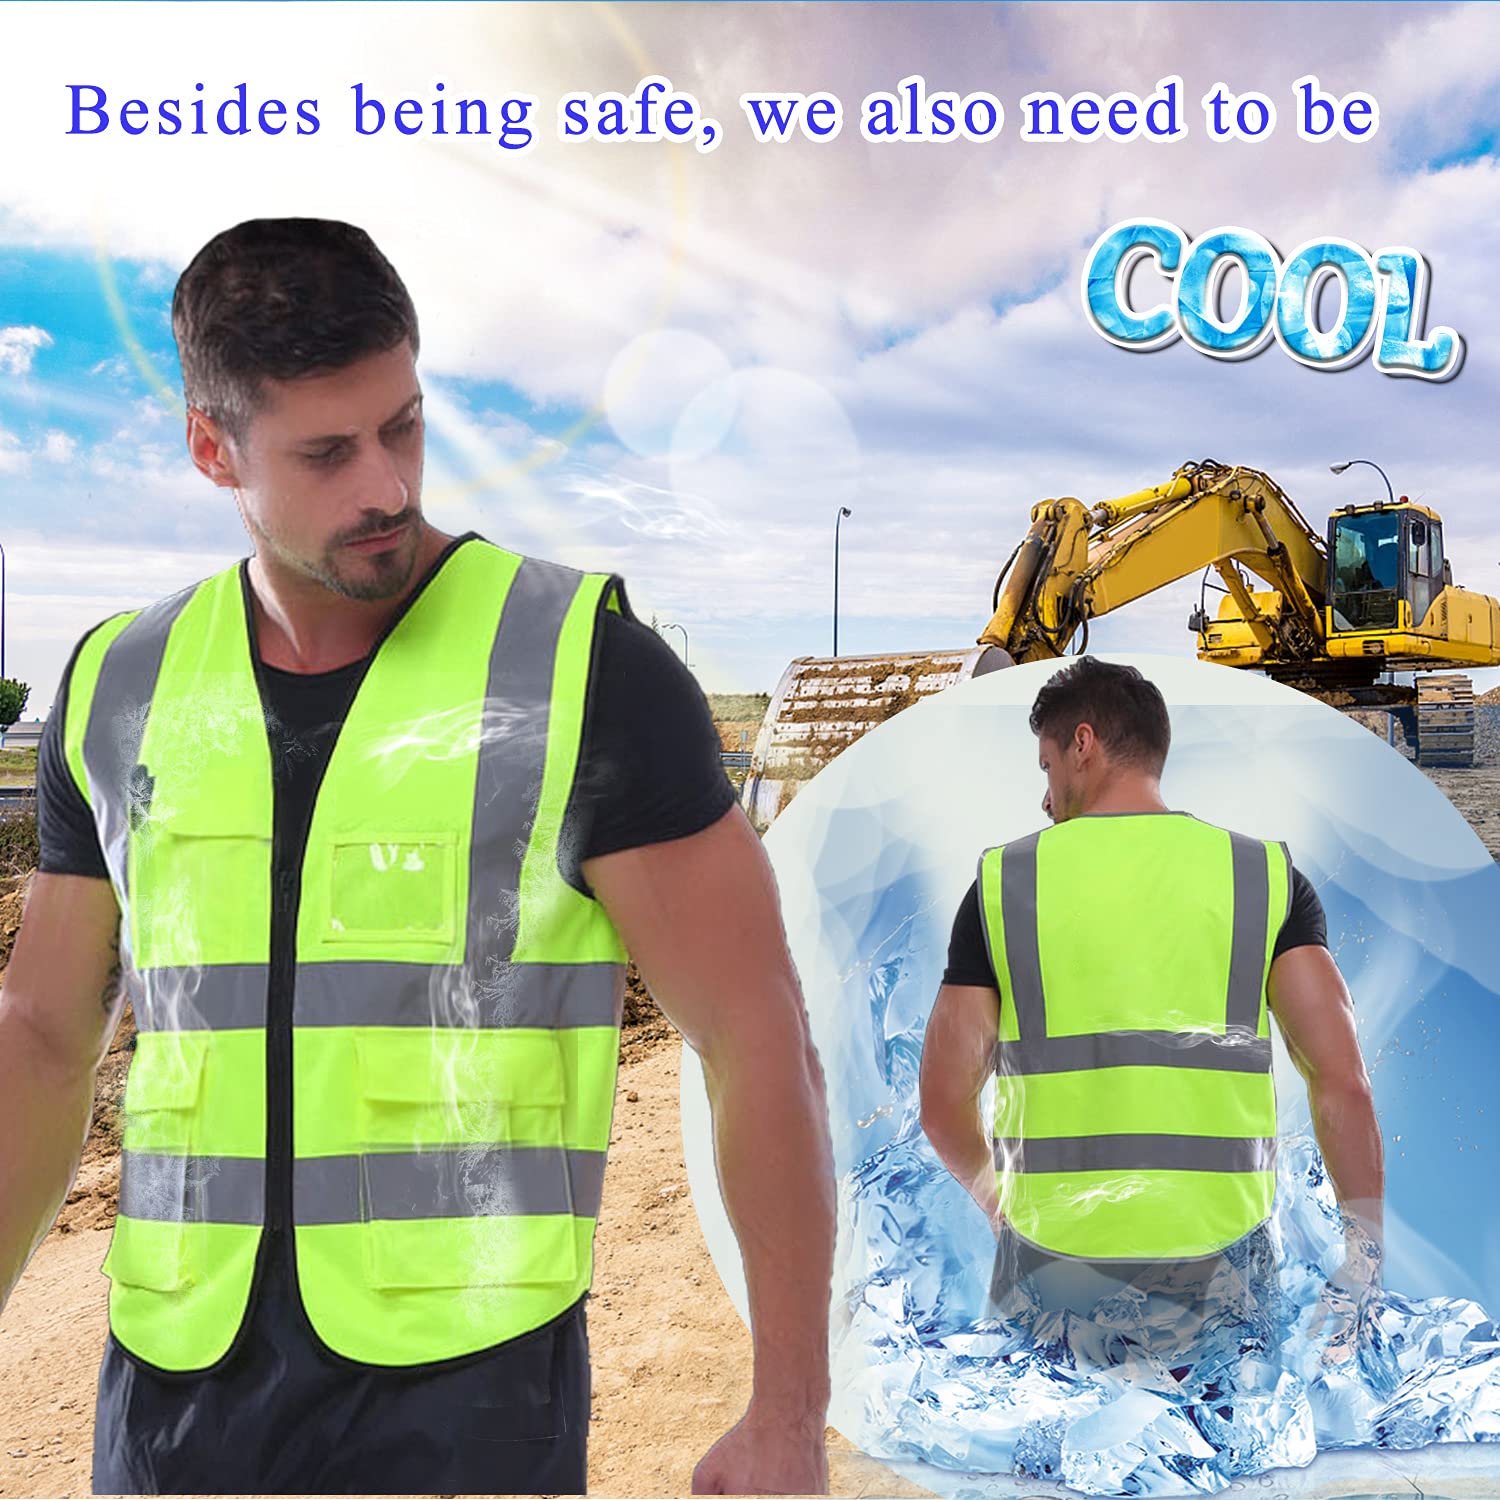
Here’s an uncomfortable truth: a cooling vest can look perfect on paper — right materials, clean stitching, solid zippers — and still fail the moment it matters most. The reason? Ice packs that don’t cool.
Cooling performance is the one quality metric buyers skip most often. It’s also the one that triggers the most field complaints.
What You’re Testing
The goal is clear: validate that ice packs hold 0–15°C for their full rated duration under real heat conditions. The benchmark environment is 38°C (100°F). That’s the heat your field crew works in — not a controlled lab setting.
Set up thermocouple monitoring inside a conditioning chamber. Follow the ISTA 7E thermal validation protocol. Record temperature data without gaps. Then compare your measured cooling window against what the supplier claimed. That gap tells you everything.
The minimum threshold: sustained temperature within 0–15°C for the vest’s full rated wear period. Any drift beyond that range during the rated duration is a reject. It’s not a negotiation point.
Phase Change Material Validation
PCM-based cooling inserts use a different testing framework. Run validation through ISTA 7D/7E protocols. Check three variables: thermal mass, refrigerant volume, and rated transit duration.
Hold suppliers to these acceptance criteria:
-
Net ice pack weight tolerance: ±5% of nominal fill weight per unit
-
Multi-pack distribution variance: No single side of the vest should exceed a 5% weight imbalance — uneven load causes discomfort and shrinks effective contact surface
-
Cooling zone coverage: Confirm pack placement targets core body heat zones, not just evenly spaced pockets that look balanced on a diagram
Freeze-Thaw Cycle Durability
A cooling vest doesn’t get used once. It gets frozen, worn, thawed, and refrozen — day after day, season after season.
Require 50-cycle freeze-thaw testing before approving any ice pack component. After 50 cycles, inspect for:
-
Seal integrity (cross-reference with Step 1 leak criteria)
-
Visible deformation or crystallization inside the pack
-
Cooling retention rate — measured performance at cycle 50 versus cycle 1
Research on comparable cooling systems shows rotomolded insulation with water bottle coolants holds linear cold time at 8.3 hours/kg (R²=0.99). PS foam equivalents track at 7.3 hours/kg. Use these numbers as a calibration reference. They let you check ice pack vest cooling claims against real thermal physics — not marketing math.
Cooling Performance Acceptance Checklist
|
Test Parameter |
Minimum Pass Standard |
|---|---|
|
Ambient test temperature |
38°C (100°F) simulated environment |
|
Sustained cooling range |
0–15°C for full rated duration |
|
Net fill weight tolerance |
±5% of nominal per pack |
|
Multi-pack side variance |
≤5% weight difference |
|
Freeze-thaw cycle validation |
50 cycles — no seal failure or performance drop |
|
PCM validation protocol |
ISTA 7D/7E compliant |
A supplier who can’t produce third-party thermal validation data under ISTA 7E conditions is making cooling claims without proof. That’s not a product specification. That’s marketing copy. Don’t let it into your supply chain.
Step 5: Safety Compliance & Final Pre-Shipment Visual Inspection
Every quality check before this one protects the product. This step protects your business.
A vest can pass Steps 1–4 and still create problems. Regulatory liability, customs rejection, a failed facility safety audit — these risks stay open until you run compliance documentation and final visual checks before sealing the cartons.
Regulatory Compliance: What Certificates You Need
Start with materials. Fabric and ice pack components require REACH/RoHS certificates on file. Reject non-compliant lots on the spot. No exceptions. No batch-by-batch negotiations.
Most buyers miss this one: ice packs that make skin contact in an occupational setting need FDA or LFGB food-contact certification. Non-toxic does not mean compliant. Get the paperwork before the order ships.
For high-visibility industrial vests, confirm EN ISO 20471 compliance. Reflective tape stitching must be ≥10mm wide. No gaps can exceed 2mm. Any certified PSI sample must return zero critical defects.
AQL 2.5 Sampling: The Numbers Behind the Decision
Don’t guess on a bulk shipment. Use ISO 2859-1 sampling logic:
-
Lot size 1,201–3,200 units → pull 80 units
-
Major defects: maximum 5 allowed before rejection
-
Critical defects: 0% tolerance — one defect rejects the entire lot
Final Visual Inspection Checklist
Run every sampled unit through this sequence:
-
Logo placement: Deviation must stay ≤3mm from spec centerline
-
Label integrity: Size tags within ±5% tolerance; care labels must be complete with correct language and symbols; no tears or fading allowed
-
Ice pack final check: No leaks; confirm FDA-grade non-toxic gel; check ≥100 freeze-thaw cycle rating
-
Cooling function spot-check: Temperature drop must reach ≤10°C within 30 minutes under ambient conditions
-
Vest strap tension: Pull test must confirm >50N before carton close
Defect Tolerance at a Glance
|
Defect Category |
Examples |
AQL Limit |
|---|---|---|
|
Critical |
Missing safety labels, sharp edges |
0% — any = reject |
|
Major |
Misalignment >3mm, discoloration, scratches >2mm |
≤2.5% |
|
Minor |
Dust specks, slight color variance |
≤4.0% |
Packaging & Shipment Verification
A packaging failure at this stage quietly multiplies your costs.
Inner packaging requires moisture-proof PE bags at ≥0.05mm thickness. Add pressure-resistant foam inserts to protect ice pack components during transit.
Outer cartons need corrugated construction, stack-tested at 5× product weight for 48 hours. Seal integrity must follow AQL 2.5 standards.
Before closing the shipment, confirm every document is inside the box:
-
Certificate of Conformance (COC)
-
REACH/RoHS/FDA test reports
-
Packing list with 100% PO quantity match
-
Defect photos with pass/fail logged per unit
-
Barcode scan verification and FSC marks where required
This checkpoint turns a passed inspection into a documented, defensible decision. A safety auditor, customs officer, or procurement director asks for proof — you hand it over without hesitation.
Cooling Vest Inspection Checklist: What to Ask Your Supplier Before Every Order
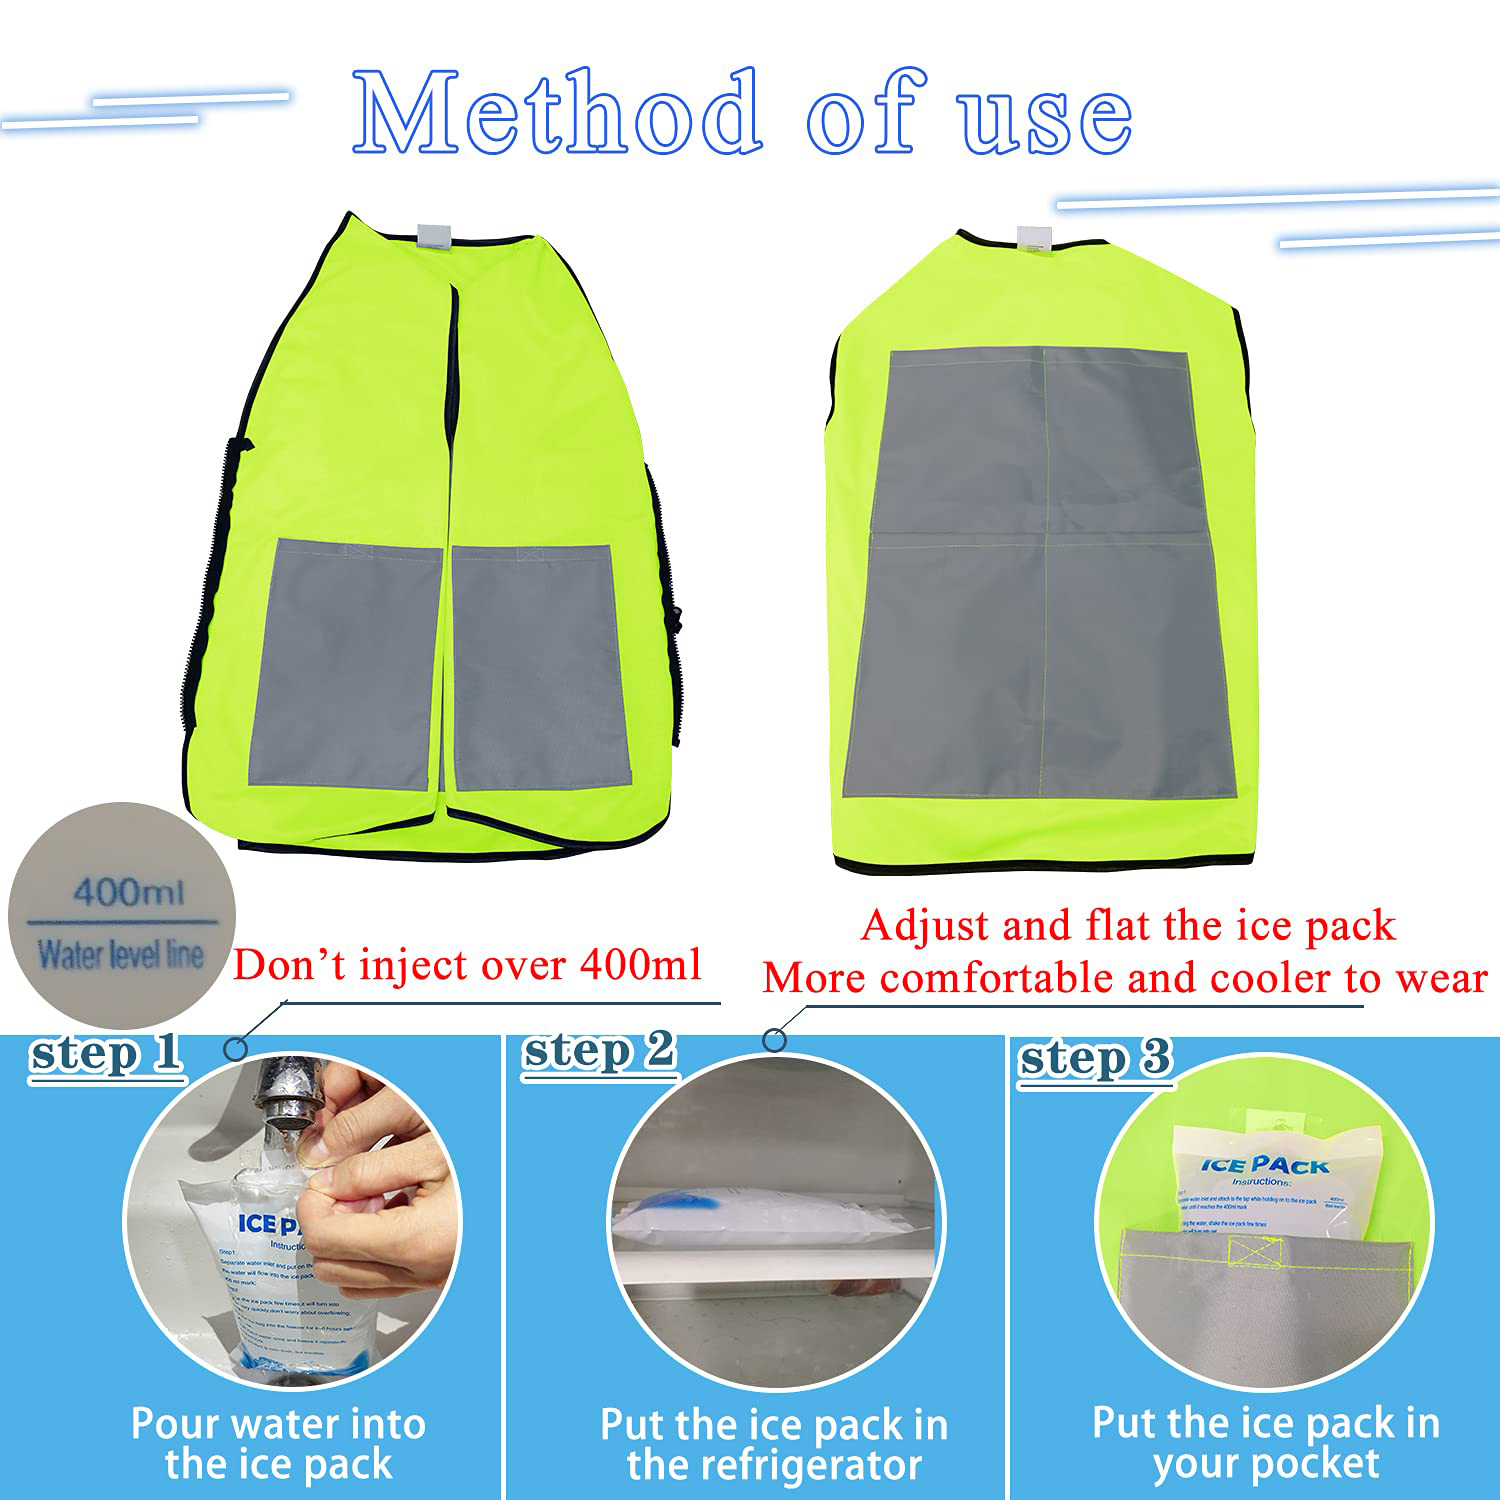
Most supplier conversations start with price. They should start with proof.
The five steps in this guide give you a complete technical framework. But knowing what to inspect means nothing without the right questions. This checklist puts those questions in your hands — organized by inspection step, with clear red lines that tell you when to walk away.
The 5-Question Framework to Send Every Supplier
Step 1 — Material & Cooling Tech
Ask: “What is the PCM composition, melting point range, and documented thermal retention time at 35°C ambient?” You want lab data showing >4 hours of sustained cooling per ASTM F2371. No REACH compliance certificates? That’s a hard reject. PCM containing >0.1% restricted substances? Also a hard reject.
Step 2 — Construction & Durability
Ask: “What are your seam strength results, fabric weight specs, and IPX4 water resistance rating?” Samples must survive 500 wash cycles without exceeding 5% shrinkage. Any visible defects on a 10% batch inspection — that’s an instant fail.
Step 3 — Sizing & Fit Standards
Ask: “What chest measurements correspond to each size, and how is the vest validated for 8+ hour continuous wear?” Check return rate data from prior orders. Anything above 10% is a warning sign. Probe it before you commit.
Step 4 — Performance Metrics
Ask: “What is the measured cooling capacity in W/m², and do evaporative models carry Legionella-free certification?” Target >50W/m² with a vest weight under 2kg. No biocide treatment documentation means bacterial growth risk. That’s a non-starter for industrial use.
Step 5 — Compliance Documentation
Ask: “Can you provide OSHA heat stress equivalency reports and EN 16889 compliance records?” More than three non-severe audit issues counts as a major deficiency. Poor compliance scores kill the order — full stop.
Bring in a Third Party
Verbal supplier claims and glossy spec sheets are not verified data. For large orders or high workforce exposure, independent testing agencies take out all guesswork:
|
Agency |
Core Testing Scope |
When to Use |
|---|---|---|
|
SGS |
PCM thermal testing (ASTM F2371), microbial resistance (AATCC 100), REACH chemical analysis |
Orders >$10K; hazmat exposure environments |
|
Intertek |
IPX ratings, 500-cycle fabric durability, Legionella checks, hi-vis per ANSI/ISEA |
Orders >$5K; >20% of workforce in 35°C+ conditions |
|
Bureau Veritas |
Full GMP/HACCP audits, structural integrity, pest control verification |
Orders >$15K or >500 units; EU/US export |
One firm rule: any supplier claim you can’t confirm on-site goes to a third party for verification. A single contamination observation is an auto-fail — no exceptions.
Ready to use this now? Download the free PDF checklist with built-in red line trackers. Print it, send it to your supplier, and ask for a signed response before the order moves forward.
FAQ: Common Quality Concerns About Ice Pack Cooling Vests
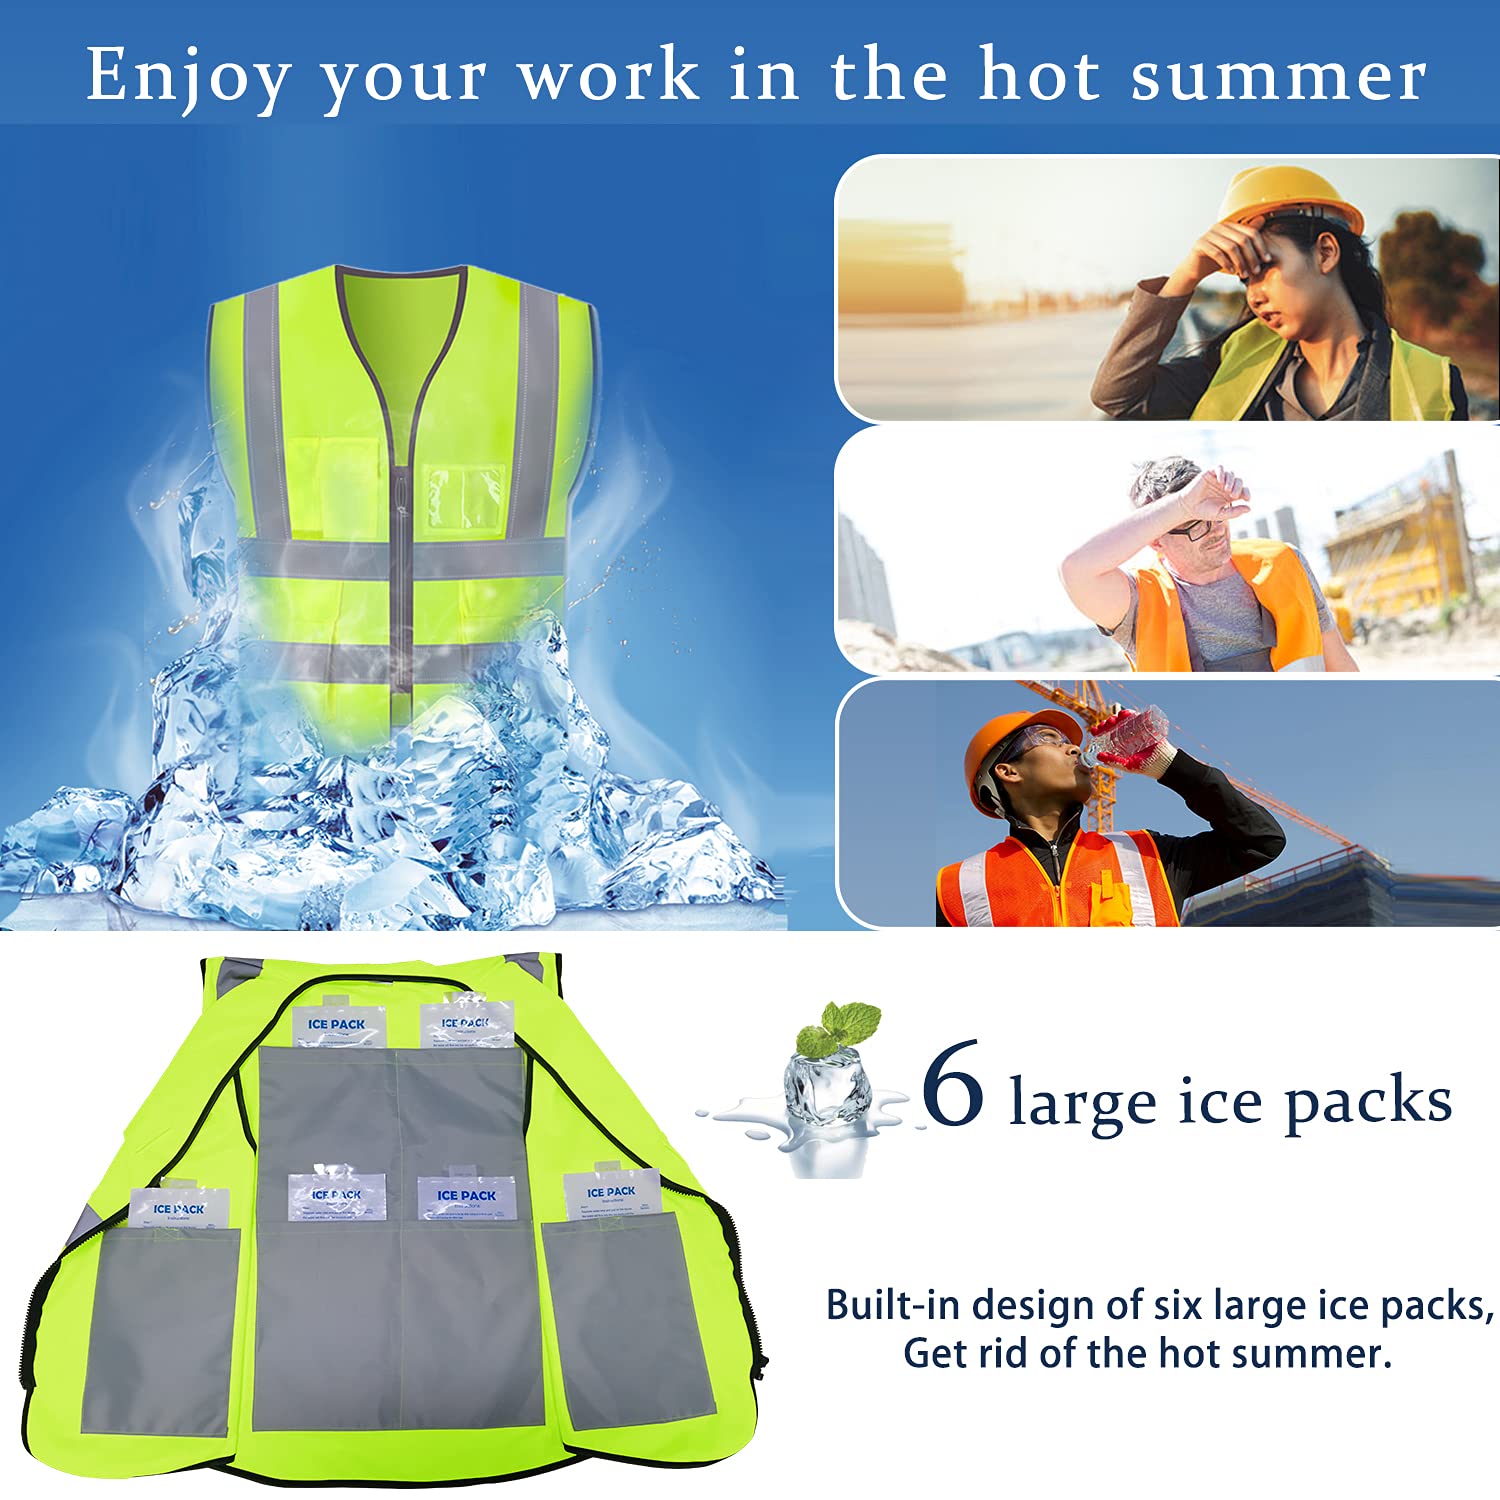
Buyers ask the same questions before every bulk order. Here are direct answers — no fluff, no filler.
Will ice packs leak onto work clothes or contaminate gear?
No. Quality ice pack vests use heat-sealed pouches built to hold coolant under pressure. Any surface moisture you see is condensation from the outer fabric layer — not a seal failure. Well-made phase change packs show zero leakage after 500+ cycles. That’s the benchmark. Hold your supplier to it.
How long does cooling last in extreme heat?
It depends on the pack type and conditions:
-
Standard packs: 2–3 hours at 65°F ambient
-
Phase change packs: 2–3 hours of stable 55–65°F output
-
Heavy-duty packs (rated for 110°F+): Extended duration — required for workers over 250 lbs or in environments above 43°C
For all-day field coverage — road crews, HazMat teams — rotate 3–4 pack sets every 20–30 minutes. Recharge takes just 20 minutes in an ice water cooler. Three rotations triple your cooling window. Your vest inventory stays the same.
Are replacement ice packs sold on their own?
Yes. Standard cool packs and heavy-duty inserts come in separate 4-pack sets — Feather Ice or Phase Change format. Each insert weighs around 16 oz and measures 6″×14″.
How do you wash and maintain the vest?
Hand wash only. Pull out all ice pack inserts first. Use non-phosphate soap in warm water, rinse well, then hang dry. Need to iron? Stay between 80–120°C. Skip the dry cleaner. Before long-term storage, clean the vest fully — never fold it with packs still inside.
PCM elements carry a service life of up to 3 years with proper care.
Ice pack vest or PCM vest — which one performs better?
|
Feature |
Ice Pack Vests |
PCM Vests |
|---|---|---|
|
Temperature output |
Below 50°F — intense |
55–65°F — stable |
|
Cooling duration |
2–3 hrs, short bursts |
2–3 hrs, consistent |
|
Best use case |
Industrial short shifts |
All-day wear, medical, 110°F+ environments |
|
Key risk |
Skin shock, heavier weight |
Longer recharge time |
The honest answer: neither is the clear winner. Ice pack vests hit hard and fast — great for short, high-heat bursts. PCM vests hold a steady, skin-safe temperature across a full shift. For 110°F+ environments or workers in full protective suits, PCM heavy-duty packs are the go-to professional choice.
What compliance standards should a quality vest meet?
At minimum, look for:
-
ASTM F2371 — standardized heat removal performance test
-
ANSI/ISEA 107-2020 — high-visibility requirements for industrial environments
-
OSHA heat mitigation PPE guidelines — covers any occupational heat stress program
-
CE marking — required for EU market entry
For emergency response teams, confirm Cal OES MEL 6.4.2 compliance — that’s 4 cooling systems required for Type 1/2 teams. These aren’t optional certifications. They’re the floor, not the ceiling.
Conclusion
Bulk orders of ice pack cooling vests come with real risk. Uncomfortable workers, liability exposure, and expensive returns are all on the table — unless quality control is built into your procurement process from the start.
The five inspection steps outlined here aren’t bureaucratic checkboxes. Think of them as your frontline defense:
-
Seal integrity checks catch leaks before they turn into lawsuits
-
Phase change material testing confirms performance before heat stress makes headlines
-
Stitching inspections spot failures before a vest falls apart on the job site
The best B2B buyers know this well — a supplier who opens their QC process to outside scrutiny is a supplier worth trusting.
Before your next order ships, treat the inspection checklist above as your baseline. Non-negotiable. Ask your supplier the hard questions. Push for documentation. Get it in writing.
Want a cooling vest manufacturer that builds quality control into every unit — not just on paper? Explore coolheatech.com’s industrial cooling solutions and request your sample today.
The one surprise your cooling vest should deliver is how well it performs.