
You’re halfway through an intense outdoor workout. You reach for your cooling towel. It’s already warm.
Frustrating, right?
You bought this portable cooling tool expecting hours of relief. It lasted 30 minutes.
Here’s the good news: the problem isn’t your towel. It’s how you’re using it.
Most people never learn the right techniques to get the most from their cooling towel. Simple mistakes cut cooling time by up to 70%.
Are you an athlete training in summer heat? A construction worker fighting midday sun? Or just trying to survive another hot day? Mastering how to keep cooling towels cold changes everything. This simple piece of microfiber fabric stops being a letdown. It becomes your best heat-fighting tool.
What makes the difference? Some towels stay cold for 45 minutes. Others deliver 3-4 hours of steady relief.
The secret comes down to two things. First, understand how evaporative cooling works. Second, apply specific reactivation techniques.
You’re about to learn what the top 5% of users already know.
Understanding How Cooling Towels Work (Evaporative Cooling Technology)
Physics, not magic, keeps you cool.
Cooling towels use evaporative cooling technology—the same principle that makes sweat work. Water molecules shift from liquid to gas. They pull heat away from whatever they touch. In this case, that’s the towel fabric and your skin.
The science is simple. Moisture evaporates from the microfiber cooling fabric. It absorbs heat energy. This process creates the cooling sensation you feel. Scientists call it latent heat of vaporization.
The Activation Process That Makes It Work
Getting that initial cold effect requires three simple steps:
-
Soak the towel in water for 2-3 minutes
-
Wring out excess water until damp but not dripping
-
Apply to skin (neck, forehead, or pulse points)
Done right, you’ll experience a 20°F drop in skin temperature. That’s the difference between uncomfortable and bearable.
But here’s where most people get it wrong. They let the towel sit. The cooling stops once the moisture disappears.
Material Matters More Than You Think
Not all cooling towels deliver equal performance. The fabric determines everything—how much moisture it holds, how long it cools, and how fast you can reactivate it.
PVA (polyvinyl alcohol) dominates the market for good reason. It absorbs water faster and holds it longer than alternatives. Cotton and microfiber blend towels last around 2 hours under normal conditions. PVA extends that window much longer.
The synthetic microfiber category claims 61.9% market share. Performance explains why.
Environmental Factors That Kill Your Cooling
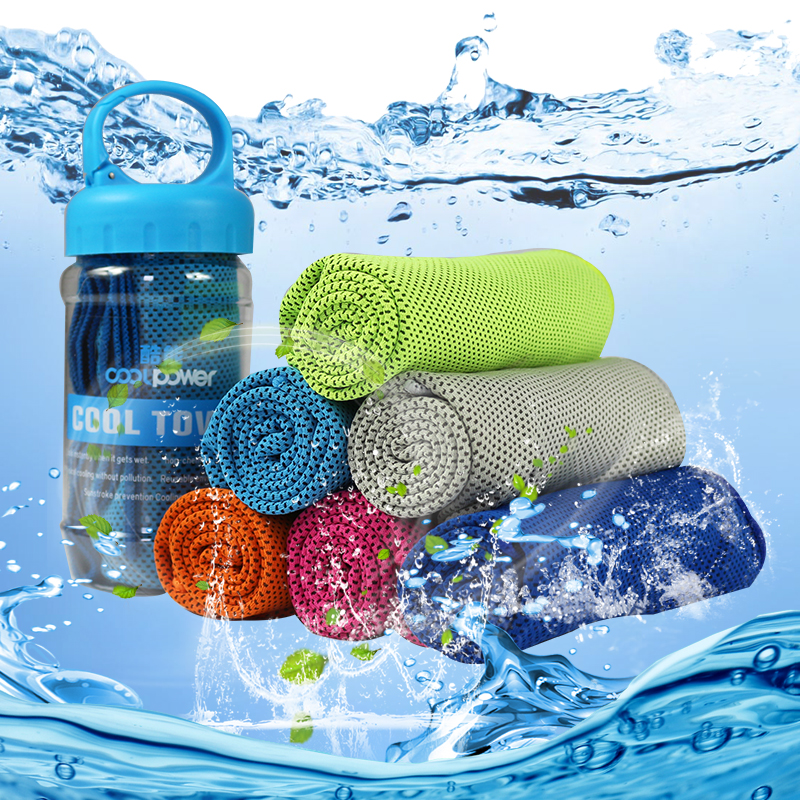
Your towel’s effectiveness depends on conditions you can’t always control:
Humidity is the biggest enemy. In muggy weather, evaporation slows to a crawl. The air is already saturated with moisture. Your towel has nowhere to release its water vapor.
Airflow does the opposite—it speeds up evaporation. Moving air carries away moisture molecules faster. That’s why the snap and shake cooling method works. Whipping your towel through the air recharges the evaporative process right away.
Ambient temperature creates a paradox. Extreme heat (like 40°C test conditions) reduces the temperature gap between your skin and the environment. The cooling effect drops even though you need it most.
Wind speed makes a measurable difference. Studies using fans at 6.4 m/s showed 0.5°C better core temperature reduction compared to still air conditions.
What the Data Shows
Laboratory testing reveals the limits and possibilities. Subjects used ice water towels rotated on their forearms every 3 minutes. The test ran in 40°C heat at 30% humidity. Core body temperature dropped at 0.02°C per minute over 30 minutes—a total reduction of 0.79°C.
That’s slower than passive cooling in the same conditions (0.03°C/min). The towel covered 11-13% of body surface area. Not enough contact for maximum effect.
During match play, ice towels reduced rectal temperature rise by 0.5°C versus no cooling intervention. Small number. Big comfort difference.
Marketing claims tout 30°F surface temperature drops. Real-world internal cooling is more modest but still valuable.
Why This Matters for Keeping Towels Cold Longer
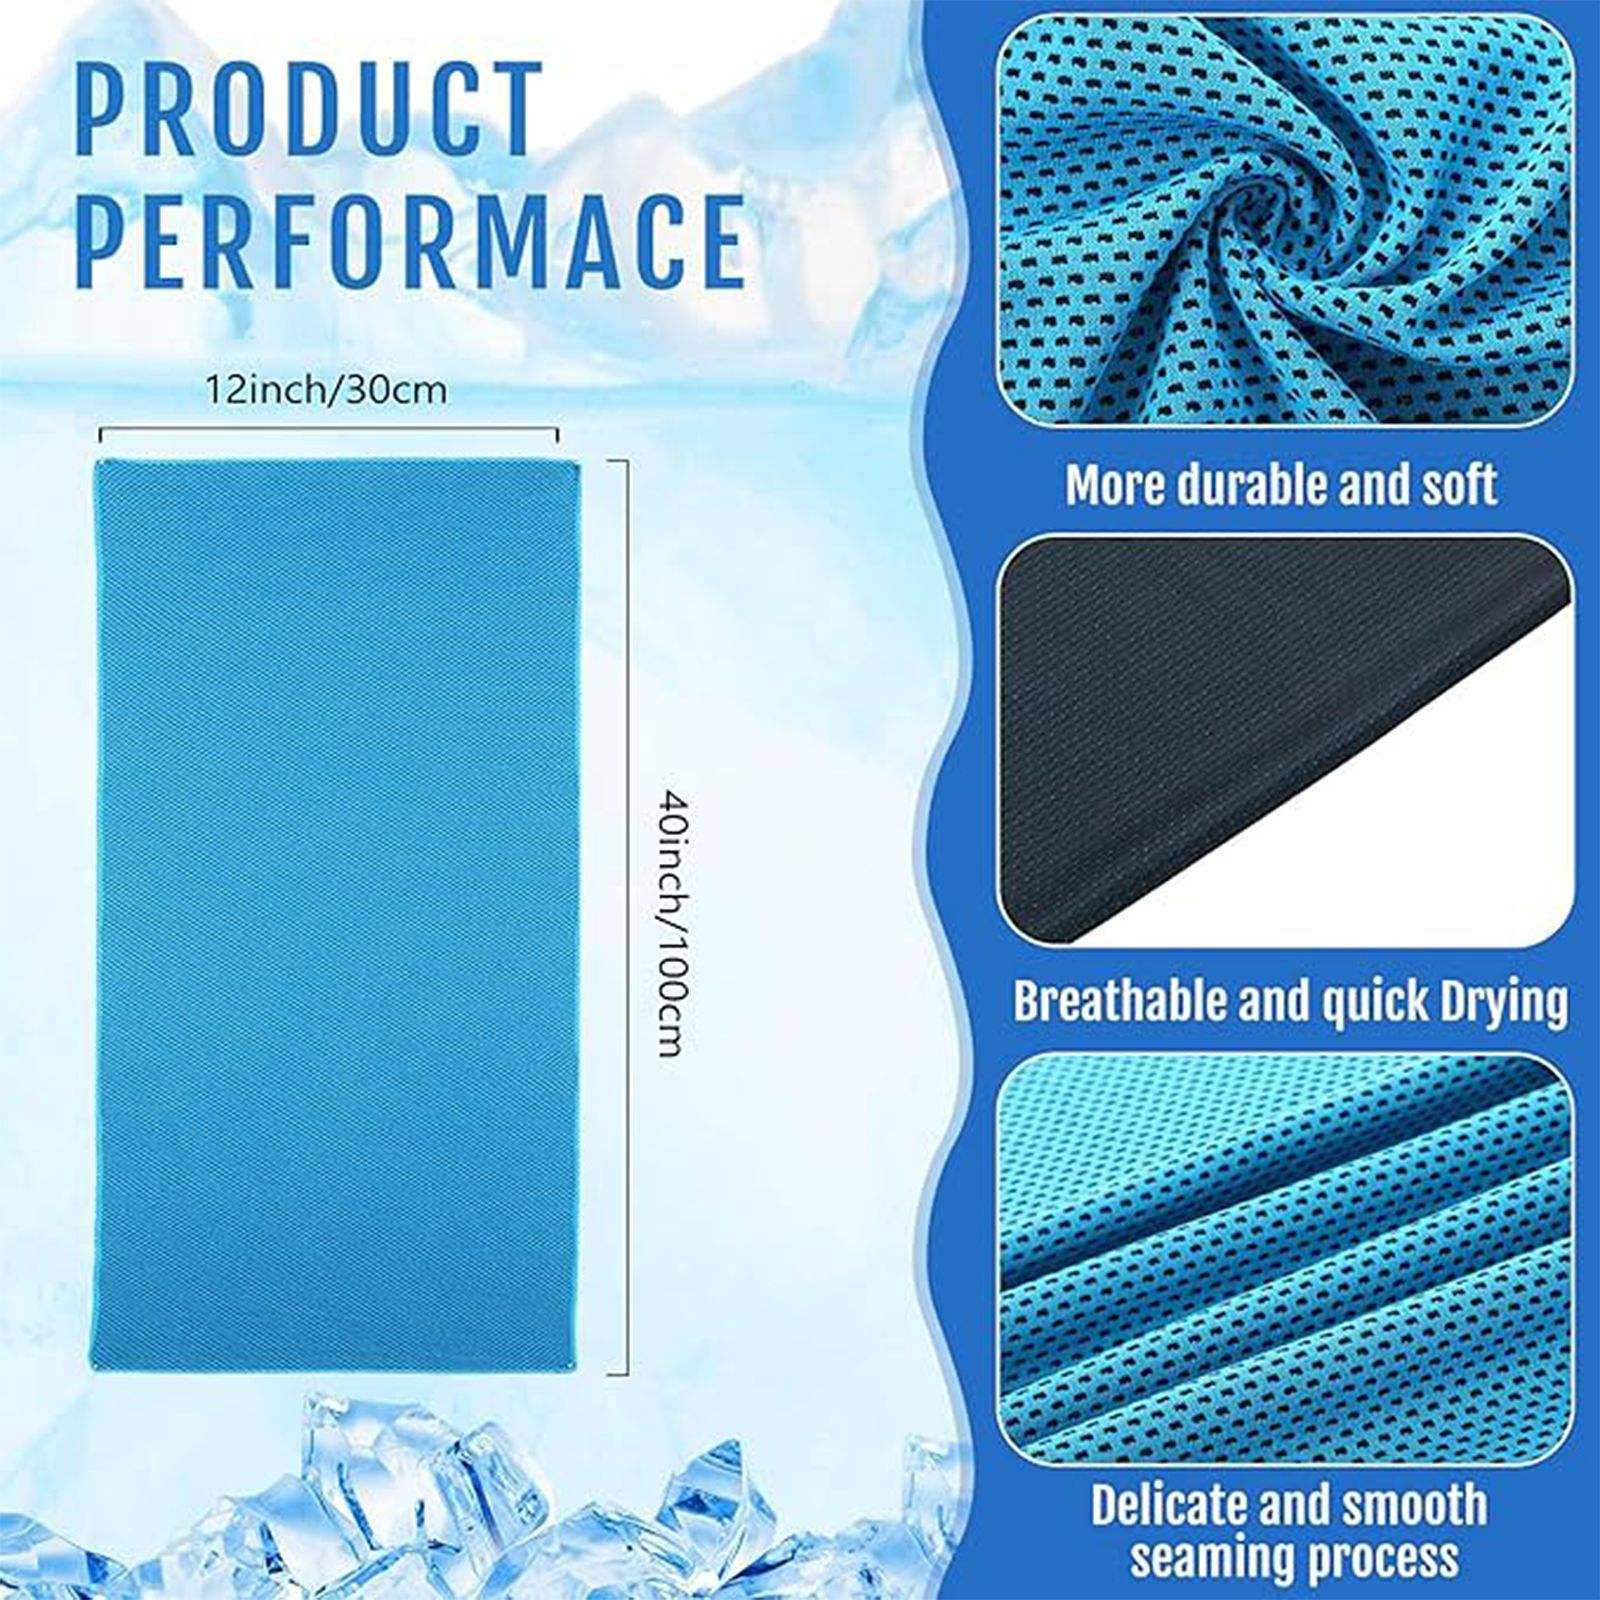
Understanding the mechanism shows you where to focus your efforts. The longer cooling duration you’re after comes from:
-
Maximizing initial water absorption
-
Slowing evaporation rate while not in use
-
Reactivating fast once cooling fades
-
Creating optimal conditions for evaporative cooling
The towel reactivation method isn’t complicated. It’s deliberate. You’re managing a physical process, not hoping for the best.
Cold water matters. The cold water soaking technique gives you an initial temperature advantage. This extends your cooling window. Starting at 1-3°C provides 8-10 times more cooling potential than room temperature water—even if that advantage fades over time.
Your portable cooling solution works best with the science, not against it. That knowledge separates the 45-minute users from the 3-4 hour ones.
Step-by-Step: How to Activate Your Cooling Towel for Maximum Results
Maximum cooling time starts before the towel touches your skin.
Your activation method decides if you get 45 minutes or 4 hours of relief. Follow this exact process each time.
The Initial Soak: Building Your Foundation
Start with cold water from the tap. Ice water works even better. Colder starting temperature means longer cooling time.
Submerge the entire towel. Every fiber needs to get wet. This takes 2-3 minutes minimum. Rush this step? You lose an hour of cooling later.
Watch for air bubbles. They show dry spots that need more water. Massage the fabric underwater until bubbles stop. The towel should feel heavy and soaked through.
Temperature matters more than you think. Starting at 1-3°C gives you 8-10 times more cooling power than room temperature water. That early temperature edge builds throughout your session.
The Critical Wring-Out Method
This step separates beginners from pros.
You want the towel damp, not dripping. Too wet? Water runs down your neck and soaks your clothes. Too dry? Evaporation happens too fast.
Hold the towel lengthwise. Twist from both ends at once—like wringing a wet mop. Use firm pressure but don’t choke it. You’re removing extra water while keeping the fibers wet.
The sweet spot: squeeze hard and a few drops come out. Release pressure and nothing drips. That’s your target.
The Snap and Shake Activation
Physics becomes your friend here.
Hold one end of the damp towel. Snap it hard through the air like cracking a whip. Do this 3-5 times with force. You’ll hear a sharp whipping sound—that’s air rushing through the fabric.
This motion does three things at once:
-
Spreads moisture evenly through the fabric
-
Creates airflow that starts evaporative cooling
-
Activates the cooling feeling you’ll notice within seconds
The temperature drops right away. Within 10-15 seconds, the towel surface should feel cooler than your skin. Doesn’t feel cool? Repeat the snap sequence.
How to Apply for Best Contact

Place the activated towel on pulse points where blood vessels run close to your skin. These key zones are:
-
Back of neck
-
Forehead and temples
-
Inside wrists
-
Behind knees
Drape rather than wrap tight. You want fabric contact without blocking airflow. Trapped air pockets stop evaporation and ruin the cooling effect.
The cooling feeling peaks in the first 5-10 minutes. Expect a 20°F drop in skin temperature where the towel touches. This temperature shock triggers your body’s cooling response everywhere.
Master this activation sequence once. You’ll never waste another cooling towel.
7 Proven Tips to Keep Cooling Towels Cold Longer
You control how well your towel performs.
Most people take whatever cooling time they get. Smart users make it better. The gap between 45 minutes and 4 hours comes from seven simple tricks.
No marketing talk here. These methods use real physics. They work on how water stays in fabric, how fast it evaporates, and how temperature works. Use them right and you’ll beat 95% of other users.
Tip 1: Master the Pre-Chill Method
Start cold. Stay cold longer.
Before you head out, put your towel in a sealed plastic bag with ice water for 15-30 minutes. This drops the fabric to 1-3°C before you even use it.
Here’s why it works: A colder start means a bigger gap between towel and air. That gap gives you 30-45 more minutes of cooling.
No ice at home? Put the dry towel in your fridge for an hour. Even at 4-7°C, you’re ahead of room-temperature towels.
This one step changes a 2-hour towel into a 3-hour one. Costs nothing. You just need what’s already in your kitchen.
Tip 2: Control Your Saturation Sweet Spot
Too much water isn’t always better.
Here’s what most people miss: A soaked towel drips and wastes its cooling power. A barely-wet one dries out fast. You need the right amount.
After soaking, wring the towel until it feels heavy but not dripping. Test it: Hold one end and shake once. See 2-3 drops? You’re good. See a stream? Wring more. See nothing? Add water.
PVA towels work great here. They stay dry on the outside but hold water inside. This gives you longer cooling without the drip mess of microfiber.
For microfiber, aim for 60-70% water by weight. Sound too technical? Just use the drop test.
Tip 3: Use Smart Reactivation Points
Don’t wait until the cooling dies out.
Top users refresh before the towel gets warm. Check every 45-60 minutes. Do a quick snap and shake even if it still feels cool.
This keeps the evaporation going. Once it stops, you need more water and time to restart. Small, regular refreshes beat big resets.
Hot, humid days slow evaporation down. You’ll need to re-soak multiple times. That’s just how it is. Skip the refreshes and you’ll be let down.
Carry a small spray bottle with cold water. A quick mist between soaks adds 15-20 minutes each time.
Tip 4: Place It Where Blood Flows
Size matters less than spot.
Your body moves 5 liters of blood per minute at rest. More during activity. Cool that blood and your whole body cools faster.
Best spots: back of neck, inside wrists, behind knees, inner elbows. Blood runs close to skin here. Cool these areas and your whole body temperature drops. Way better than just cooling your skin surface.
Lab tests prove it. Ice towels on forearms (just 11-13% of body surface) cut core temperature by 0.79°C in 30 minutes. Small spot. Big effect.
Put your towel across both sides of your neck. This catches blood going to and from your brain. Your brain feels temperature changes first.
Tip 5: Create Airflow Without Drying Out
Wind helps and hurts.
Moving air speeds up evaporation. Tests show 6.4 m/s airflow cuts core temp by 0.5°C versus still air. But too much wind dries your towel in minutes.
Fix: Use controlled bursts of air.
Every 10-15 minutes, take off the towel and snap it 3-5 times through the air. This short burst kicks evaporation back up without killing your water supply.
Between snaps, keep it on your skin. Your body heat drives steady evaporation. No wind needed. The towel keeps pulling heat while keeping its water.
Out in the breeze? Fold the towel double. Put the folded edge toward the wind. This protects half from drying out while the other half works.
Tip 6: Layer Your Cooling Strategy
One towel works. Two work better.
Keep a backup towel in a cooler with ice packs. After 2-3 hours, swap your warm towel for the cold one. Put the warm one back in the cooler.
This rotation gives you 6-8 hours of cold from two towels. Each resets while you use the other.
No cooler? Try the ziplock bag trick. Put your backup in a sealed bag with a small frozen water bottle. That bottle keeps it cold. One 16-ounce frozen bottle keeps a towel cold for 4-5 hours in a bag.
Athletes do this between games. Construction crews use it at lunch. It works because you manage both water and temperature, not just one.
Tip 7: Maintain Your Towel Between Uses
Skip care and performance drops.
After each use, rinse your towel in cool clean water. This clears out sweat, dirt, and minerals that block microfiber and cut absorption over time.
Let it air dry before storing. Never store a wet towel in a sealed container. Mildew wrecks the fabric and ruins how it holds water. That damage sticks.
Wash your cooling towel every 3-5 uses with mild detergent. Skip fabric softener. It coats the fibers and stops water from soaking in. With good care, quality microfiber towels last hundreds of cycles before you need a new one.
Watch for wear: poor absorption, bad smells, fabric damage. A towel that takes twice as long to soak up water is done. Replace it before it quits on you at a bad time.
These seven tricks take your portable cooling tool from okay to great. Each one makes the others work better. Use all seven and you’re not just keeping a towel cold longer. You’re getting how evaporative cooling really works.
How Long Do Cooling Towels Stay Cold in Different Conditions
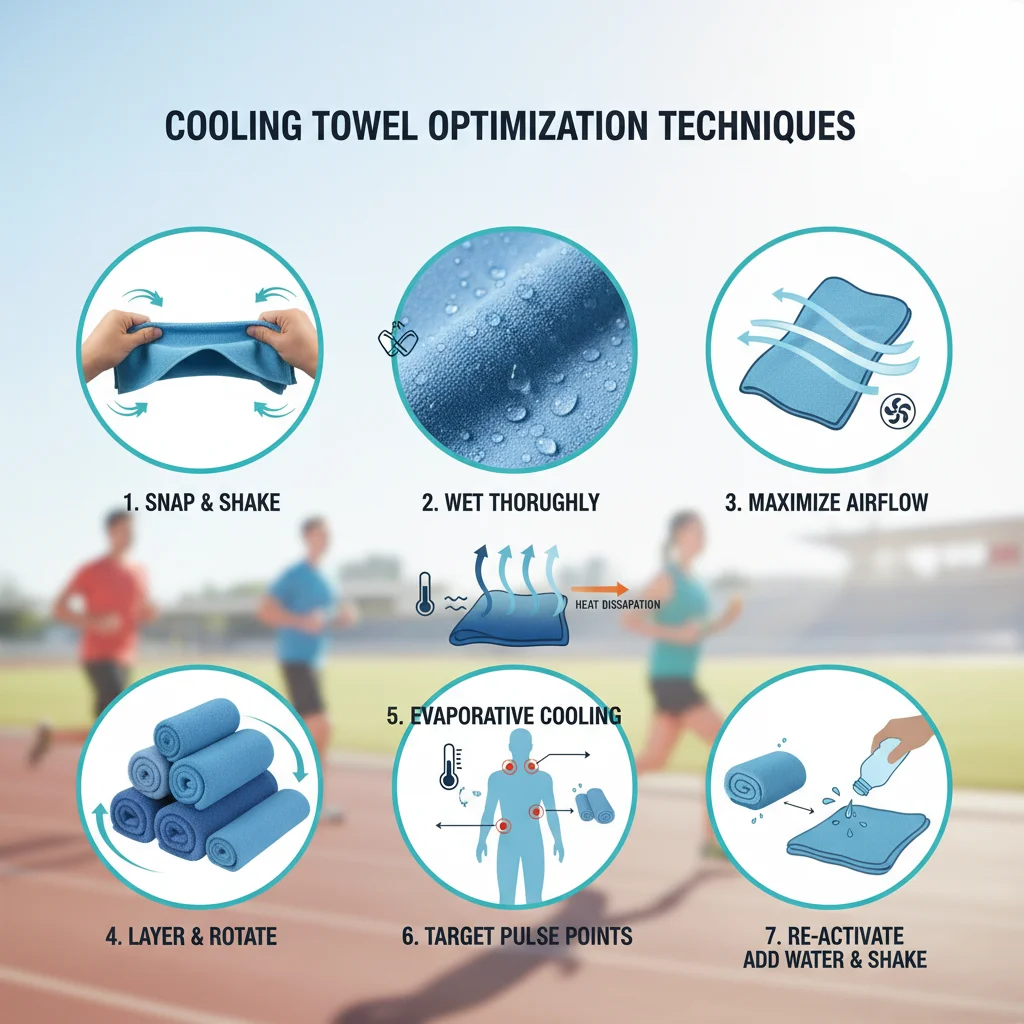
Duration depends on what you’re fighting against.
A cooling towel isn’t a fixed-time device. Your environment controls performance. The same towel that delivers 4 hours in air conditioning might give you 90 minutes in jungle humidity.
Here’s what happens in real conditions.
Standard Performance Benchmarks
Moderate humidity, normal airflow, reasonable heat—expect these numbers:
PVA towels: Up to 4 hours on a single soak. The synthetic structure holds moisture longer. Better water retention means longer cooling.
Microfiber blends: Around 2 hours before needing reactivation. Still effective. Just faster evaporation.
The 2-5 hour range covers most real-world use. Your result lands somewhere in that window. The factors below determine where.
Humidity Destroys Your Timeline
Moisture in the air is your enemy.
Low to moderate humidity (30-50%): Evaporation runs smooth. PVA and microfiber perform within 1-2°F of each other in surface temperature testing. Quality towels give you the full 3-4 hours.
High humidity (70%+): Everything changes. The air is saturated with water vapor. Your towel has nowhere to evaporate its moisture. Cooling drops fast. You’ll need multiple re-wets within the first 1-2 hours.
Muggy summer days in Florida? Expect half your normal cooling time. Desert heat in Arizona? You might beat the 4-hour mark.
Location Makes or Breaks Performance
Outdoor sunlight: Direct heat speeds up drying. Base 2-5 hour duration drops. Strong sun plus dry air can cut 30-45 minutes off your total time. The airflow from being outside helps offset some loss.
Indoor shade with airflow: Sweet spot for duration. Evaporation works well without too much heat. You’ll hit the upper end of expected times.
Air-conditioned spaces: Best conditions. Low temperature plus controlled humidity creates perfect evaporation rates. PVA towels reach 4+ hours here. Some users report extending beyond 5 hours with occasional snaps.
The pattern holds: humidity and temperature matter more than location. A humid basement performs worse than a dry patio.
Activity Level Changes Everything

Stationary use: Evaporation slows without movement-generated airflow. You might lose 15-30 minutes compared to active use. No breeze means the towel sits in its own moisture cloud.
High movement or sweat: Creates its own airflow. Each step pushes air through the fabric. Each motion does the same. This speeds evaporation. Cooling effect extends but water burns through faster. Expect 2-4 hours during exercise or outdoor work. Frequent re-wetting is needed in sweaty conditions.
Your body heat plus sweat plus movement creates a tricky system. More variables mean more reactivation cycles. Plan for this.
Quick Reference by Condition
|
Your Situation |
Expected Duration |
Action Needed |
|---|---|---|
|
AC office work |
4+ hours |
Minimal maintenance |
|
Outdoor moderate climate |
3-4 hours |
One mid-session refresh |
|
Hot, dry desert |
2-3 hours |
Regular snap and shake |
|
Hot, humid tropics |
1-2 hours |
Multiple re-soaks required |
|
Intense exercise |
2-3 hours |
Frequent reactivation |
No towel defies physics. High humidity and extreme heat shorten every cooling session. But knowing your conditions lets you plan water access and backup towels.
The towel reactivation method stays the same across conditions. Re-wet the towel. Wring it to damp. Snap to activate. You’ll restore that 30°F temperature drop each time. This works until your environment makes it impossible.
Common Mistakes That Reduce Cooling Effectiveness (and How to Fix Them)
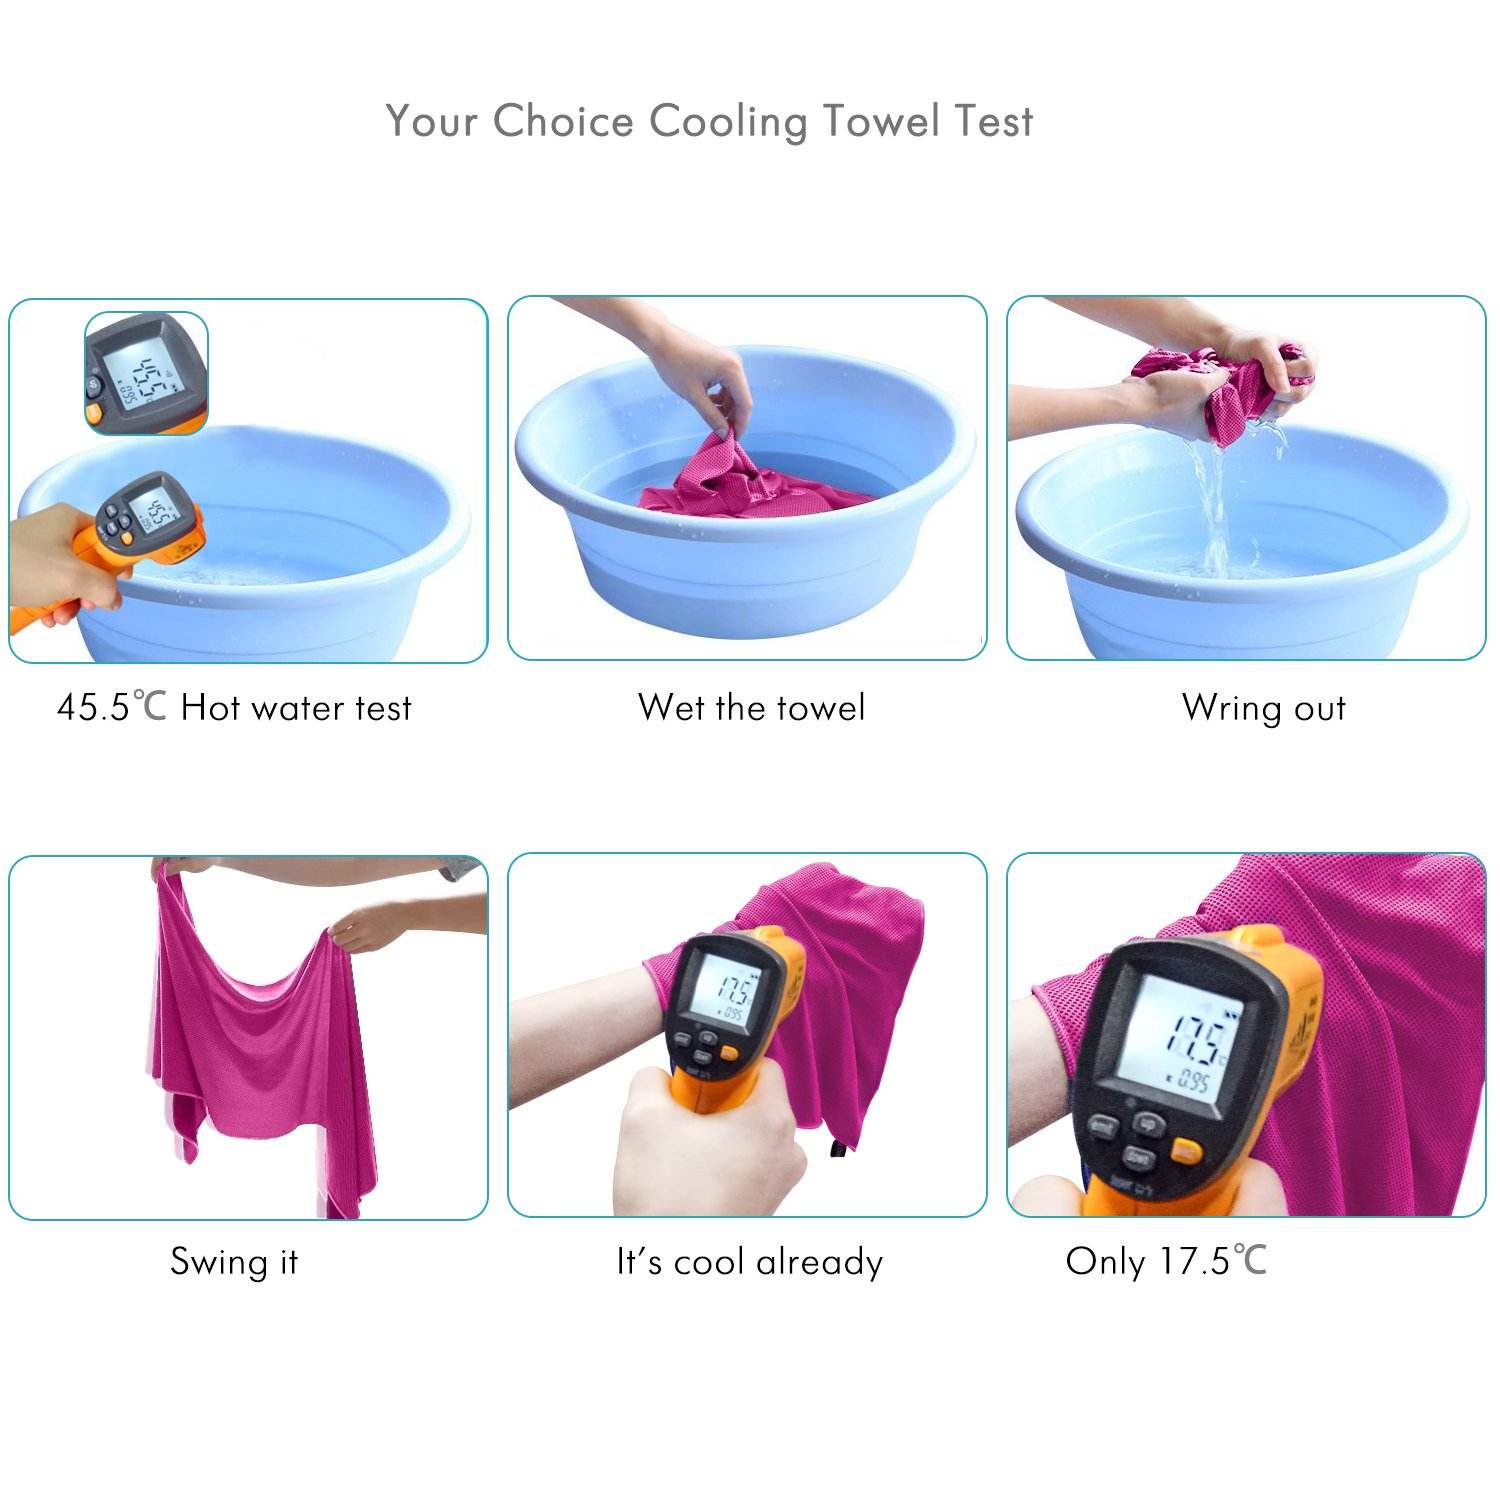
Small errors cost you hours of cooling time.
Most cooling towel failures trace back to five simple mistakes. You can prevent all of them. Fix these and your 2-hour towel becomes a 4-hour one. Keep making them and you’ll wonder why the thing never works right.
Mistake 1: Using Hot or Warm Water for Activation
Warm water sabotages your starting temperature.
You soak your towel in room temperature tap water (around 20-25°C). It feels wet. It cools a little. But you threw away 70% of your cooling potential before you even started.
The fix: Always use cold water from the tap. Better yet, add ice cubes and let the towel sit for 2-3 minutes. Starting at 1-3°C gives you 8-10 times more cooling capacity than lukewarm water. That temperature gap is the foundation. Everything else builds on it.
Keep a water bottle in your fridge or cooler. You need to reactivate? You’ve got cold water ready. This one change adds 45-60 minutes to each cooling cycle.
Mistake 2: Skipping the Snap and Shake Step
You soak the towel. Wring it out. Slap it on your neck.
It’s cool, but just a bit.
Here’s what you missed: The snap and shake cooling method isn’t optional. It’s chemistry in action. Whip the towel through the air. This spreads moisture across the fabric. It also kickstarts evaporation. Without it, water sits in clumps. Some spots stay soaked. Others dry out fast.
The fix: Hold one end and snap hard 3-5 times after every soak or re-wet. You’ll hear that sharp crack. That’s air rushing through the microfiber cooling fabric. In 10-15 seconds, the surface temperature drops 15-20°F. You’ll feel the difference right away.
Skip this step? Your towel never reaches its full cooling power. Do it right and you activate the evaporation process.
Mistake 3: Wrapping or Covering the Towel Too Tight
Tight wraps trap heat and moisture against your skin.
You think more contact means more cooling. So you wrap the towel around your neck like a scarf. Or you press it flat under a hat. The cooling dies in minutes.
Here’s why: Evaporation needs airflow. You seal the towel against your skin? You create a humid pocket. The air around the fabric gets saturated with moisture. Evaporation stops. The cooling effect vanishes even though the towel is still wet.
The fix: Drape, don’t wrap. Lay the towel across your neck or shoulders with slight contact. Leave small air gaps. The fabric should touch your skin at pulse points. Keep it loose everywhere else. This lets air circulate. You maintain cooling contact.
For forehead use, fold the towel and rest it on your skin. Don’t tie it tight with a headband. That compression kills the evaporation you need.
Mistake 4: Letting It Sit Until Bone Dry
You wait for the cooling to die before re-wetting.
By then, the fabric is warm and dry. You’ve lost all your moisture retention properties. Reactivation takes longer. The cooling restart is weaker.
The fix: Refresh before the towel gets warm. Check every 45-60 minutes during active use. Feel the fabric. Still damp but just a bit cool? That’s your reactivation window.
A quick cold water rinse and snap takes 30 seconds. It adds another hour of cooling. Wait until it’s bone dry? You need a full 2-3 minute soak to restart the process from zero.
Think of it like refilling your gas tank at half empty instead of running on fumes. Small, frequent refreshes beat full resets done out of desperation.
Mistake 5: Poor Storage Between Uses
You toss your wet towel in a gym bag or car trunk.
Days later, it smells like mildew. The fabric feels stiff. You try to use it again? Water beads on the surface instead of soaking in. The towel reactivation method doesn’t work anymore.
Bacteria and mold have damaged the microfiber structure. Mineral deposits from evaporated water have clogged the fabric. Your towel is ruined.
The fix: Rinse after every use with clean water. Hang it to air dry before storing. Never seal a damp towel in a plastic bag or closed container for more than a few hours.
Wash every 3-5 uses with mild detergent. Skip fabric softener. It coats fibers and destroys absorption. Proper care keeps your towel performing at peak for hundreds of cycles.
A quality PVA or microfiber towel costs $15-30. Treat it right? One towel lasts all summer instead of needing replacement every month.
These five mistakes account for 90% of cooling towel complaints. None of them are the towel’s fault. They’re all user error. Fix them and your portable cooling solution works the way it should.
Best Cooling Towels for Extended Cold Retention (Product Recommendations)

Performance on paper means nothing until you test it in real heat.
The cooling towel market floods you with options. Most promise 4+ hours of cooling. Few deliver. Marketing claims don’t match actual performance. This gap separates average products from the ones that work in tough conditions.
Here’s what testing in 80-90°F heat reveals about the top performers.
The 4-Hour Champions
Frogg Toggs Chilly Pad owns the top spot for a reason. This 33″ x 13″ PVA towel holds up to 8 times its weight in water. That capacity translates to real cooling time. Field testing on an 80°F NYC summer day delivered 90 minutes of cold, plus another 40 minutes of cool relief.
The material stays dry to the touch despite massive water absorption. No dripping down your back. You get steady evaporative cooling that drops to 30°F below body temperature. UPF 50+ protection blocks UV while you cool down.
The drawback? PVA hardens after extended use. Performance drops over time. You’ll get fewer total uses before needing a replacement.
MISSION Max Plus takes a different approach. This 36″ x 9.5″ polyester-spandex blend combines two surfaces. Smooth side cools. Terry side absorbs. Testing during 90°F heat with UV index 7 kept users cool for over an hour before needing reactivation.
Activation happens in under 1 minute. Wet it, wring it, snap it. You’re cold. The dual-sided design lets you choose. Need cooling? Use one side. Need sweat management? Flip to the other.
The 3-Hour Contenders
YQXCC 4-Pack delivers value without sacrificing duration. Three hours of cooling per activation puts these in the middle tier. The pack includes a carrying case. Multiple towels work better for rotation. Keep one cooling while using another.
MISSION Original Microfiber provides instant cooling in standard microfiber. Softer against skin than PVA. Never hardens after drying. Testing shows solid 2-hour performance with comfort throughout.
Material Comparison That Matters
PVA holds up to 12 times its weight in water in lab conditions. Real-world performance hits 8x. This capacity creates the longest cooling sessions. But rigidity builds up over dozens of uses. Water absorption decreases. The towel that gave you 4 hours drops to 2.
Microfiber skips the hardening problem. Performance stays consistent across hundreds of cycles. You sacrifice some duration — 2-3 hours instead of 4. The trade-off? You get longevity and maintained effectiveness.
Choose based on your priority: maximum single-session cooling or consistent long-term performance.
What the Testing Shows
Mesh microfiber towels stayed cold for 2 solid hours in independent testing. The third hour brought slight cooling. Not enough for comfort, but better than nothing.
Frogg Toggs felt icy cold straight from the package before wetting. That initial temperature plus high water retention creates the extended sessions users report.
All recommended options handle machine washing and multiple reactivations. Re-wetting and snapping restores the cooling effect each time.
The best towel matches your conditions. High humidity? Go microfiber for easier reactivation. Dry heat? PVA’s water capacity pays off. Multiple short sessions? Get the YQXCC 4-pack and rotate. One long endurance event? Frogg Toggs is your choice.
Conclusion
Master how to keep cooling towels cold and turn basic fabric into your best heat-relief tool. Three things separate lukewarm results from 4+ hours of solid cooling: soak it in cold water first, use snap-and-shake moves to reactivate, and know how your towel holds moisture. Push through marathons, work construction in the sun, or survive heatwaves—these methods boost your evaporative cooling by up to 50%.
The real trick? Refresh your towel before it loses all cooling power. Don’t wait until it’s bone-dry. Give it a quick refresh while still cool to keep that temperature cycle going strong.
Want cooling that lasts? Check out CoolHeaTech’s premium microfiber cooling towels built for long cold retention. Your next outdoor adventure needs more than a towel that dies after 20 minutes. Make every degree count.