
Getting a cooling vest that works starts with one thing most people skip: the fit. Too loose, and the cooling panels lose contact with your body. Too tight, and you’ve traded heat exhaustion for restricted movement. Neither option helps you on a sweltering job site or during an outdoor event.
Measuring for the perfect fit cooling vest takes less than five minutes. Those five minutes decide whether your vest drops your core temperature — or just looks like it should.
This guide covers every measurement that matters. You’ll learn which ones to skip, and how to read a size chart with confidence.
Content Framework: “How To Measure For The Perfect Fit Cooling Vest?”
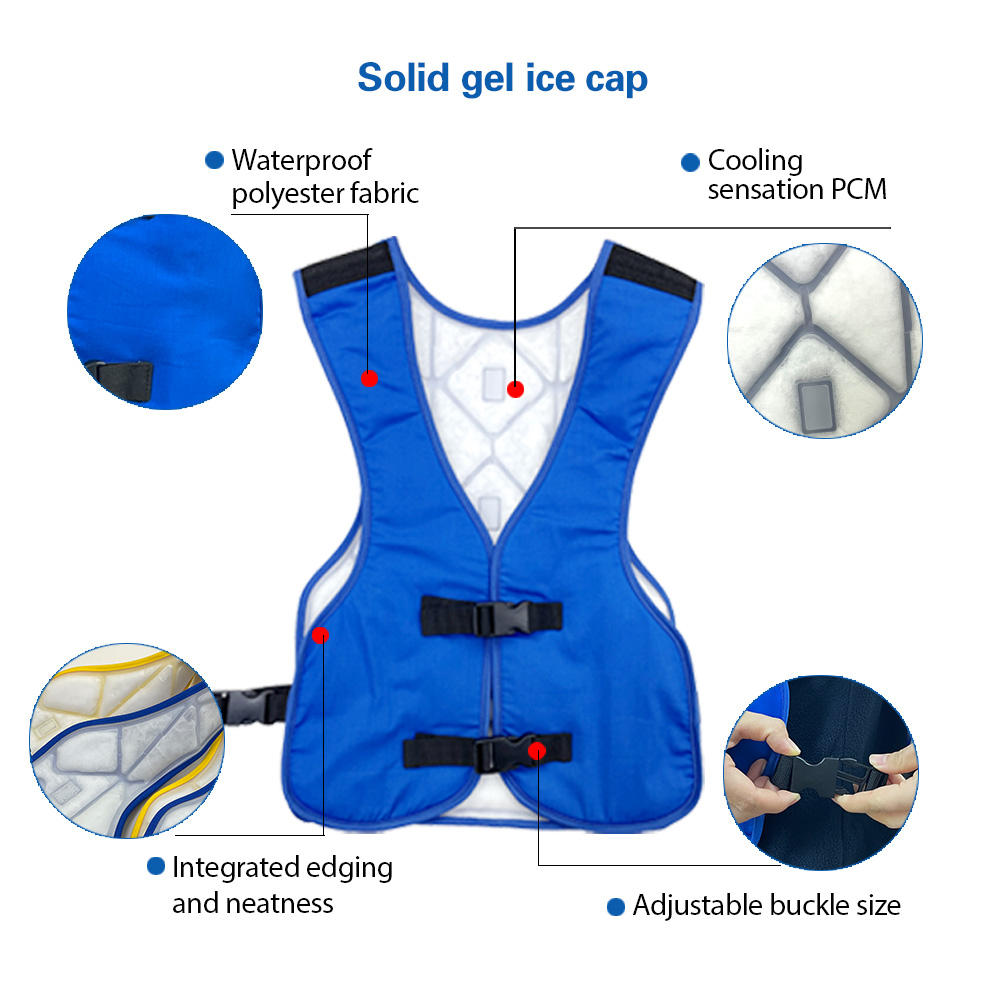
Four measurements. That’s the difference between a vest that cools you and one that just adds bulk.
Here’s what to capture:
-
Chest — across the fullest part, left upper side
-
Abdomen — right side, just below the ribcage
-
Shoulders — measured across the back, right side
-
Waist — your natural waistline, not your pants size
Take all four. Average them. That number is your baseline. Match it against a size chart — not your gut instinct.
Why it matters beyond sizing: Research tracks trunk skin temperature at these exact points with 0.1°C accuracy. A well-fitted vest keeps your skin temperature close to its natural resting state — around 36.29°C. Stray too far from that, and cooling efficiency takes a real hit.
Fit isn’t about comfort preference. It’s thermal physics.
Why Fit Is Everything: How a Cooling Vest Works

Physics doesn’t care about your preference for a relaxed fit.
A cooling vest moves heat through direct skin contact. Break that contact, and the cooling stops. There’s real math behind this. Fourier’s law puts it this way: Q = k × A × ΔT / thickness. In plain terms: less contact area between vest and skin means less heat pulled away from your body. Cut the contact in half, and you cut the cooling in half. Every time, no exceptions.
Here’s what that looks like in practice:
-
A 5mm air gap between vest and torso acts like an insulating layer — the same cooling-killer as wearing thick clothing under a PCM pack
-
PCM vests lose up to 54% of their cooling output as the gap between skin and panel grows — output drops from ~70 W down to ~32 W
-
Evaporative vests face the opposite problem: too tight seals in humidity, trapping moisture in the microclimate and slowing evaporation — the main driver of cooling capacity (R = 0.9, p < 0.001)
The HEAT-SHIELD study measured this with hard data. Vests with proper skin contact kept torso skin temperature at 31.7 ± 1.5°C. No vest? 36.1 ± 0.5°C. That 4.4°C difference comes down to contact quality — not the vest brand, not the PCM formula.
Heart rate numbers back this up: 103 bpm with a well-fitted vest versus 116 bpm without one. Vests that lost skin contact during movement delivered far weaker results. A vest that fits while you stand still may gap at the shoulders the moment you start walking. Movement changes everything.
The bottom line: fit isn’t a comfort variable. It’s the control variable — the one that decides whether every other feature on your vest does its job.
What You’ll Need Before You Start Measuring
Grab these before you touch a tape measure. Miss one item mid-measurement and you start over — with a different number the second time.
What you need:
-
A flexible measuring tape — the soft, fabric kind used in tailoring. Metal tape measures don’t bend around your torso right.
-
A fitted base layer — measure over what you’d wear under the vest. A bulky hoodie adds centimeters that throw off every reading.
-
A notepad or your phone — you’re capturing four numbers. Write them down right away. Memory is not a measurement tool.
-
A second person (recommended) — back measurements are hard to self-measure alone. Shoulder width is the trickiest. Solo attempts almost always introduce error.
That’s the full list. Nothing specialized, nothing expensive. Precision comes from technique — not equipment.
Step 1 — Find Your Natural Waist (The Only Measurement That Matters for Most Vests)
Most sizing charts list four or five measurements. In practice, waist measurement does the heaviest lifting. For most cooling vest brands, it’s the single number that determines your size — full stop.
Finding it is simpler than you think.
Stand up straight, then bend sideways. See that crease forming at your side? That’s your natural waist. It sits about one inch above your hip bones, at the narrowest point of your torso. This is not your pants waist. It’s not where your belt sits. It’s higher — and it’s the point where a vest settles during wear.
How to measure:
-
Wrap a soft, flexible tape measure around that narrowest point
-
Keep the tape level all the way around — no dipping at the back
-
Snug tension, not tight. You should be able to slide two fingers underneath
-
Measure over whatever you’d wear under the vest — a thermal base layer adds real inches, and those inches matter
Write down that number before you do anything else.
Why this measurement dominates sizing:
Each brand grades its size ranges in its own way. ThermApparel UnderCool 3.0 spans from 18″ to 64″ — built for medical and occupational users who need a wide fit range. Tux-USA runs more traditional — XS starts at 25″, 4XL caps at 61″. Ten Townsend Gilets grade in tight 2″ steps per size. Fox Creek Leather Women’s Vests lock each size to one fixed number: a Medium is 34″, no range at all.
Landed between two sizes? Go larger. Every time. A vest with a little extra room holds better panel contact through movement. One you squeezed into won’t.
Step 2 — Take the Measurement Right (Technique Details)
Technique separates a useful number from a useless one. You can have the right tape measure, the right base layer, the right lighting — and still end up with a measurement that puts you in the wrong size. Here’s how to avoid that.
Chest Measurement
Find the fullest part of your chest — right across your nipple line. Pull the tape snug across your back, level all the way around. Don’t puff up. Don’t slouch. Just breathe out, then read the number. That exhale posture is your actual size.
Common mistake: Letting the tape dip at the back. A sagging tape adds phantom inches. Keep it parallel to the floor.
Abdomen Measurement
Drop about two inches below your chest measurement point. Most cooling vest panels sit here during real use — not at your chest point, not where your belt rides. Wrap the tape around this spot, level and snug.
Shoulder Width
You need a second person for this one. Have them place the tape at the bony tip of your left shoulder. Then run it straight across your upper back. Stop at the bony tip of your right shoulder. Do not measure across the front. Back-measured shoulder width decides whether arm panels and straps stay in place during movement.
Getting the Read Right
Every measurement has two failure points: tension and posture.
-
Too tight compresses the base layer and gives you a number that’s too small
-
Too loose lets the tape shift and gives you a number that’s too large
-
The standard: snug enough that you can’t pinch slack, loose enough to slide two fingers under
Take each measurement twice. Two numbers differ by more than half an inch? Measure a third time and use the middle value. Write down each result right away — don’t round, don’t adjust, don’t second-guess.
Step 3 — Decode Your Number: Men’s vs. Women’s Sizing Rules
Men’s and women’s cooling vests are built on different assumptions about the human body. That difference is what turns your measurements into the right size — not just a close guess.
The Cut Is Different Before the Numbers Even Start
Men’s vests run straight through the torso. They have broader shoulders and longer panels. Women’s vests are shaped around a narrower waist, wider hips, and extra seam structure at the bust. So the same chest measurement produces a different vest shape entirely. That’s why cross-referencing matters more than most brands let on.
A men’s Medium fits a 38–40 inch chest. In women’s sizing, that same torso lands around a Large or XL — sometimes higher, depending on the brand. The chest measurement stays the same. The pattern changes.
Reading the Chart by Body Area
|
Area |
Men’s Sizing Logic |
Women’s Sizing Logic |
|---|---|---|
|
Chest |
38–40″ = Medium |
Measured at fullest point under arms |
|
Waist |
Narrowest point |
Narrowest point, tape parallel to floor |
|
Hip-to-waist variance |
Not a factor |
A 12″+ difference changes your size tier |
Women’s sizing carries more variables. A man’s waist and inseam predict his fit with solid accuracy. For women, hip width becomes a third required input. The wider range of possible size combinations reflects that added layer.
Where the Numbers Cross
Ordering a men’s vest as a woman? Or working from a unisex chart? Start here: take your four measurements first. Then compare each one against the brand’s listed dimensions — not the size label alone. Labels shift. Centimeters don’t.
Your chest and waist fall into different size brackets? Size up. Panel contact holds better with a larger vest than one pulled tight across the torso.
Step 4 — Match Your Measurement to the Right Size Chart
Numbers in hand. Now comes the part where most people hand their money to the wrong size.
Size charts aren’t universal. A Medium from one brand is not the same vest as a Medium from another. You’re matching your body’s actual measurements against the brand’s specific dimensions. The label on the tag means nothing here.
Here’s how to read the chart with confidence:
Use all three measurements together — not just one.
For women’s standard sizing, a Medium runs 36″–37″ chest, 28″–29″ waist, and 38.5″–39.5″ hips. All three should land in the same row. They don’t all match? You’re between sizes. Between sizes always means go larger.
Check which chart applies to your body type.
|
Chart Type |
When to Use It |
|---|---|
|
Standard Women’s |
Chest 32″–43″, standard proportions |
|
Plus Size |
Chest 40″+ or waist 33″+ |
|
Petite |
Same measurements, scaled shorter torso |
|
Youth/Kids |
Chest under 39″, narrower shoulder span |
The between-sizes rule applies here too. A chest of 40″ sits right at the boundary between standard Large and Plus 0X. These are two different fits. Don’t treat them as the same. The Plus cut is built for different torso depth and panel placement. Pick the chart that matches your actual proportions — not the one with the smaller number.
One more thing: shoulder width on the manufacturer chart runs narrow. A listed 13.4″ shoulder at size Small is a precise tailoring measurement — not a rough estimate. Your shoulder measurement from Step 2 comes out wider? Size up. Do this regardless of where your chest lands.
Vest-Type Exceptions: More Than Just Waist Measurement

Waist measurement gets you most of the way there — but not all of it. Some vest types break the single-measurement rule. In those categories, a waist number alone will get you the wrong size.
Here’s where the exceptions are:
Safety vests with ANSI compliance requirements are the clearest case. An XS women’s safety vest in a V2 pattern has 623.84 sq in of background material. That’s 151 sq in short of the ANSI Class 2 minimum of 775 sq in. It meets reflective striping at 201 sq in, but still fails compliance. The same pattern at XXL reaches 821.24 sq in and passes. Visibility standards are tied to vest size. That makes chest and torso length just as critical as waist. Sizing down for a snug waist fit can push you out of compliance.
Women’s contoured vests add another layer. Straight men’s cuts grade by chest and waist. Women’s bodice patterns need three measurements:
-
Chest — for panel width and arm opening clearance
-
Torso length — shorter female torsos need shorter hemlines; the V2 prototype’s first design fix was raising the hemline
-
Waist — still needed, but as one of three, not the sole measurement
Layering changes your baseline. Wearing a shirt or light sweater under a puffer or utility vest? Add 1–2 inches to both chest and waist before checking the chart. The vest has no way of knowing what’s underneath it. Your measurement needs to account for that.
Utility vests go furthest — chest, waist, and hips all matter. One-size-fits-most options exist across the 2XS–9X range, but these are built for temporary use. At the size extremes, precision breaks down.
Your vest falls into one of these categories? Waist measurement is the starting point — not the finish line.
The “Snug Fit” Test: How to Confirm You Got It Right
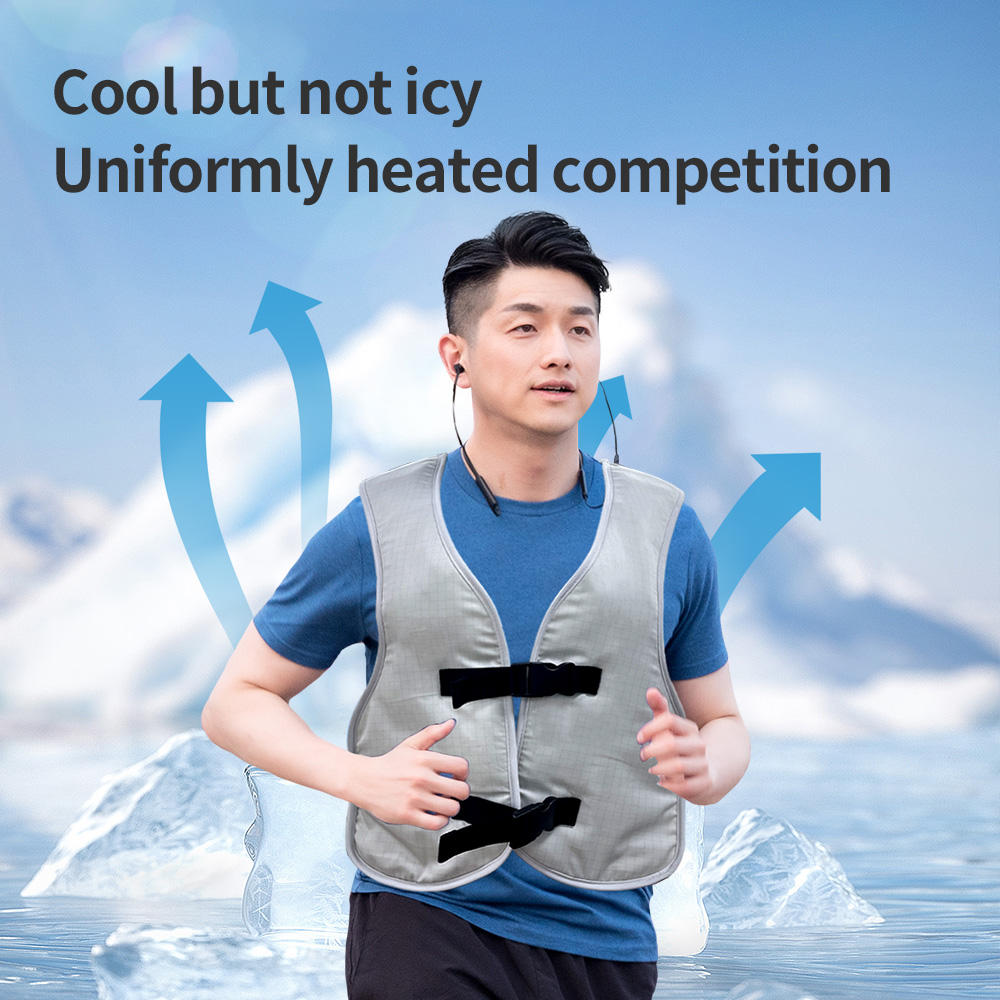
Measurements written down, size selected — now confirm the vest fits before you wear it somewhere that matters.
Put it on over your base layer. Then run through these checks in order:
The two-finger rule. Slide two fingers under the front panel at your waist. Both fingers fit without forcing? You’re in range. Can’t get the second finger in? Too tight. Both fingers slide in with room to spare? Too loose. This one check catches most fit problems right away.
The movement test. Raise both arms overhead. Reach across your chest. Bend forward at the waist. The vest should move with you — not ride up, not gap at the sides, not pull tight across your shoulders. A vest that fits while standing still but shifts the moment you move won’t keep panel contact where it counts.
The shoulder check. Look in a mirror or ask someone else. The shoulder seams should sit at the edge of your shoulder. Not drooping toward your upper arm. Not creeping toward your neck. Seams that sit off to either side mean the panels below are already out of position.
The pinch test. Pinch the fabric at your side panel. More than an inch of extra fabric? Wrong size. That extra material creates an air gap between the cooling surface and your skin. Air gaps reduce cooling output — so the fit problem becomes a performance problem.
Two or more checks fail? Size down. One fails on the tighter side? Size up. Go with what the checks tell you, not what the tag says.
Common Measuring Mistakes and How to Avoid Them
Bad measurements are sneaky. They feel correct in the moment — you wrapped the tape, you got a number, you wrote it down. The mistake already happened before you noticed it.
Here are the most common ones, and how to stop each one cold.
Measuring over the wrong layer. A thick hoodie adds real inches. A thermal base layer adds fewer — but still adds. Measure over what you’ll wear under the vest. That’s the number that counts.
Letting the tape go slack at the back. The tape shifts downward the moment you stop holding tension. A sagging tape gives you a number that’s too large. Keep it parallel to the floor all the way around, not just at the front.
Rounding your number toward a preferred size. A 38.5″ chest is not a 38″. It’s not a 39″ either. Write down what the tape says. Let the size chart make the call — not your preference for a particular size label.
Self-measuring your shoulder width. This one is hard to do alone. You can’t hold the tape flat across your upper back and read it at the same time. Bring in a second person for this one. It’s the one measurement that needs two sets of hands.
Taking one measurement and calling it done. Measure twice. Two readings differ by more than half an inch? Measure a third time. Use the middle value. A single reading has no error check built in — and a quarter-inch error is enough to push you into the wrong size bracket.
One bad number ripples through your entire fit. These fixes take thirty seconds each.
Conclusion
Getting a cooling vest that works starts with one tape measure and three minutes of your time.
Here’s what matters: find your natural waist, measure it, and match that number to the right size chart for your vest type. That’s it. A vest that fits keeps you cool. One that gaps, bunches, or restricts your breathing comes down to that one measurement done right.
Keep it simple. You now know how to measure for the perfect fit cooling vest. You also know why each step exists. That’s what separates a lucky guess from a confident purchase.
Your next move: grab a flexible measuring tape. Take your waist measurement right now while it’s fresh. Pull up the size chart for the specific vest you’re considering. Cross-reference. Confirm. Order.
Stay cool — for real.