
Your cooling vest is working hard. But fumbling with warm ice packs — or guessing which slot goes where — kills the relief you’re counting on.
Replacing cooling vest ice inserts the right way isn’t complicated. There’s just a process worth following. Do it right, and your vest stays at peak performance, your gear lasts longer, and you stay cool even when the heat hits hard.
This guide covers every step: removal, rechilling, reinsertion, and rotation. First-time user still unboxing your vest? You’ll get a clear starting point. Experienced wearer noticing a drop in cooling performance? You’ll find exactly what to fix. Either way, less time sweating the small stuff — more time actually staying cool.
Content Framework: “How To Replace Ice Packs In Our Cooling Vests?”
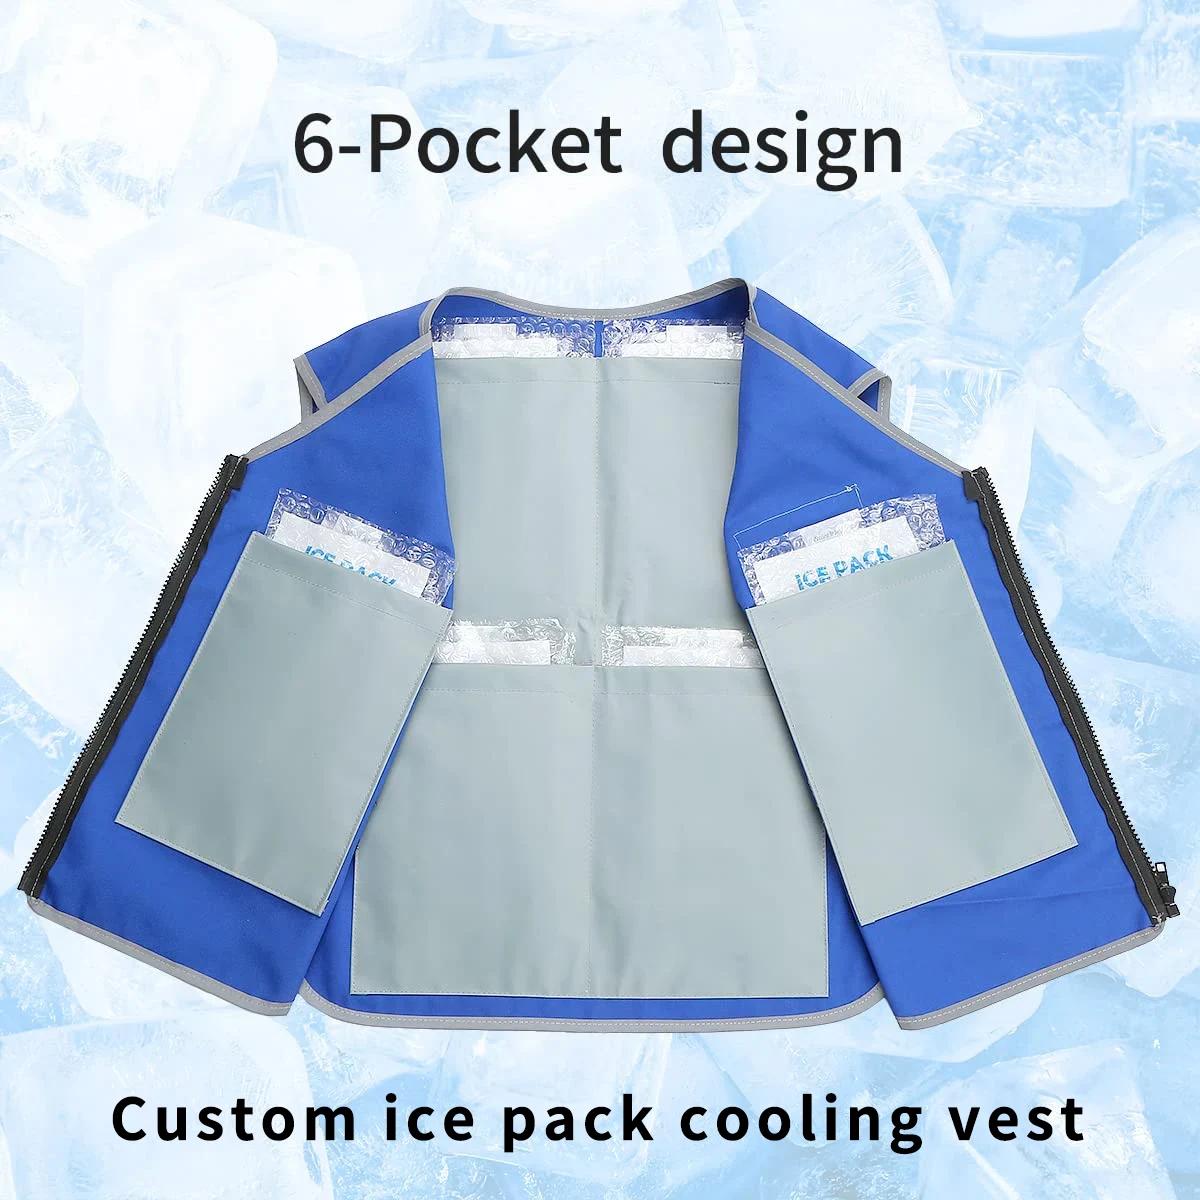
Think of this guide as your vest’s owner manual — the one that makes sense.
Here’s what we’ll walk through, step by step:
-
How to remove spent ice packs without damaging the vest or the inserts
-
How to recharge your cooling vest ice inserts — ice water, freezer, or refrigerator, depending on your pack type
-
How to reinsert packs the right way, including pocket orientation and Velcro securing
-
Rotation strategies for all-day cooling, so you’re never stuck waiting on a refreeze
-
Maintenance tips that protect your gear long-term
Using phase change packs? They cool to a precise 58°F and last 3–4 hours. Using standard gel inserts? The steps are the same either way. The core process doesn’t change. Small details still matter, though. Flatten any lumpy packs before sliding them back in. Place wax paper between layers to stop them from sticking together in the freezer.
Get this right, and your vest cooling system performs as designed.
What You Need Before Replacing Ice Packs (Pre-Replacement Checklist)
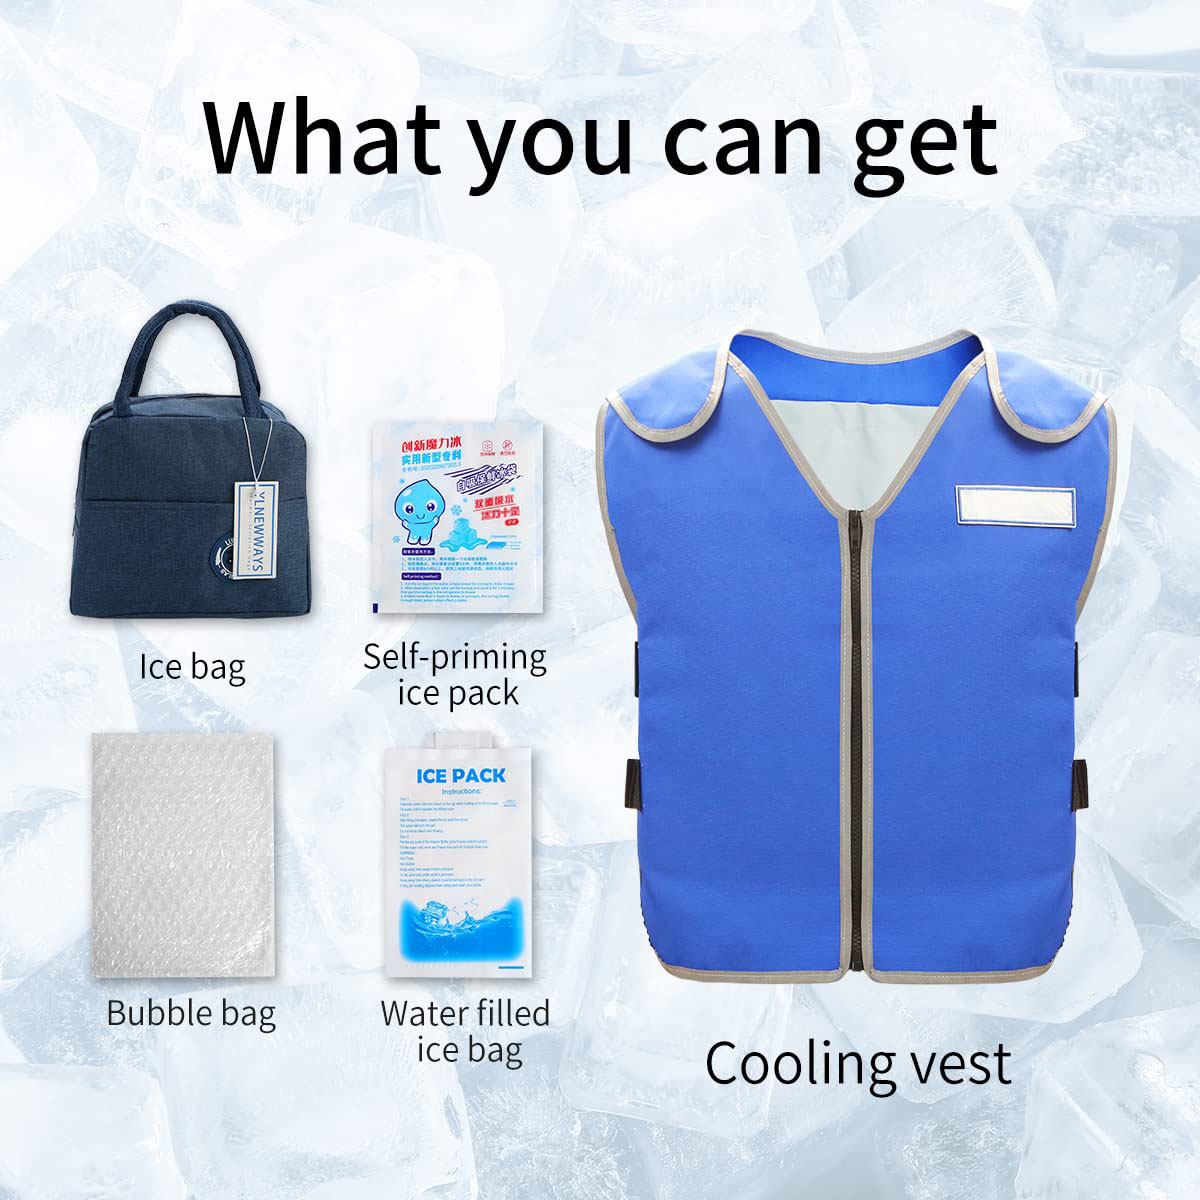
Five minutes of prep saves twenty minutes of frustration mid-shift.
Before you touch the vest, gather what you need. Two full sets of ice packs — not one, two. That’s the base of a smart rotation system. One set works in the vest while the other recharges. No downtime. No waiting. No sweating through a meeting because your set is still in the freezer.
Here’s your checklist:
-
✅ 2 spare ice pack sets — for non-stop rotation
-
✅ Insulated bag or cooler — keeps recharged packs cold until swap time
-
✅ Clean towels — never place packs against bare skin. Frostbite risk is real after 20 minutes
Before inserting anything, inspect every pack:
-
Give it a squeeze. Feel for cracks, soft leaks, or uneven gel distribution
-
Toss any pack that’s torn, misshapen, or leaking — no exceptions
-
Skip packs frozen solid. Cap freeze time at 4 hours for gel types. Hard lumps cut contact and hurt cooling performance
Each pack type needs different prep:
|
Vest Type |
Key Prep Step |
|---|---|
|
Standard Ice Pack |
Freeze 4+ hours; wrap in towel before inserting |
|
Phase Change Gel |
Pre-chill flat 4–8 hours; replace if leaking (lifespan: 6–12 months) |
|
Evaporative |
Soak 10–15 min in water; no freezing needed |
One more thing: use manufacturer-approved inserts. Third-party packs bring leaks, contamination, and a cooling vest that stops cooling altogether. That defeats the whole point.
Step 1 — How to Remove Warm Ice Packs From Your Cooling Vest
Warm packs mean the vest has done its job. Now it’s your turn.
Removal is straightforward. But a rushed pull or careless yank can tear the vest lining or crack a pack’s outer shell. Take an extra ten seconds — it saves you from damage you don’t need.
Locate your pack pockets first. Most cooling vests carry packs across three back panels and one or two insulated front pockets. Run your hand along the vest’s interior — you’ll feel the weight of the spent packs right away.
Then extract with care:
-
Open any Velcro flaps or pocket closures all the way before reaching in — don’t force a half-open pocket
-
Slide the pack out flat, not at an angle. PEVA and LDPE pack materials are tougher than they look, but sharp edges still catch
-
Set each pack on a flat surface — not tossed in a pile, not stacked
Check the shape as you go. A pack that comes out lumpy or misshapen isn’t ready to recharge yet. Hold it under warm water for a few seconds until it softens and lays flat. Then it’s ready for the freezer cycle.
One pack at a time. Steady hands. Done in under two minutes.
Step 2 — How to Rechill Ice Packs for Cooling Vest Replacement (By Pack Type)
The method you use to rechill your packs matters more than most people think. Get it wrong, and your vest’s performance drops fast — often before you notice anything is off.
Not all cooling vest ice inserts recharge the same way. Throw a phase change gel pack into the freezer for two hours and you’ve made a rigid, body-shaped brick. It fits badly and cools in uneven patches. Soak an evaporative pack in ice water and you’ve burned twenty minutes for zero results. Each pack type has a specific recharge window. Work within it, and your vest cooling system snaps back to full performance fast.
Here’s how to rechill each type, broken down by pack.
Standard Ice Packs
Soak in ice water for 1 hour. That’s it. Do not put these in the freezer long enough to freeze solid. A hardened pack loses flexibility. It sits stiff against your body and delivers uneven cooling across the contact surface. The goal is a partial chill — cold enough to work, soft enough to conform to your shape.
Phase Change Gel Packs
These packs — used in vests like ThermApparel and Glacier Tek — are the most precise option in personal cooling equipment. They hold a steady 53–59°F until the gel is thawed out. That consistent temperature is the whole point, so how you recharge them directly affects how well they perform.
Your options, by speed:
|
Recharge Method |
Time Required |
Best For |
|---|---|---|
|
Ice + water + salt slurry |
10 minutes |
Outdoor emergency, fast rotation |
|
Freezer |
45 minutes |
Workplace with freezer access |
|
Refrigerator |
1 hour |
Slower, gentler — preferred for longevity |
|
Regular ice water |
15–20 minutes |
Most common field method |
The salt slurry method is worth a closer look. Fill a cooler with ice, add water, then stir in one teaspoon of salt. This pulls the liquid temperature down into the mid-20s°F — well below standard ice water. Phase change packs recharge in as little as ten minutes using this mix. For outdoor workers managing a cooling vest for heat stress without freezer access, this is one of the most practical tricks available. Check manufacturer guidance first to confirm your gel packs are compatible.
One firm rule: do not freeze phase change packs solid. The sweet spot is a half-frozen, semi-flexible state. That’s where these packs perform best. Hard and rigid means poor contact with your skin, uneven cooling, and real discomfort during long shifts.
Evaporative Packs
These work on a completely different principle — no freezing, at any point. Submerge in water for 2–3 minutes, drain well, and they’re ready to go. Cooling duration runs 2–3 hours, so turnaround is fast. That makes them a solid choice when time is tight and freezer space isn’t available.
Recharge at a Glance
|
Pack Type |
Fastest Method |
Recharge Time |
Cooling Duration |
|---|---|---|---|
|
Phase Change |
Ice slurry + salt |
10 min |
2–4 hours |
|
Gel / Standard Ice |
Ice water |
20 min |
2–3 hours |
|
Evaporative |
Water soak |
2–3 min |
2–3 hours |
Know your pack type. Match it to the right method. That’s the difference between a body cooling vest refill that’s ready on time — and one that fails you right when the heat is at its worst.
Step 3 — How to Insert New Ice Packs Into Your Cooling Vest
Cold packs in hand. Vest laid out in front of you. This is where most people rush — and where a thirty-second shortcut turns into a two-hour problem.
Insertion isn’t just “slide it in and zip up.” Orientation, fit, and closure all shape how long your cooling vest ice inserts stay effective against your body. Get these details right, and your vest cooling system runs exactly as built.
Lay every pack flat before it goes near a pocket. Not kind of flat. All the way flat — no folds, no creases, no corners bent from freezer stacking. A warped pack creates air gaps between the insert and your body. Air gaps mean uneven cooling. That’s the quiet reason your vest sometimes feels like it’s barely working.
Slide each pack straight in, parallel to the pocket seam. Match the pack’s shape to the pocket slot. Don’t angle it, force it, or fold an edge to make it fit. The pack resists? It’s either too stiff from over-freezing or a little misshapen. Give it another minute, then try again.
Close every pocket all the way. Press the Velcro firm along the entire edge — corners included. Run your fingers across the seam. No gaps. No bulging sides. A half-secured pocket lets the pack shift during movement. That breaks consistent skin contact and kills cooling efficiency.
Once everything is inserted, do a quick fit check:
-
The vest should lie flat against your torso — no drumming or lumps
-
Shoulder and waist straps should adjust without restriction
-
The zipper should close with ease — some initial stiffness is normal. It softens within 15 minutes as the packs warm up to body temperature
One pack type worth noting: gel crystal inserts tend to stick together after freezing. Separate them with a sheet of wax paper before storing or reinserting. It takes five seconds and saves you a damaged pack.
Fit right. Sealed right. That’s a body cooling vest refill that does its job.
How to Rotate Ice Pack Sets for Extended Wear (2–6+ Hours)
A single set of ice packs lasts 2–4 hours. A full workday lasts 8. The fix is simple: rotation.
The idea is easy to follow. Two sets, taking turns. One set works inside your vest, cooling your body. The other sits in an insulated cooler, staying cold. The first set warms up — you swap. Zero downtime. No standing in front of an open freezer, waiting and sweating. Your body cooling vest refill stays ready before you ever need it.
Here’s how to run that system well. It works on a construction site, a warehouse floor, or a long outdoor event.
Set Up Your Rotation Before the Day Starts
Don’t wait until mid-shift to figure out rotation. Prepare both sets the night before.
-
Freeze or pre-chill Set A and Set B overnight — both sets, all the way through
-
Store both in an insulated cooler with ice in the morning
-
Label them if it helps — anything that cuts guesswork when you’re hot and tired
Know Your Swap Windows
|
Cooling Duration |
Swap Frequency |
Best For |
|---|---|---|
|
2–3 hours |
Every 2 hours |
Light-duty, moderate heat |
|
3–4 hours (phase change) |
Every 3.5 hours |
Industrial, construction, logistics |
|
6+ hour shifts |
3-set rotation recommended |
Extreme heat, outdoor labor |
For industrial cooling vest packs in high-heat environments, don’t wait until you feel warm. Swap on a schedule. Set a phone reminder if that helps. By the time you notice the warmth, your core temperature is already rising.
Keep Your Spare Set Cold
An insulated cooler with a 2:1 ice-to-water ratio keeps pre-chilled packs at full readiness for 4–6 hours. Toss in a handful of salt to push the water temperature down further — the same idea as Step 2’s slurry method.
That cooler is your rotation anchor. It’s what turns a 2-hour vest into a full day of cooling vest for heat stress protection.
Cooling Vest Ice Pack Replacement: Common Problems & Fixes

Every vest runs into trouble at some point — even a well-maintained one. Knowing what to look for, and how to fix it, is what separates a vest that actually works from one that just looks like it does.
Here are the four most common problems, with real fixes for each.
Problem 1: Ice Pack Stuck in the Slot
Some vest systems are harder to swap than others — that’s just how they’re built. The Steele vest, for example, needs more force to pull out frozen packs than systems like EXOTEMP or LSSI. That’s a deliberate trade-off for its longer 120-minute cooling duration.
Fix it: Pack won’t budge? Dip the exterior of the vest pocket in room-temperature water for 30 seconds. This loosens the freeze bond without warming the pack itself. For Steele systems, a firmer grip or a flat tool to break the seal is your best move.
Problem 2: Leaking or Melting Too Fast
Gel seepage and fast melt are among the top 10 reported issues in cooling vest surveys. In fact, 21.4% of users flag ice replenishment as a real operational headache.
Fix it: Check every seal before freezing. Gel migrated to the edge? Replace the pack — don’t refreeze it. Freeze flat at -18°C for 4–6 hours. Overfilled packs and uneven freezing both speed up leakage and melt. Keep the fill level consistent and the freeze time full.
Problem 3: Cooling Performance Drops After Replacement
Short cooling duration ranked as the #2 reported issue among workers. The numbers back this up. A mismatched or half-frozen pack drops cooling output to the 85–160W range — far below the 270W a Steele vest delivers at full capacity. EXOTEMP packs cycle every 40 minutes under normal use. Yours fading faster than that? That’s your first red flag.
Fix it:
– Lock in a full 12–24 hour freeze — half-frozen packs cut effective duration by up to 50%
– Match your pack size to the pocket slot — a size mismatch alone reduces cooling rate by 20–30W
– Build a rotation schedule rather than waiting until you feel the warmth
Problem 4: Pack Durability Failures
7.7% of vests show physical damage from wear. In construction environments, that number jumps to 15.6%. Ice packs are often the first thing to fail. Field reports log pack failures anywhere from 3 hours to 2 months of use.
Fix it: Run a quick visual check before every insertion. Toss the pack right away if you spot any of these:
-
Bloating or visible deformation (freeze damage inside)
-
Shell cracks, even hairline ones
-
Any trace of gel leakage — this is a direct safety hazard
-
Cooling duration falling below 40 minutes, or output dropping under 85W
A pack that hits any of those thresholds is done. Don’t run a compromised insert through another cycle. Reach out to your vest manufacturer and get proper replacements.
Cooling Vest Maintenance Tips to Maximize Ice Pack Performance
Small habits add up. A cooling vest that lasts two months versus one that gets you through a full season? That gap usually comes down to three or four routine choices — made the same way, every time.
Store your ice packs at the right temperature. LDPE and PEVA packs work within a -20°C to 60°C range — stay inside that window. Your freezer handles the job fine. But if your facility falls within the 19–37% that provide dedicated storage areas, use that space. Organized storage speeds up rotation and cuts down on damaged packs.
Clean the vest on a schedule — and do it with care. About 57.1% of workers clean their own vests. That’s completely fine. Just keep chemical cleaners away from the ice packs. Some agents eat through the pack shell faster than a full day of wear ever would.
Swap out packs before they fail — not after. Physical damage shows up in 15.6% of construction vests — more than any other industry. A torn or bloated pack won’t give you a warning. You catch it during inspection, or you miss it entirely. Build the habit of checking before each shift.
Track how long your cooling lasts. Fresh, well-maintained packs deliver 107–270W of cooling output. Your packs cycling faster than usual? Output feeling weaker than it used to? That’s a signal worth acting on. Don’t wait for a full breakdown — adjust your maintenance or replacement schedule now.
The vest does its job. Make sure you’re doing yours.
Where to Buy Replacement Ice Packs for Your Cooling Vest
The right replacement pack isn’t just a pack. You need the specific pack built for your specific vest. That difference matters more than most people think.
Start with your vest brand, then buy direct.
|
Brand |
Pack Set |
Where to Buy |
|---|---|---|
|
Glacier Tek Flex |
12-pack (6 front, 6 back) |
glaciertek.com |
|
Glacier Tek Adult/Classic |
8-pack (4 large, 4 small) |
wingstuff.com |
|
StaCool |
ThermoPaks (2 sets standard) |
stacoolvest.com |
|
Chill-Its by Ergodyne |
4-pack, $129.99 |
tractorsupply.com |
|
Gobi Heat Breeze |
15-pack replacement set |
Gobi Heat direct |
Why does brand-matching matter? Official packs use airtight seals, phase-change calibration (59–64°F), and FDA or SGS review. Generic gel packs from general retailers carry real risks:
-
Burst seams
-
Frostbite potential
-
Zero phase-change consistency
Older Glacier Tek XS/S vests (pre-2021) need a special-order email sent to the brand. They process orders same-day. Don’t assume current packs fit legacy sizing. Measure your pocket dimensions first.
Generic packs from Home Depot cost less upfront. They also fail faster, fit badly, and chip away at every other step in this guide.
FAQ: Ice Pack Replacement for Cooling Vests
These questions come up all the time — and they deserve straight answers backed by real numbers, not guesswork.
How often should ice packs be replaced during use?
Swap packs every 15–60 minutes during recovery. The first 5 minutes deliver the sharpest results — a skin temperature drop of −0.59 to −0.61°C. A full 60-minute cycle gives you a −1.62°C total reduction. That first quarter-hour alone covers 56% of the entire cooling effect.
Can regular ice bags substitute for purpose-built cooling vest packs?
Yes, they can. Studies show optimized ice packs perform on par with paraffin vests for thermal strain. Ice also holds greater latent heat at a lower cost. So it works as a solid field substitute when official inserts aren’t on hand.
How long does one set of ice packs cool?
You get useful cooling across 15–60 minutes. Heat loss hits −84W within the first 15 minutes. Rotate 2–4 sets per session to keep cooling gaps from forming.
Are ice vests better than other cooling methods?
Compared to hand cooling, ice vests deliver a −1.68°C skin temperature advantage. Compared to paraffin vests, results are close — but ice comes out ahead on cost and latent heat capacity.
How many times can gel packs be reused?
Gel packs built for cooling vest gel pack replacement handle repeated freeze-thaw cycles with ease. You’ll find them used across sports, firefighting, and industrial heat stress settings. Check each pack before use. Toss any pack that shows cracks, bloating, or gel leaking out.
Conclusion
Replacing ice packs in your cooling vest isn’t complicated. But doing it right makes a real difference — between a vest that keeps you truly comfortable and one that barely cuts the heat.
You now have everything you need:
-
The removal technique
-
The rechilling method that fits your specific pack type
-
The correct insertion approach
-
A rotation strategy that extends your cooling window well past a single cycle
Each step matters for a reason. In high-heat environments, proper cooling vest ice insert maintenance protects more than your gear. It protects you.
So here’s your next move: pull out your vest and run through the process once while it’s fresh. Build the habit before your next shift or outdoor session. Small practice now saves you from overheating later.
Your ice packs worn out? Browse our replacement cooling vest gel packs — built to fit right, freeze faster, and last longer.
Stay cool. Work safer.