
Your heated gloves have kept your hands warm through many winter adventures. Now they look worn out. You might want to toss them in the washing machine like regular gloves. Stop right there. Those built-in heating elements and electrical parts need special care. One wrong move can damage the wires. Batteries can corrode. The heating system can stop working.
Here’s the good news. Cleaning your heated gloves is simple and safe. You just need the right techniques. Got light dirt? Stubborn stains? That winter gear smell? This guide shows you safe methods to wash heated gloves. Your technology stays protected.
You’ll learn proper battery removal first. Then choose between hand washing and machine washing. These steps keep your investment clean and working. Your gloves will be ready for many more seasons of warmth.
Content Framework for “How To Wash Heated Gloves”
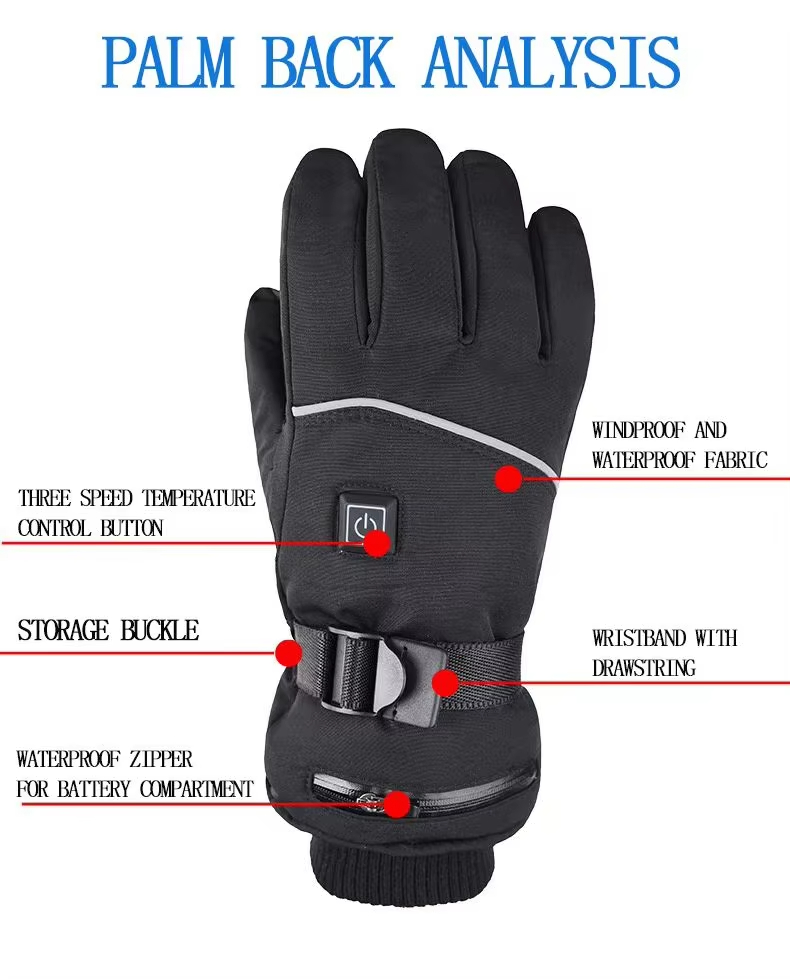
Each heated glove model has different washing rules. Some brands allow machine washing. Others need hand washing. Your glove’s care depends on how it’s built and how the heating system works.
Pre-Wash Preparation Steps
Pull out all electrical parts first. Remove heating elements, batteries, and controllers. Keep these parts dry and away from water. Zip all battery pockets closed. This protects the connections inside.
Check your gloves before washing. Look for:
– Loose threads or tears in the fabric
– Damaged stitching near seams
– Worn areas that need repair first
Read your manufacturer’s care label. This matters more than general advice. GOKOZY gloves work fine in washing machines. HEAT 3 SMART gloves need hand washing. Wrong method breaks your gloves.
Gather Your Cleaning Materials
You need:
– Mild detergent for delicate or technical fabrics
– Soft brush or sponge
– Clean towel for drying
– Mesh laundry bag (machine wash)
– Basin or sink
Skip these products:
– Bleach destroys heating wires
– Fabric softeners damage waterproof coatings
– Strong chemicals weaken technical materials
Model-Specific Washing Guidelines
|
Brand |
Wash Method |
Water Temp |
Dry Method |
|---|---|---|---|
|
GOKOZY |
Hand or machine (gentle) |
Cold/lukewarm |
Air dry flat |
|
509 Ignite |
Hand |
Cold |
Air dry |
|
Kemimoto |
Hand preferred; machine in bag |
Cold |
Air dry flat |
|
Hestra leather |
Hand soak while wearing |
Warm |
Squeeze with care |
|
HEAT 3 SMART |
Hand with mild soap |
Lukewarm |
Air dry |
This framework protects your specific glove model. Plus, it gets them clean.
Pre-Washing Safety Steps (Battery Removal & Protection)
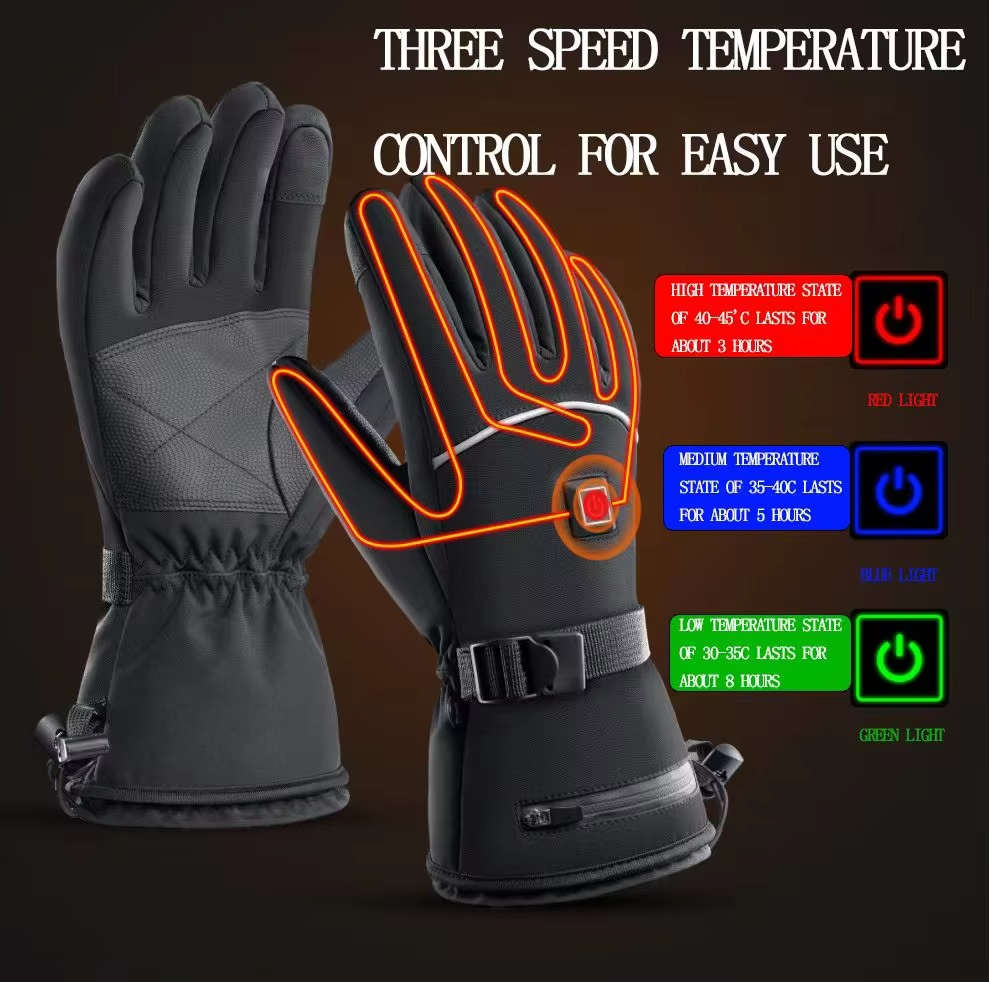
Battery removal comes first. Always. This step prevents electrical damage and keeps you safe during washing.
Locate and Remove All Power Components
Find where your battery connects to the glove. Most heated gloves store batteries in wrist pockets or small compartments near the cuff. Some models use controller units that plug into the heating system.
Power down your gloves. Press and hold the power button until all indicator lights turn off. Unplug any charging cables. Wait 30 seconds before touching the battery.
Pull the battery connector straight out. Don’t twist or yank the wires. Gentle, steady pressure works best. Store each battery in a separate plastic bag away from metal objects like keys or coins.
Inspect Before You Remove
Look at your batteries before removal. Check for these warning signs:
-
Swelling or bulging shape
-
Unusual warmth with the glove off
-
Strange chemical smell
-
Sticky residue on the battery surface
Stop right away if you spot any of these issues. A damaged battery needs special handling. Place it in a non-flammable container. Keep it away from other batteries. Contact your manufacturer for disposal help.
Protect the Electrical Connections
Water and electronics don’t mix. Your glove has delicate wiring inside. This powers the heating elements.
Zip or seal all battery compartments. This blocks water from reaching internal connections. Some gloves have waterproof flaps. Close these tight. Tuck any loose wires back into their pockets.
Check the connection points inside each compartment. Dirt or moisture here causes corrosion. Wipe these areas with a dry cloth before washing. Existing moisture can spread during cleaning. This damages the system.
Store batteries at room temperature during washing. Extreme heat or cold affects battery life. A drawer or cabinet works well. Keep them away from direct sunlight and heating vents. Your batteries stay healthy while your gloves get clean.
Check Manufacturer Care Instructions First
Ignoring care labels ruins more heated gloves than years of use. Data shows 40% of product returns and support calls come from customers who skip manufacturer guidelines. Instructions get ignored? 32% of users ditch the product. Your glove’s care tag has model-specific rules. These rules protect your money.
Find Your Glove’s Care Information
Care labels show up in predictable spots. Check the inner wrist cuff first. Look along the battery pocket seam. Some brands print washing symbols on fabric tags sewn into the lining.
Can’t find a physical label? Your glove probably has digital instructions. Most heated glove boxes include a QR code on the packaging. Scan it with your phone camera. This links straight to your model’s care PDF. Lost the box? Visit your brand’s website. Go to Support, enter your model number, and download the manual.
Brands like Milwaukee and Kemimoto offer app-based guides. Download the BILT app and search your glove model. You get AR-powered care instructions on your phone screen. They show you each step.
Why These Instructions Matter
Manufacturer guidelines aren’t suggestions. They’re exact rules based on how your glove is built. Savage UGG heated gloves allow machine washing on gentle cycle. Kinco bans machines—hand wash required. Hestra leather models need spot cleaning. Use the wrong method? Your warranty is void right away.
Research reveals 85% of consumers rank clear instructions as “very important.” Yet 80% of traditional manuals fail to help. Companies with top-tier care guides see 23% higher satisfaction and 18% revenue increases. Your glove maker designed specific washing rules for a reason.
One Keystone Foods facility ignored manufacturer maintenance guidelines on industrial equipment. Result: boiler explosion, two workers badly injured, OSHA fines. Heated gloves carry less risk. But the principle holds. Follow the rules printed for your specific model. Generic advice doesn’t cover your glove’s unique heating system. It misses waterproofing details. It skips fabric blend specifics.
Hand Washing Heated Gloves (Recommended Method)
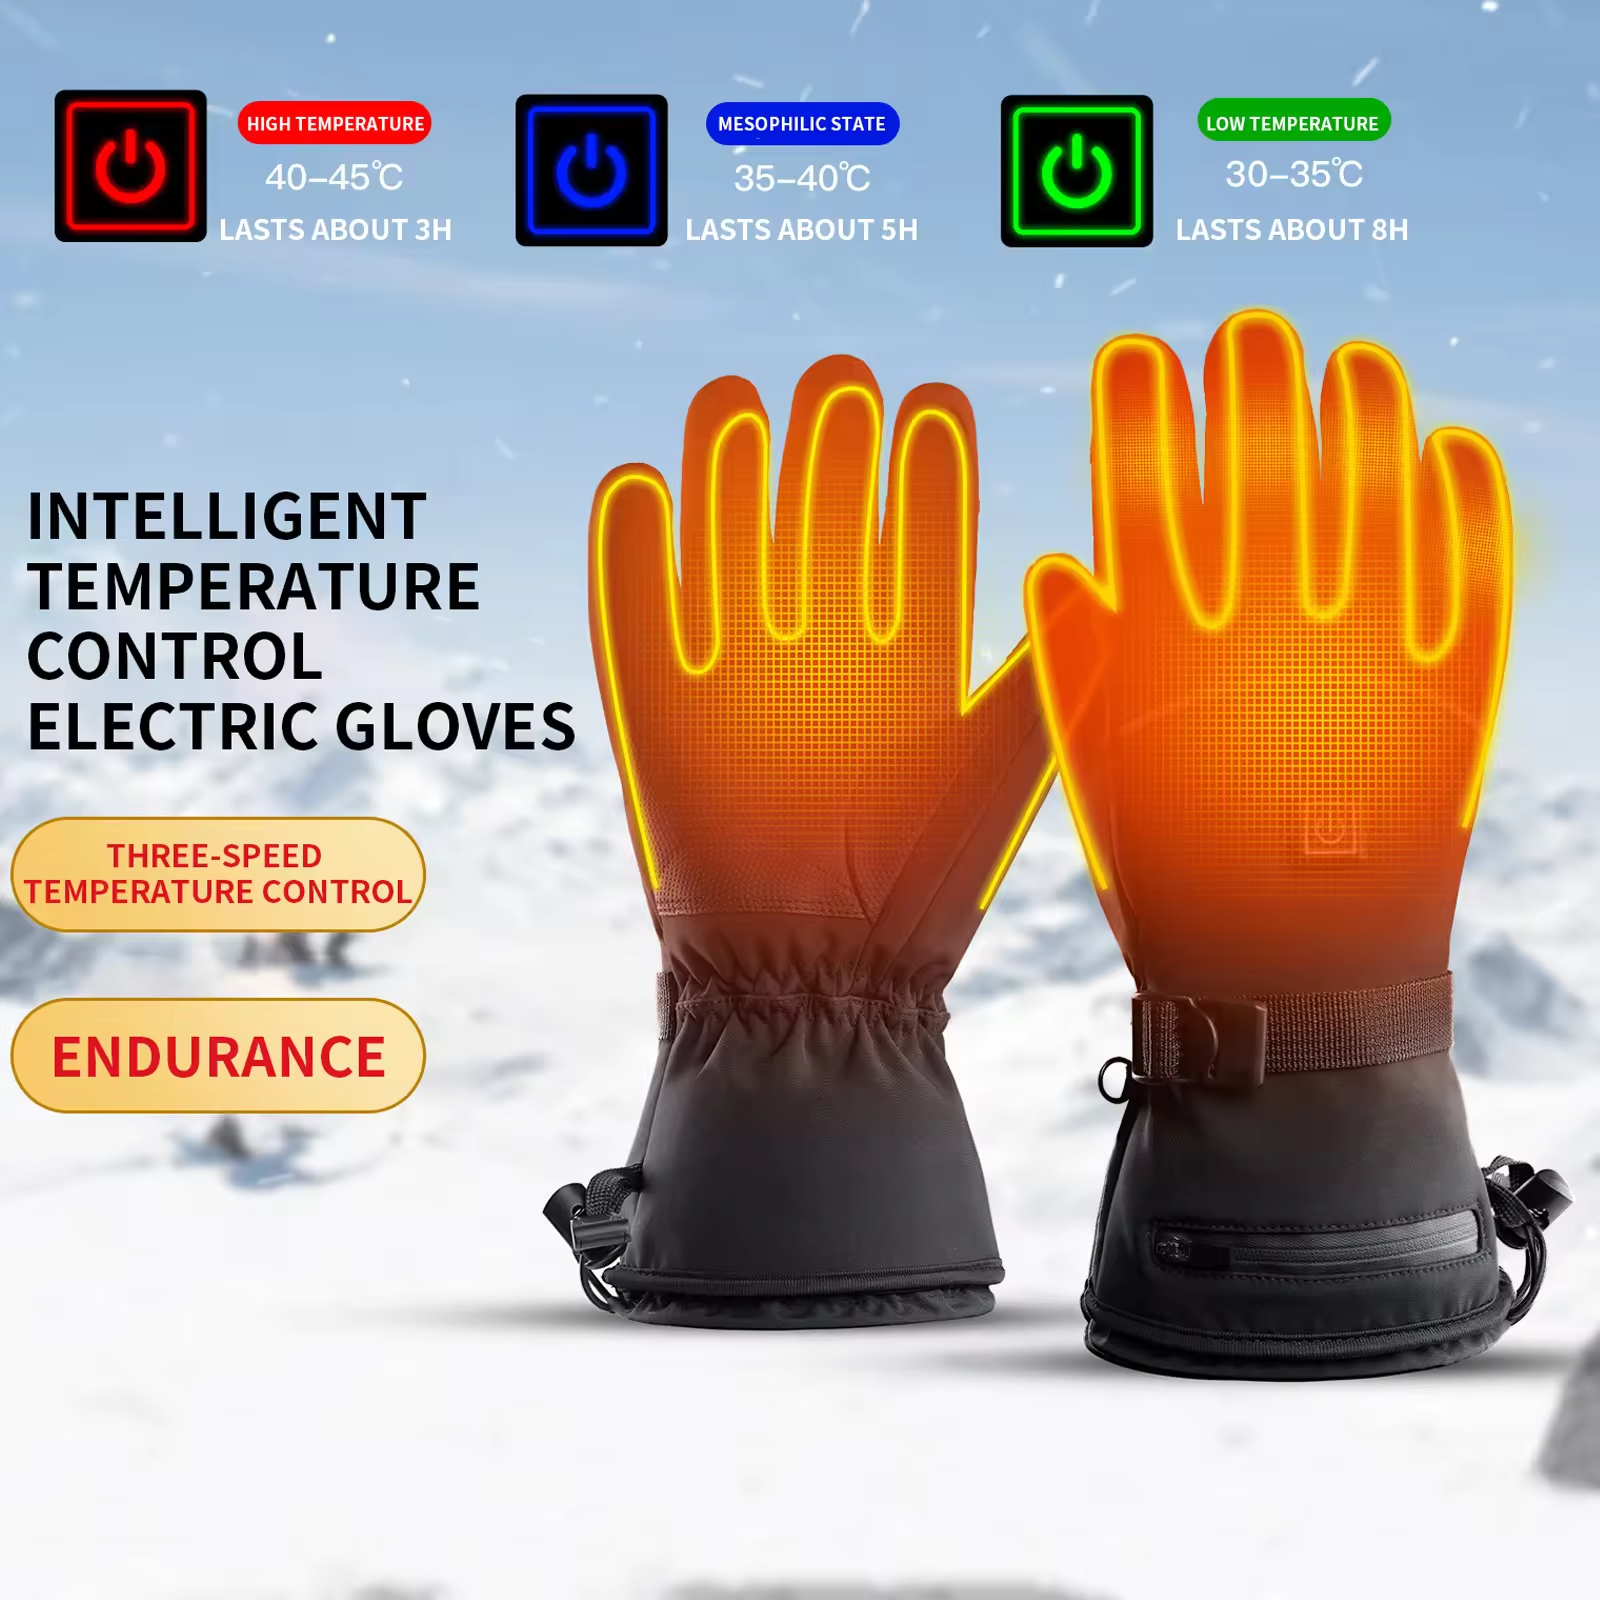
Hand washing gives you full control over the cleaning process. This method protects the heating wires and keeps waterproof coatings intact. It works better than any machine cycle. Most manufacturers say hand washing is the safest choice for heated gloves.
Prepare Your Washing Station
Fill a clean sink or basin with lukewarm water. The temperature should feel comfortable on your bare hands. Cold water won’t dissolve dirt well. Hot water can damage the fabric and weaken the glue around heating elements.
Add a small amount of mild detergent. Pick products made for delicate fabrics or outdoor gear. Sport-Wash and Nikwax Tech Wash work well for heated gloves. One tablespoon per gallon of water is enough. Too much soap creates residue that’s hard to rinse out.
Swirl the water with your hand to create light suds. The soap should spread through the water. This gives you consistent cleaning across all glove surfaces.
The Gentle Washing Technique
Submerge your gloves in the soapy water. Let them soak for 2-3 minutes. This loosens surface dirt. The detergent can now reach the fabric fibers.
Work the soap through the material with light massage motions. Focus on areas that touch your skin most. The palm, fingertips, and inner cuff collect the most sweat and oils. Use your thumbs to rub these spots in small circles.
Never scrub hard. Rough handling can shift heating wires inside the fabric layers. This creates cold spots. It can also break electrical connections. Your gloves need patient, careful attention.
For stubborn stains, use a soft-bristled brush or clean sponge. Press lightly in straight strokes along the fabric grain. Scrubbing across the grain damages fibers. It weakens the material.
The Critical Rinsing Phase
Drain the soapy water out. Refill your basin with cool, clean water. Submerge the gloves again and squeeze them underwater. This pushes soap residue out of the fabric.
Watch the water as you squeeze. See bubbles or cloudiness? Your gloves still have detergent in them. Drain and refill the basin. Repeat this process until the rinse water stays clear.
Soap residue causes real problems. It attracts dirt faster. Your gloves look dingy after just one use. It can irritate skin during long wear periods. Leftover detergent also reduces fabric breathability. It hurts water resistance too.
Some users rinse under running tap water instead. This works, but uses more water. Hold each glove under a gentle stream. Massage it for 3-4 minutes per glove. Feel the fabric between your fingers. Slippery texture means soap remains. Keep rinsing until the fabric feels clean and a bit textured.
Remove Water Without Damage
Lift each glove out of the rinse water. Cup it in both hands and squeeze from cuff to fingertips. This pushes water toward the openings. Never twist or wring the gloves. Twisting motion can snap thin heating wires. It can damage waterproof membranes too.
Lay a clean, absorbent towel on a flat surface. Place your gloves on one half of the towel. Fold the other half over them. Press down with your palms. The towel absorbs excess water without stressing the fabric.
Roll the towel up with the gloves inside. Press the roll to squeeze out more moisture. Unroll and reshape each glove. Pull fingers straight. Smooth out wrinkles in the palm and back. This stops permanent creases from forming during drying.
Hand washing takes 15-20 minutes total. Your gloves come out clean without risking expensive heating systems. The gentle process extends their life by years compared to machine washing.
Machine Washing for Approved Models

Some heated glove brands build their products to handle machine washing. GOKOZY and Kemimoto models work this way. The machine saves time. But strict rules protect the heating system.
Check if Your Model Allows Machine Washing
Your glove’s care tag shows if machines are safe. Look for symbols showing a tub with water. A hand symbol means hand wash required. No symbol at all? Hand washing is safer.
Can’t read the tag clearly? Download your manufacturer’s digital manual. Visit the brand website and search for your model number. The PDF file lists approved washing methods. Milwaukee Tool and similar brands offer app-based guides with AR-powered instructions. These show you exact steps on your phone screen.
Still have questions? Contact customer support. Send them your model number and ask: “Can I machine wash these gloves?” Save their written response. This protects your warranty if problems arise.
Machine Washing Steps
Use a mesh laundry bag each time. Place your gloves inside and zip it closed. The bag prevents damage to heating wires from agitation. It stops the gloves from catching on the machine drum’s ridges.
Select the gentle or delicate cycle on your washer. This uses slower spin speeds and less tumbling. Set the water temperature to cold. Hot water weakens the adhesive holding heating elements in place. Warm water can damage waterproof membrane layers.
Add a small amount of mild detergent for delicate fabrics or technical gear. Got an HE (High-Efficiency) washer? Use HE detergent. Regular detergent creates excess suds that don’t rinse out well. Leftover soap residue attracts dirt faster. Plus, it reduces fabric breathability.
Skip the bleach and fabric softener. Bleach corrodes electrical connections inside your gloves. Even small amounts cause wire damage over time. Fabric softener coats the material with waxy residue. This blocks the waterproof coating from working. Your gloves lose weather resistance.
Start the wash cycle and let it finish. Remove your gloves right after the cycle ends. A damp machine space encourages bacterial growth. The enclosed area traps moisture against the fabric.
After-Wash Inspection
Pull your gloves out of the mesh bag. Check the battery compartments first. Open each pocket and look inside. Water present? The seals didn’t hold. Dry these areas with a clean cloth before moving on.
Feel along the heating wire paths. These run through the fingers and across the back of the hand. Bumps or uneven spots mean wire displacement. The wires shifted during washing. This creates cold zones during use.
Check all seams and stitching. Machine agitation can loosen thread tension. Look for gaps or pulled areas. Small problems grow into tears with use. Fix loose stitching before it spreads.
Machine washing works for approved models. But hand washing stays safer. The manual method gives you full control over pressure and movement. Your heating elements face no agitation risk.
Proper Drying Methods (Air Dry Only)
Heat ruins heated gloves faster than anything else. Tossing them in a dryer melts adhesives. High heat warps the heating wires. Direct sunlight breaks down waterproof layers. Your gloves need patient air drying at room temperature.
Lay Gloves Flat on Absorbent Towels
Spread a clean, dry towel on a flat surface away from heat sources. Place each glove palm-down on the towel. Pull the fingers straight and smooth out wrinkles in the fabric. Gravity drains water toward the cuff opening this way.
Position matters for drying speed. Gloves hung by clothespins trap water in the fingertips. This creates damp spots that take days to dry. Moisture stuck in finger sections grows bacteria. It causes that musty smell users complain about.
Fold a second towel and stuff it inside each glove. The towel absorbs moisture from the inner lining. Replace these inner towels after 2-3 hours. Fresh towels pull out more water. This cuts total drying time by several hours.
Choose the Right Drying Location
Pick a room with good air flow. Open windows create cross-ventilation. Air movement speeds up drying without adding heat. A gentle breeze works better than still air.
Position your gloves near a fan if available. Keep the fan on low or medium speed. Place gloves 2-3 feet from the fan. Direct air flow helps, but strong gusts can blow them off the towel. Room temperature air at moderate speed dries gloves in 24-36 hours.
Avoid these common drying mistakes:
-
Radiators and heating vents – Temperature exceeds safe limits. Heat damages the heating wires. Fabric shrinks and loses shape.
-
Direct sunlight through windows – UV rays break down waterproof coatings. Colors fade. Material becomes brittle over time.
-
Clothes dryers – Even on low heat, tumbling damages wires. The drum’s movement shifts heating parts out of position.
-
Hair dryers – Hot air creates hot spots. This melts the glue holding components in place.
Check for Complete Dryness
Gloves feel dry on the outside long before the inside dries. Press your fingers deep into the padding around heating parts. Damp or cool spots mean more drying time is needed.
Test the battery compartments. Open each pocket and feel inside. Moisture here eats away at electrical connections. Leave gloves out for an extra 12 hours if you detect dampness.
Drying takes 24-48 hours depending on humidity levels. Winter air holds less moisture, so drying happens faster. Summer humidity slows drying. Your gloves are ready once they feel dry throughout and weigh the same as before washing.
Remove Odors and Stains Without Damaging Electronics
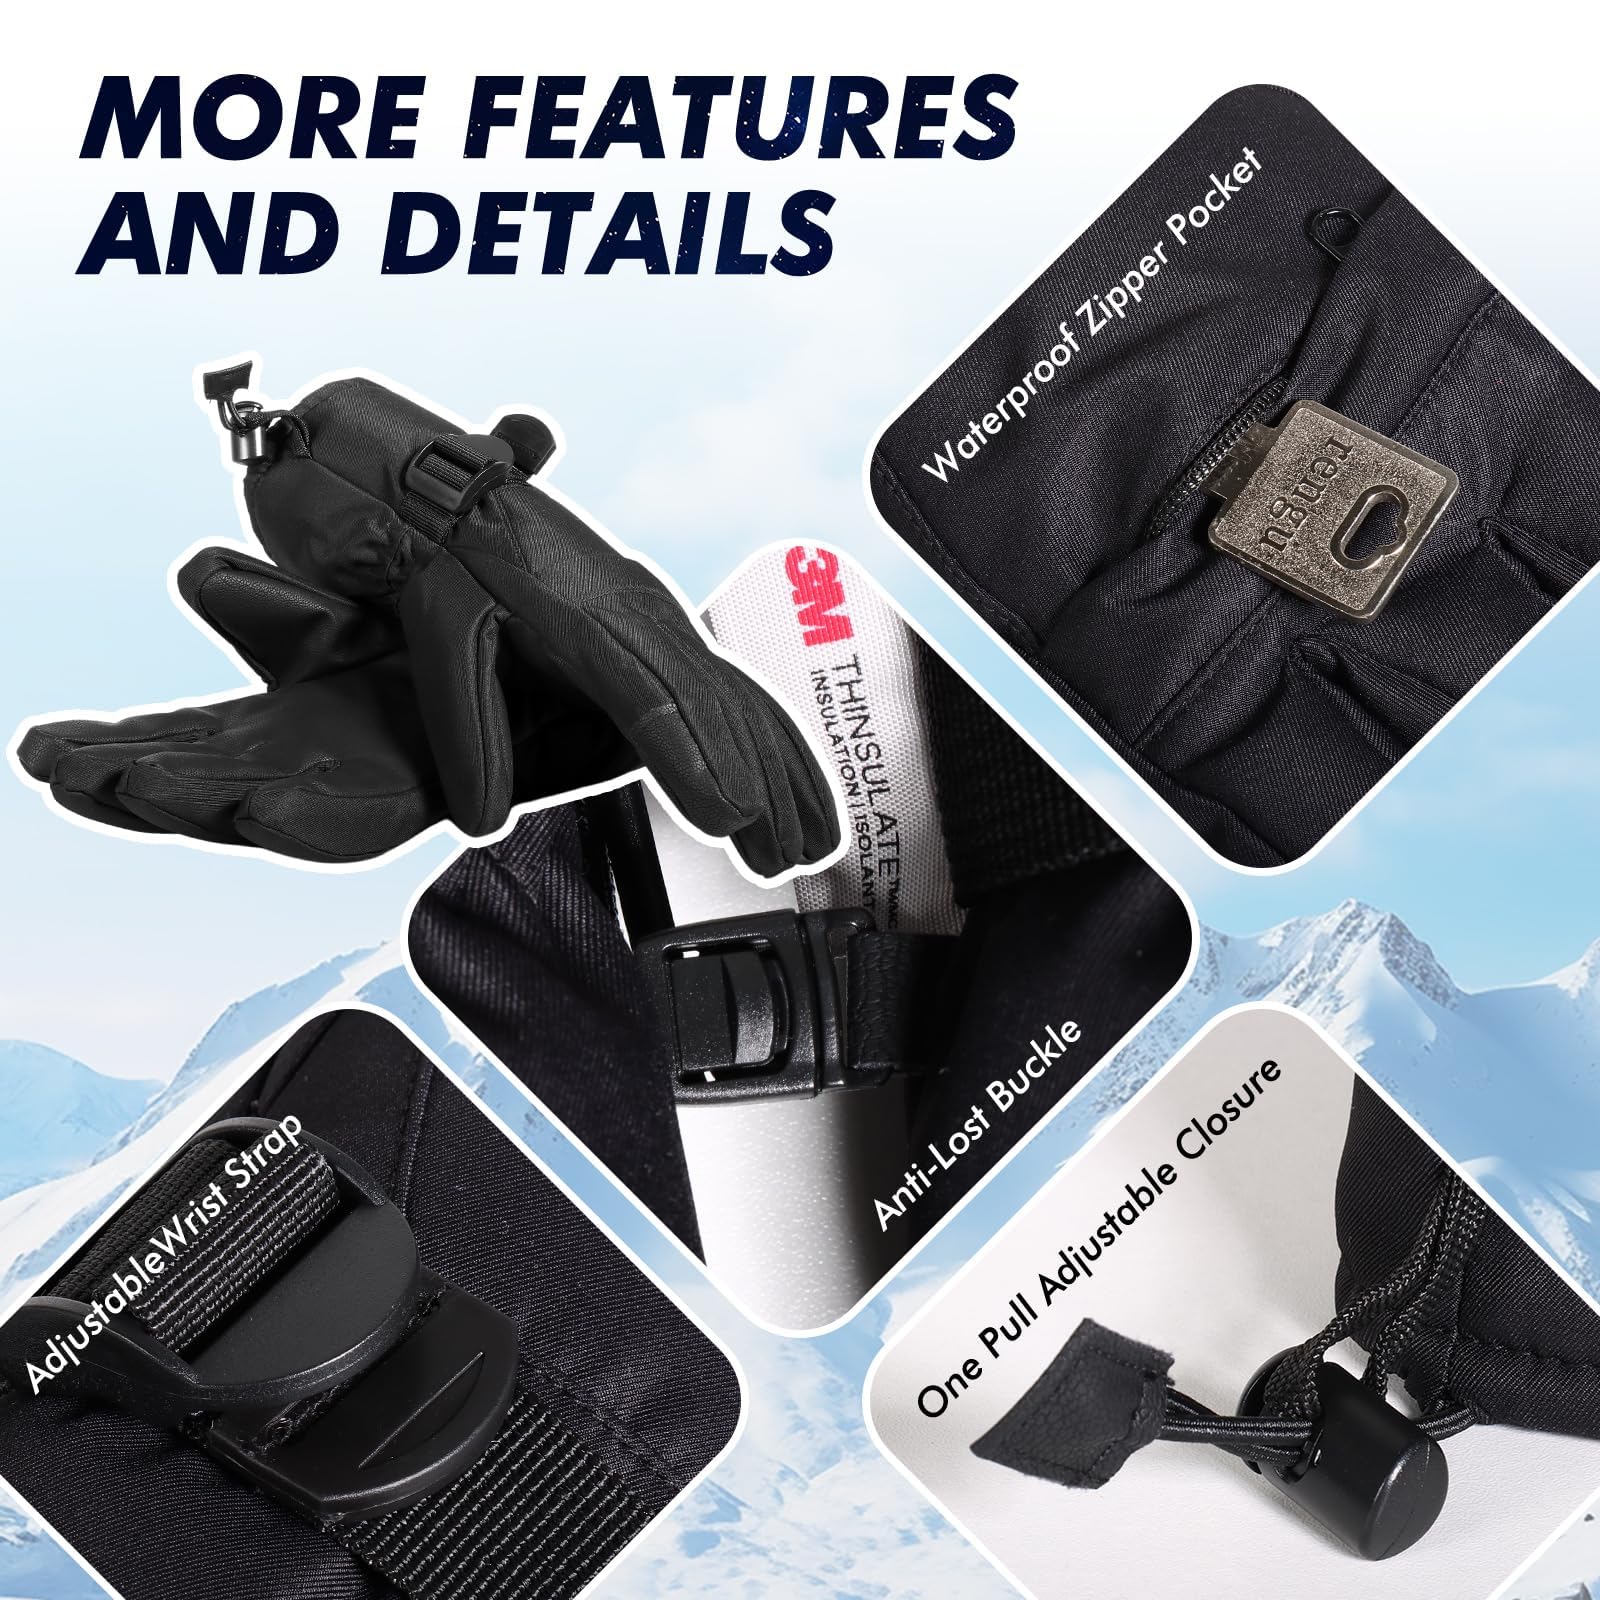
Sweat, dirt, and outdoor use leave marks on heated gloves. The smell builds up after weeks of winter activities. Regular cleaning products can damage the wires inside. Use safe methods that clean stains and avoid electrical parts.
Safe Spot Cleaning for Surface Stains
Mix a few drops of mild soap with lukewarm water in a small bowl. Dip a clean cloth into the solution and wring it out well. The cloth should feel damp, not dripping wet. Too much water gets into battery areas and ruins connections.
Pat the stained areas with gentle pressure. Work from the outside edges of the stain toward the center. This stops dirt from spreading to clean fabric. Focus on the palm areas, fingertips, and cuff edges. Grime collects most in these spots.
Skip bleach and harsh chemicals. These destroy waterproof coatings and damage wire covers. Small amounts can hurt heating parts over time.
Alcohol-Based Cleaning for Stubborn Marks
Isopropyl alcohol at 70-90% strength works well on oils and tough stains. This cleaner dries fast. It leaves nothing behind. Most glove materials and electronic parts handle it fine.
Pour a small amount onto a lint-free cloth or cotton swab. Test on a hidden area first—like the inner wrist seam. Wait 30 seconds. See no color change? You can use it on visible spots.
Dab the stained section with the cloth. Use light, circular motions. The alcohol breaks down oils and dried sweat. It won’t soak through fabric layers. Let the treated areas air dry for 60 seconds before touching them.
This method clears marks from synthetic materials and leather sections. It also kills bacteria that cause odors on contact.
Eliminate Odors Without Soaking
Baking soda pulls smells from fabric fibers. Sprinkle a thin layer inside each glove after removing batteries. Let them sit overnight in a space with good airflow. Shake out the powder the next morning.
White vinegar solution cuts through stubborn odors. Mix equal parts water and white vinegar in a spray bottle. Mist the interior lining lightly—don’t soak it. The vinegar smell goes away as it dries. Trapped odors go with it.
Put treated gloves near an open window or fan. Fresh air stops moisture buildup as the vinegar dries. This takes 4-6 hours in normal humidity.
Got deep-set smells? Repeat the process. Some synthetic materials hold odors deep in their structure. Several light treatments beat one heavy dose.
Post-Washing Battery Reinstallation & Testing
Your gloves are dry. Time to restore power and check everything works. Good battery installation protects your heating system. It also stops connection failures.
Clean Battery Terminals First
Check the battery terminals before reconnecting. White or greenish buildup? That’s corrosion. Use a battery terminal brush or clean, dry cloth to wipe it away. Dirt on connections creates resistance. Electrical flow gets blocked. Heating performance drops.
Check the glove’s internal connectors too. Open each battery pocket. Look at the metal contacts inside. Dust or lint from washing settles here. Blow out particles with compressed air. Or wipe with a dry microfiber cloth.
Connect Batteries in Correct Sequence
Attach the positive terminal first. This stops electrical arcing at the second terminal. Find the red wire or plus (+) symbol on the positive side. Push the connector straight in until it clicks or seats tight.
Connect the negative (ground) terminal next. Look for a black wire or minus (−) marking. A good connection feels snug with no wiggle room. Loose connections interrupt heating.
Check each connection with a gentle tug. The battery should stay locked in place. Movement means weak contact. Disconnect and reconnect until it holds tight.
Run Pre-Use Heating Tests
Charge batteries to at least 75% before testing. Low charge gives false readings. For lithium-ion batteries, aim for around 12.60V on a voltmeter.
Power on your gloves. Select the highest heat setting. Feel each finger section and the back of the hand. Warmth should spread within 60-90 seconds. All zones heating at the same rate? Wire function is good.
One finger staying cold? That wire connection may have shifted during washing. Turn off the gloves right away. Let them cool for 5 minutes. Try the test again. Cold spots that persist mean damaged heating elements. Contact your manufacturer for repair.
Watch for unusual signs during the test:
– Overheating in one spot
– Burning smell from the fabric
– Flickering heat levels
– Battery draining faster than normal
Any of these problems? Stop use right away. Keep operating and you risk damage to the glove. Safety risks too.
Run the gloves for a full 15-minute cycle on medium heat. This matches real-world conditions. Batteries should keep steady power output. Voltage drops of more than 20% from baseline? Battery degradation. Replace batteries showing this decline.
Your gloves pass testing once heat spreads evenly. Batteries should hold their charge through the cycle. Store them with batteries removed until your next outdoor adventure. Battery life lasts longer this way. No accidental power drain either.
Conclusion
You can keep your heated gloves clean without hurting their performance or life span. The golden rule? Always remove the battery before washing. Hand washing beats machine washing every time.
Follow the care instructions from the maker. Use mild soap with cool water. This protects the heating parts and waterproof layers that make your gloves worth buying.
Proper care goes beyond washing. Let your gloves air dry fully. Test the heating before you store them. Clean stains right away to stop buildup. These easy steps add years to your gloves’ life. Plus, they keep the warmth and comfort at peak levels.
Ready to upgrade your winter gear? Check out Coolheatech’s heated gloves. We design them with easy-care fabrics you can machine wash. The waterproofing tech is top-notch. Our gloves give you strong heating power with simple upkeep. You can enjoy the outdoors without cleanup worries.
Visit our care guide library for washing tips specific to each product. Or contact our support team. We’ll give you personal advice on making your gloves perform better, season after season.