
You just bought a quality heated vest to stay warm this winter. Now it needs its first wash. You’re staring at it, worried the washing machine might fry the electronics.
Here’s the truth: most heated vests ARE machine washable. But you need to follow the right steps.
One wrong move can ruin everything. Leave the battery pack attached? Use hot water? Toss it in the dryer? Any of these can damage the carbon fiber heating elements for good. Your $150 investment becomes just an expensive regular vest.
This guide covers the exact cleaning process manufacturers recommend. USB heated vest or rechargeable model—doesn’t matter. You’ll get the steps that work for both.
First, you’ll learn the key pre-wash steps. Then you’ll see which heated vests can go in the machine and which need hand-washing. Finally, you’ll get the drying methods that keep your vest heating strong for years.
Let’s keep your heated vest clean, working, and safe to wear.
Step-by-Step: Machine Washing Your Heated Vest
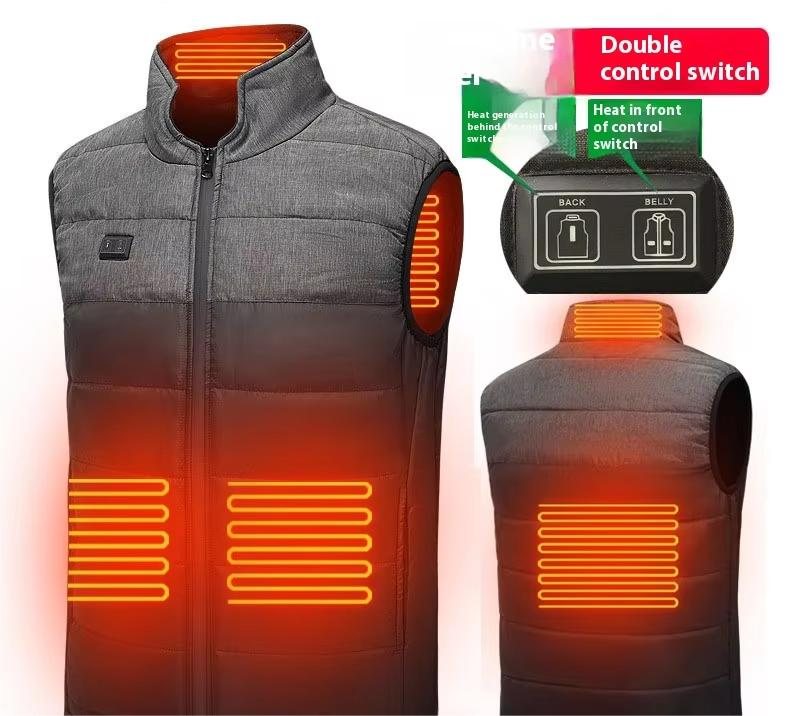
Modern heated vests with carbon fiber heating parts can handle a washing machine cycle. You must follow the manufacturer’s instructions.
Pre-Wash Safety Checklist
Before the vest touches water, complete these critical steps:
Power and battery removal:
– Turn the vest OFF at the control button
– Disconnect the battery pack from the vest connector
– Remove the battery pack (never wash with battery attached—no exceptions)
– Store the battery in a dry spot away from the laundry area
Secure all connections:
– Tuck the connector cable into the battery pocket
– Zip the pocket closed to keep water out during the wash
– Close all front zippers
– Fasten every snap and Velcro strap to avoid snagging on wires
Check the care label:
– Confirm “machine washable” appears on the tag
– Note any temperature limits (usually 30°C / 86°F maximum)
– Does the label forbid machine washing? Stop here and hand wash instead
Preparing the Vest for Machine Washing
Spot-clean visible stains first:
– Use a soft cloth or sponge with a small amount of mild detergent
– Dab stained areas—don’t scrub hard over heating zones
– Avoid soaking connector areas or heating panels
Protect the internal wiring:
– Fold the vest loose (don’t compress it tight)
– Place it inside a mesh laundry bag or clean pillowcase
– Zip or tie the bag closed
– This barrier stops wires from being pulled
– It also keeps zippers from catching on the drum
Machine Settings That Won’t Damage Heating Parts
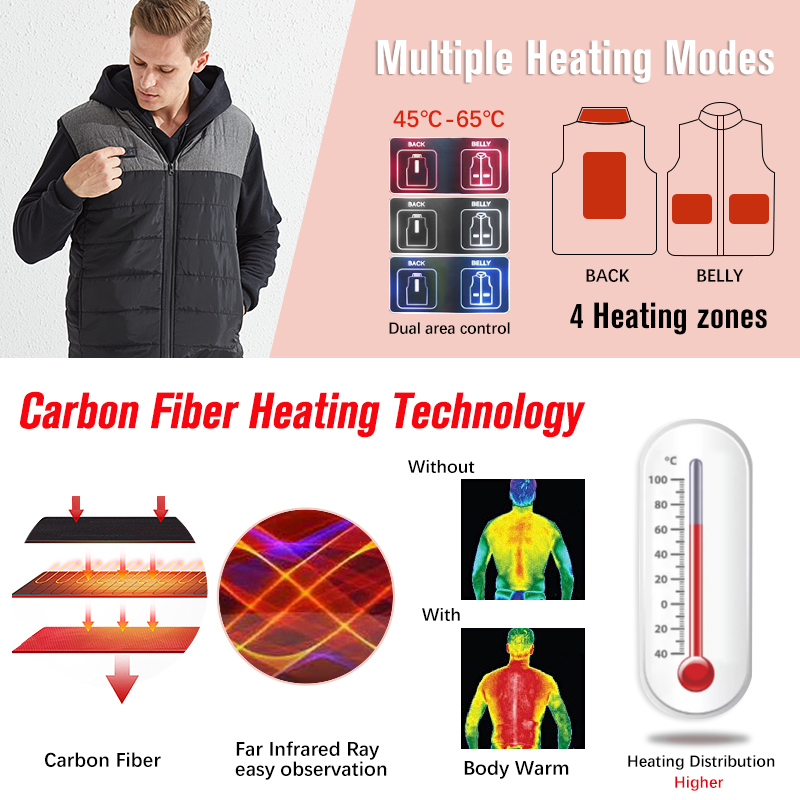
Your washing machine settings matter as much as the detergent you pick.
Required cycle settings:
– Cycle type: Gentle or Delicate
– Water temperature: Cold water (30°C / 86°F maximum)
– Spin speed: Low setting if your machine allows manual selection
– Machine type: Front-load or top-load drum without a center agitator works best
– Agitators create too much stress on internal wiring
Detergent rules:
– Add a small amount of mild or delicate-fabric detergent to the dispenser
– Never use: Bleach, fabric softener, harsh stain removers, or scrubbing products
The Complete Washing Process
Follow these 10 steps in order:
-
Power off the vest and unplug the battery pack; remove battery
-
Close the battery pocket zipper after tucking in the connector cable
-
Fasten all zippers, snaps, and Velcro closures
-
Inspect for stains; spot-clean with mild detergent if needed
-
Fold the vest loose and place it inside the mesh laundry bag; zip bag closed
-
Load the bagged vest into the washing machine by itself or with lightweight clothes. Don’t wash with heavy jeans, towels, or thick blankets. These can stress the heating wires.
-
Add detergent—a smaller dose than you’d use for regular clothes
-
Set the machine to Gentle/Delicate cycle, cold water, low spin
-
Start the cycle; skip extra hot rinse, steam, or sanitize options
-
Remove right away after the cycle finishes. Take the vest out of the mesh bag. Don’t let it sit wet in the machine.
Critical post-wash warning: Do not wring, twist, or squeeze the vest to remove extra water. This can break the delicate carbon fiber heating wires inside the fabric layers.
The vest is now clean—but not ready to wear. Bad drying habits cause more damage than washing mistakes.
Step-by-Step: Hand Washing Method for Delicate Heated Vests

Some heated vests have a care label that says no machine washing. Others use delicate insulation like down fill mixed with carbon fiber heating. These models need hand washing to protect the heating wires and insulation.
Hand washing gives you complete control. You skip the mechanical stress of a washing drum. The process takes about 20 minutes of active work plus drying time.
Pre-Wash Preparation and Safety Steps
Start with the same power-down routine you’d follow for machine washing:
-
Turn off the vest at the power button
-
Disconnect and remove the battery pack—water and batteries never mix
-
Tuck the connector cable back into the battery pocket
-
Zip the pocket closed to keep water out during washing
Inspect the heating zones before you begin. Look at areas where you feel warmth when the vest runs. See exposed wires or torn fabric over heating panels? Stop. Don’t wash a damaged vest. Contact the manufacturer first for repair help.
Check the care label symbol—a hand inside a tub icon means hand wash is safe. A crossed-out tub means the vest may need professional cleaning.
Setting Up Your Hand-Wash Station
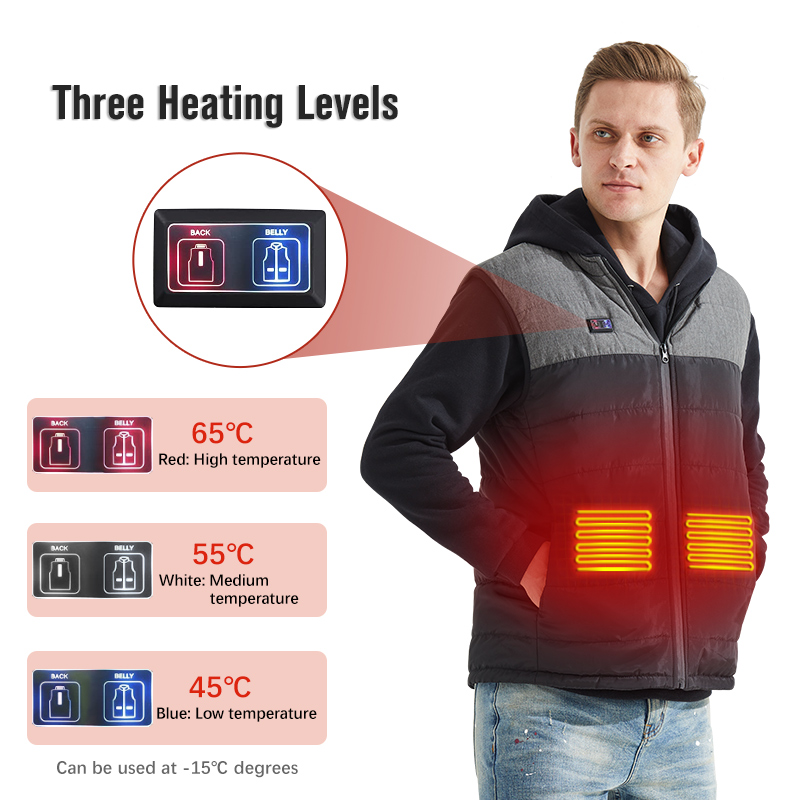
Water temperature affects your heated vest’s lifespan:
-
Fill a clean sink or large basin with cold water at 30°C (86°F) maximum
-
Some manufacturers allow lukewarm water at 30°C, but cold is safer
-
You’ll need about 5 to 10 liters of water—enough to submerge the vest when laid flat
Detergent selection and dosage:
-
Add a small amount of mild detergent made for delicate or technical fabrics
-
Typical dose: 5 to 10 mL (about one teaspoon) for the full basin—half what you’d use for regular hand-wash clothes
-
Got down insulation in your vest? Switch to a down-specific detergent to preserve the fill’s loft
-
Stir the water until the detergent dissolves before adding the vest
What to avoid in the wash water:
-
Never add bleach—it breaks down fabric and can corrode wire insulation
-
No fabric softener—it leaves residue that messes with heating element performance
The Detailed Hand-Washing Process
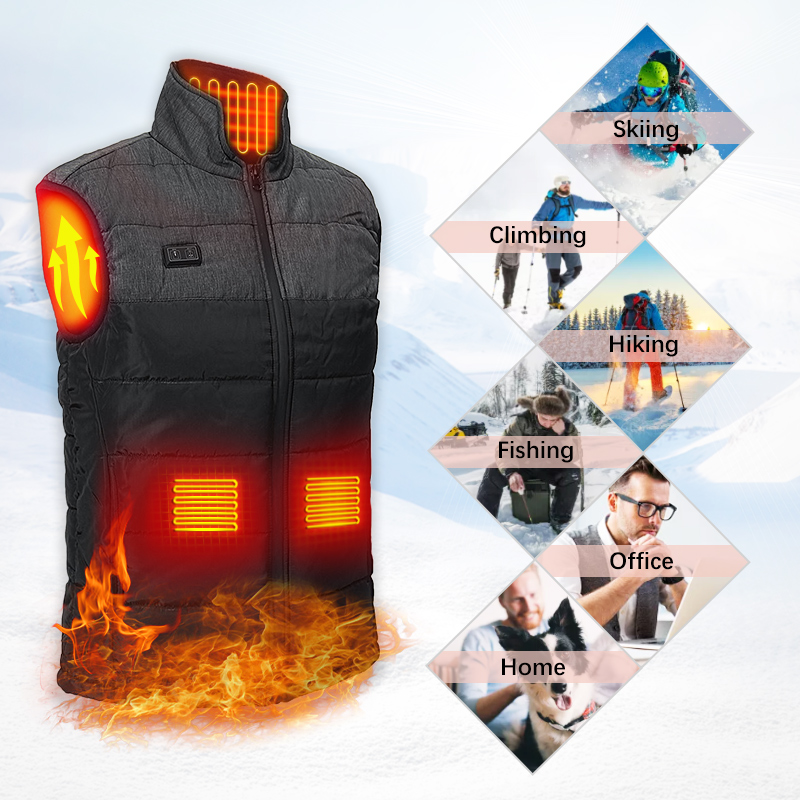
Follow these steps to clean without damaging internal components:
1. Submerge the vest
Place the vest flat into the prepared water. Push it down until submerged. The vest should float without bunching.
2. Gentle agitation technique
Use light squeezing and pressing motions with your hands. Work through the fabric like you’re kneading soft dough. Move across the entire vest surface. This pushes soapy water through the fibers. It lifts dirt without stressing the heating wires inside.
3. Target stained areas
For visible dirt or stains on the outer shell:
– Rub the fabric against itself in a back-and-forth motion
– Use a soft-bristle brush, sponge, or clean cloth on stubborn spots
– Use minimal pressure—never scrub hard over heating zones
– Don’t bend or fold heating panels during spot cleaning
4. Optional soaking for heavy soil
Got a vest covered in dirt from outdoor activities? Let it soak for 5 to 10 minutes in the detergent solution. Don’t exceed 15 to 20 minutes. Too much water exposure can damage moisture-sensitive parts near connectors.
5. Rinse well
Drain all soapy water from the basin. Refill with clean cold water. Move the vest through the rinse water using the same soft pressing motions. Repeat this rinse step 2 to 3 times until the water runs clear with no suds. Trapped detergent stiffens fabric and hurts heating performance.
6. Remove excess water
Never wring or twist the vest—this can snap delicate carbon fiber wires. Press the vest flat against the side or bottom of the basin with your palms. Push to squeeze water out. Then lay a large clean towel on a flat surface. Place the vest flat on the towel. Roll both together into a loose cylinder. Press along the rolled towel to absorb water. Unroll and check. Still dripping? Repeat with a second dry towel.
Your heated vest is now clean and ready for the drying phase covered in the next section. Proper drying protects the heating elements just as much as careful washing does.
Air Drying: The Safe Way to Dry Your Heated Vest
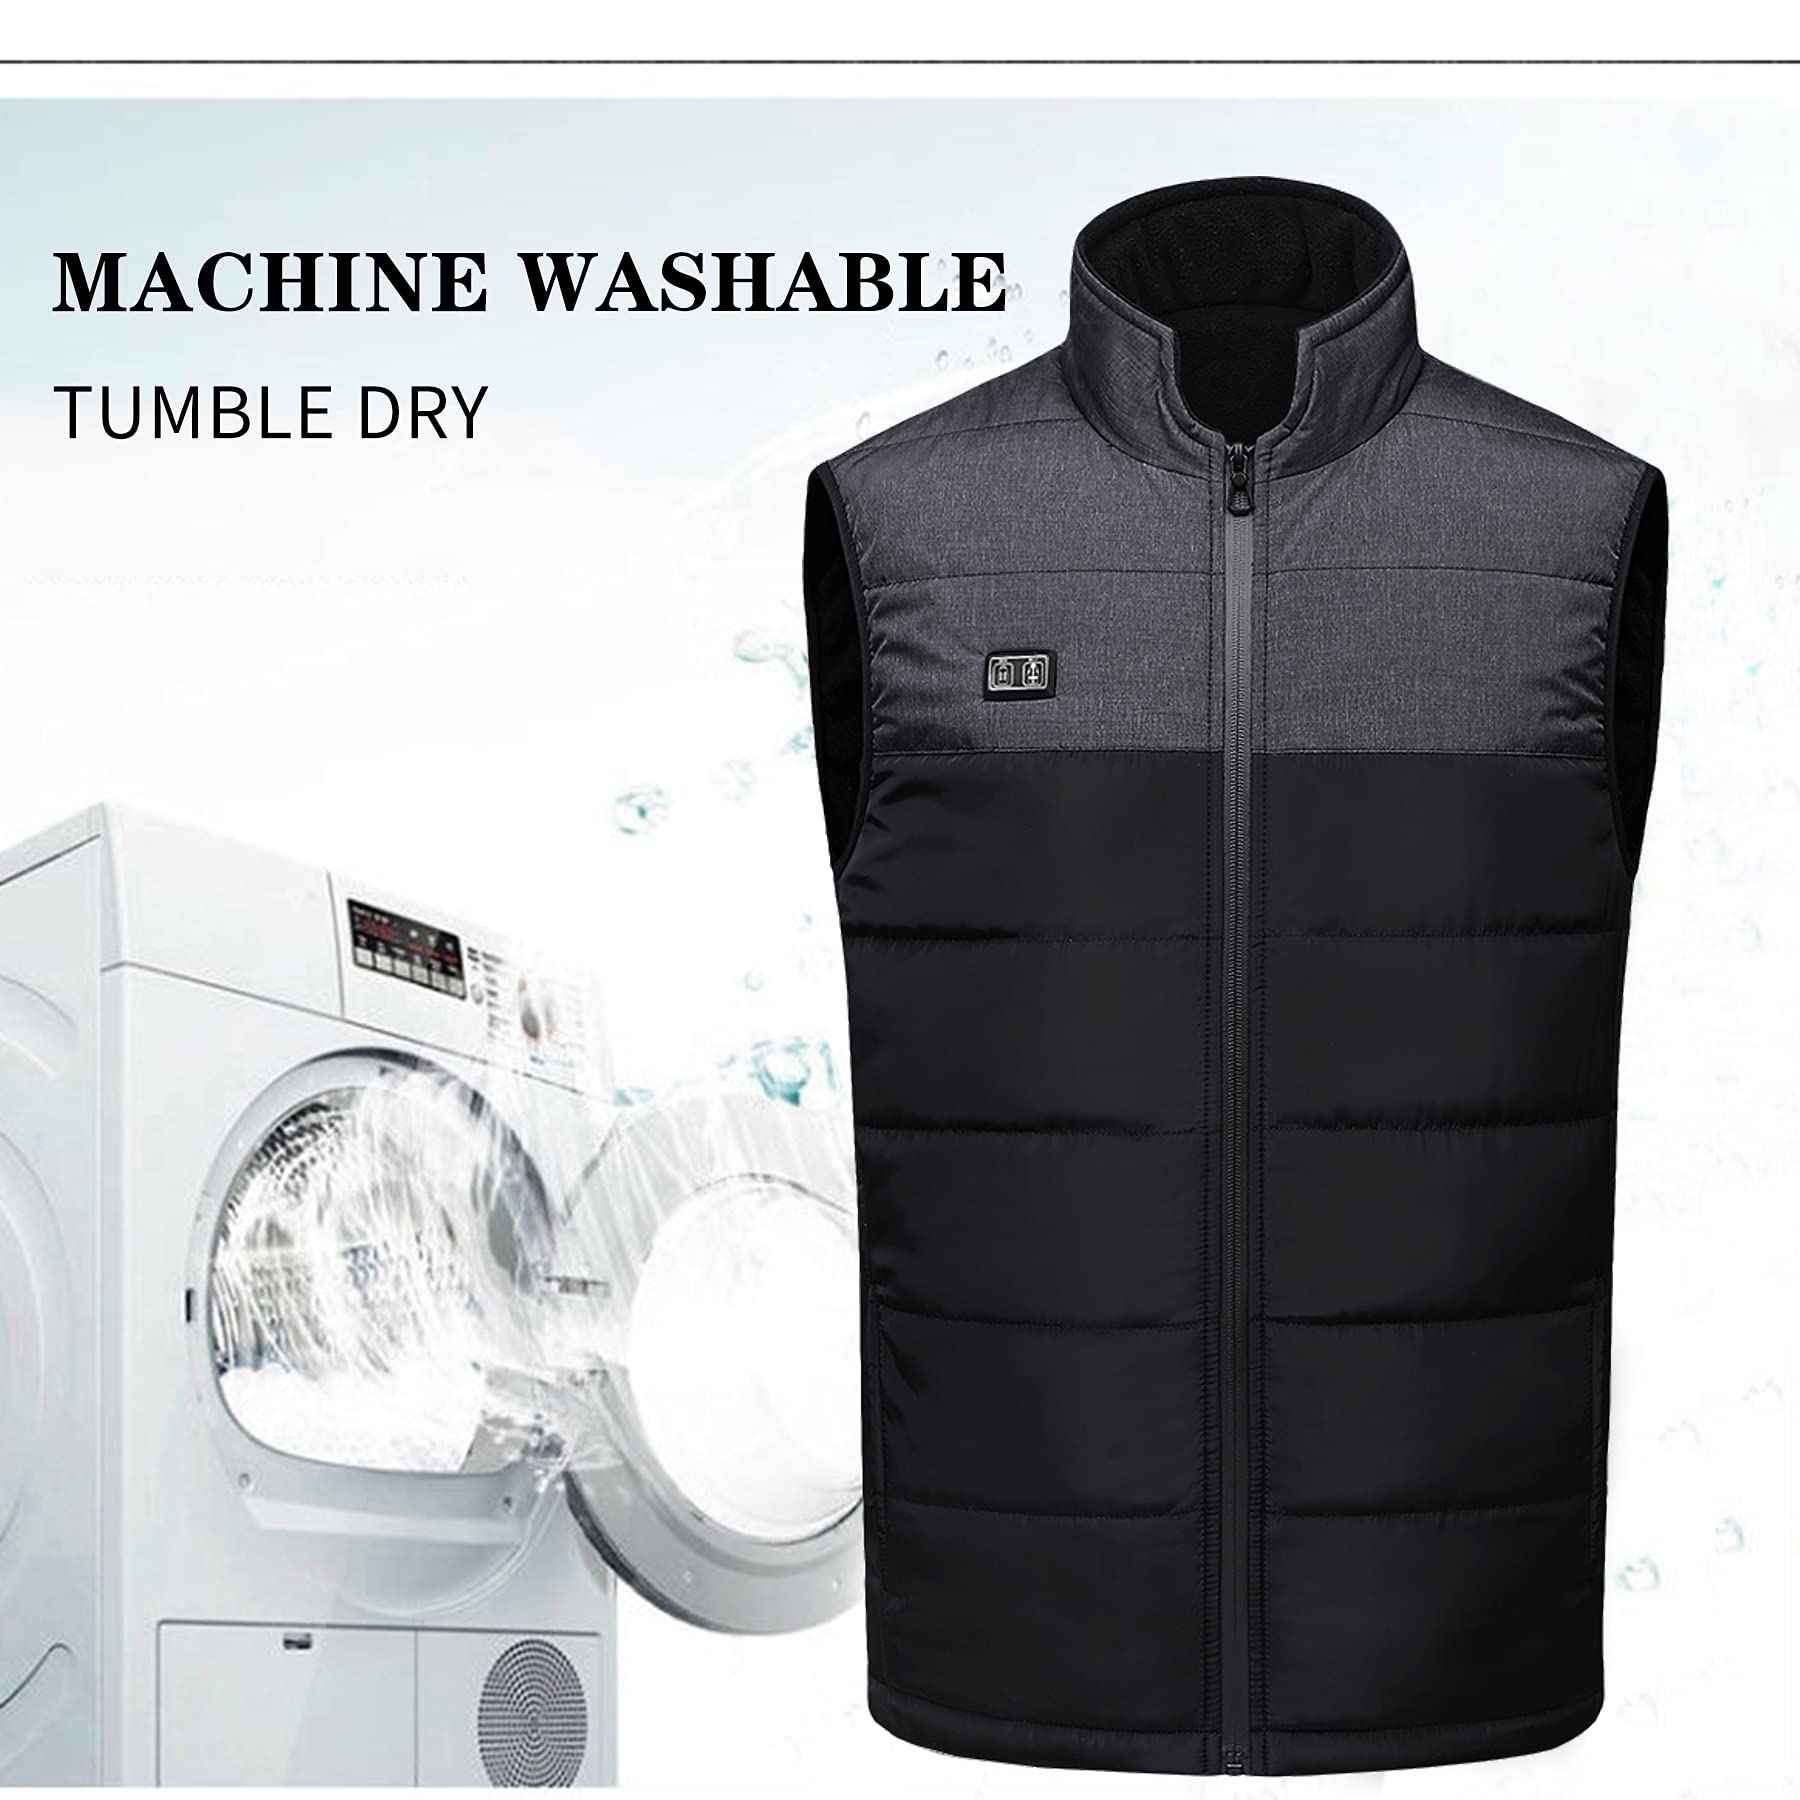
Machine dryers destroy heated vests. Heat breaks down carbon fiber heating wires. It melts protective coatings. It warps electronic connections. Every major heated vest maker puts the same warning on their care labels: air dry.
This isn’t a suggestion. It’s the difference between a vest that works for years and one that stops heating after the first wash.
Why Air Drying Matters
High heat attacks your vest’s key parts:
Heating element damage:
– Carbon fiber wires inside the fabric can’t handle dryer temperatures (55°C to 65°C / 130°F to 150°F)
– Heat makes wires brittle
– They crack
– A single tumble-dry cycle can break heating circuits
– Result: cold spots or total heating failure
Material breakdown:
– Waterproof coatings on the outer shell peel and crack under heat
– Insulation loses its fluff and warmth
– Fabric fibers weaken
– The vest’s lifespan shrinks
Connector and wiring risks:
– Plastic connectors near the battery pocket can warp or melt
– Wire insulation becomes fragile and prone to shorts
– Safety hazard: damaged wiring raises fire or electrical shock risk
Air drying protects all these parts. It takes longer, but it keeps your heated vest working and safe.
The Right Air-Drying Process
Step 1: Prepare the vest right after washing
Don’t let the wet vest sit bunched in the sink or machine. Start drying now:
-
Reshape the vest to its normal form—smooth out wrinkles and align seams
-
Never wring, twist, or squeeze to remove water. This bends and breaks internal heating wires
-
Water dripping hard? Press the vest flat between two clean, dry towels. Push down with your palms to soak up extra moisture. Repeat with fresh towels if needed
Step 2: Pick your drying position
You have two safe options:
Flat drying (best choice):
– Lay a large, clean towel on a flat surface like a table, countertop, or drying rack
– Place the vest flat on the towel in its natural shape
– Arrange sleeves and body panels so they aren’t folded or overlapping
– This position stops gravity from stretching wet fabric or pulling on wire connections
Hanging (works too):
– Use a wide, padded hanger that supports the shoulders
– Hang the vest by the shoulder seams—not by a loop or single point that creates stress
– Make sure the vest hangs straight without twisting
– Warning: Don’t hang a soaked vest. The water weight can stretch fabric and strain wiring. Press out extra water with towels first
Step 3: Pick the drying spot
Your drying spot matters as much as the position:
You need:
– Good airflow—open windows, use a fan on low speed nearby (not right on the vest), or pick a room with good air circulation
– Cool to room temperature—around 18°C to 24°C (65°F to 75°F) works best
– Shade—indirect light
Never use:
– No tumble dryer (this is the #1 mistake)
– No radiators or space heaters—direct heat damages parts
– No direct sunlight—UV rays harm waterproof coatings and fade colors
– No clothes iron or steamer—even on “low” settings
– No ozone cabinets—ozone harms electrical parts and fabric treatments
Step 4: Wait for complete dryness
Air drying takes time—6 to 24 hours depending on humidity, airflow, and vest thickness.
Be patient. Rushing this step causes safety problems.
How to check if the vest is dry:
– Touch test: Press your hand against all fabric layers, thick areas like the collar, shoulders, and battery pocket. Feel any dampness or coolness? Not ready yet
– Visual check: Look for darker patches in the fabric that show moisture
– Weight comparison: A dry vest feels lighter than a wet one
– Bend test: Flex the vest. Hear crackling or feel stiffness? Could be leftover moisture in insulation
Critical safety rule: Keep the battery pack disconnected until you confirm 100% dryness. Plugging power into a damp vest can cause:
– Short circuits that wreck the heating system for good
– Electrical shock risk while wearing it
– Fire hazard from sparking connections
Store the battery in a dry, cool place away from the drying vest.
Common Air-Drying Mistakes to Avoid
Wrong techniques create problems:
Mistake 1: Folding or squashing the wet vest
Folding traps moisture inside. It creases heating wires at sharp angles. Break risk goes up. Keep the vest open and flat or hanging free.
Mistake 2: Using “low heat” dryer settings
Some dryers offer a “delicate” or “air fluff” cycle with less heat. Still too risky. Even low dryer heat (around 40°C / 105°F) stresses heating elements. The tumbling action alone can damage wires. Stick to true air drying with zero machine heat.
Mistake 3: Speeding up drying with extra heat
Pointing a hair dryer, heat gun, or fan heater at your vest might seem harmless. Don’t do it. Focused heat creates the same damage as a tumble dryer. Use room-temperature airflow from a regular fan.
Mistake 4: Thinking “almost dry” is good enough
Moisture hides in seams, insulation layers, and around the battery connector. Reconnecting power before the vest is bone dry invites electrical problems. Not sure? Give it another 12 hours.
Your heated vest is now clean, dry, and safe to wear. Reconnect the battery pack, power on, and confirm the heating zones work before heading outside.
Different Fabric Types Need Different Care
Your heated vest’s outer shell fabric changes the washing rules. The heating elements inside stay the same—carbon fiber wires that need cold water and gentle handling. But the fabric wrapped around them has its own needs.
Machine-washable polyester shells handle rougher treatment than delicate cotton blends. Miss this detail? You’ll shrink the vest or damage the fabric finish. The heating system survives untouched.
Synthetic Shells: Polyester, Nylon, and Performance Fabrics
Most heated vests use 100% polyester or nylon blends for the outer shell. These synthetics resist water, dry fast, and tolerate machine washing. No shrinking.
Care advantages:
– Machine wash on gentle cycle works fine
– Cold water (30°C / 86°F maximum) protects both fabric and heating wires
– Low spin speeds prevent stress on seams
– Air drying takes 4 to 8 hours—faster than natural fibers
Detergent rules for synthetics:
– Use mild detergent in small amounts
– Never use fabric softener—it coats polyester fibers. This blocks the fabric’s moisture-wicking ability.
– Performance fabrics with DWR (durable water repellent) finish lose waterproofing from fabric softener
Warning for blends:
Got a vest with spandex or elastane mixed into the shell (like 93% polyester / 7% spandex)? Wash inside-out to protect the stretch fibers. Hot water above 30°C breaks down elastane over time. The vest loses its fitted shape.
Cotton and Cotton-Blend Shells
Some heated vest makers use cotton twill or cotton-poly blends for a softer feel and classic look.
Cotton-specific challenges:
– 100% cotton shrinks—even in cold water during the first wash
– Cotton blends (93% cotton / 7% spandex) need inside-out washing at ≤30°C to keep stretch and color intact
– Thicker cotton yarns take longer to air-dry: 12 to 24 hours
Adjusted care steps:
– Always wash cotton heated vests inside-out
– Stick to cold water to stop shrinkage and color fading
– No bleach—cotton handles chlorine bleach better than synthetics, but bleach still damages heating wire coating
– Air dry flat or hang with proper support. Cotton holds more water weight during drying.
Hand-dye or enzyme-finished cotton:
These specialty fabrics appear in premium heated vests. Cold wash protects the finish. Hot water strips color treatments.
Down-Insulated Heated Vests
Heated vests with down fill combine traditional insulation with electric heating zones.
Down needs extra care:
– Hand wash—machine agitation clumps down and breaks quills
– Use down-specific detergent (regular detergent strips natural oils from down clusters)
– Cold water (≤30°C) stops the outer shell from shrinking around the down fill
– No fabric softener—it makes down clump and lose loft
Drying down-insulated heated vests:
– Air dry flat on a large towel
– Fluff and redistribute down every 4 to 6 hours during drying
– Expect 24 to 48 hours total drying time
– Down must be 100% dry before reconnecting the battery. Trapped moisture creates mold inside insulation layers.
Check your vest’s care label before the first wash. The fabric type sets water temperature, detergent choice, and drying time—even though the internal heating system stays the same.
Common Washing Mistakes That Damage Heated Vests
Small washing errors wreck expensive heated vests fast. One careless step turns a $150 vest into a regular jacket that won’t heat. Some damage happens right away. Other mistakes wear down the heating over weeks.
Know these mistakes to protect your investment and stay warm. Here are the critical errors that destroy heated vests—and how to avoid them.
Washing With the Battery Pack Still Connected
This is the #1 mistake. Leaving the battery or power bank attached creates immediate dangers:
-
Water damage: Batteries and water never mix. Moisture causes rust inside and kills the battery.
-
Electrical hazards: Water in battery contacts can short-circuit the system.
-
Warranty void: Every maker states this: water damage from washing with battery installed is NOT covered under warranty.
Remove the battery pack before washing. No exceptions. Turn off the vest. Disconnect the battery. Store it in a dry spot away from the laundry area.
Using Hot Water or Aggressive Wash Cycles
Most heated vests have strict temperature limits: maximum 30°C (86°F) on gentle cycles.
Hot water and normal cycles damage in many ways:
-
Wire coating breakdown: Heat above 30°C ruins the protective coating on carbon fiber heating wires
-
Connection failures: Hard tumbling stresses solder joints and wire connections
-
Heating element breaks: High-speed spin cycles bend and twist internal wiring too far
Stick to cold water on the gentlest cycle your machine offers. Better yet, hand wash for full control.
Skipping the Mesh Laundry Bag
Makers require one simple step: “Use a laundry bag for machine washing.”
Why this matters:
-
Less stress: The bag shields internal wiring from drum impacts
-
Prevents snagging: Zippers, agitators, and other clothes can catch and pull heating wires
-
Fewer wire breaks: Less bending and twisting means fewer cold spots and failures
A basic mesh laundry bag costs $5 to $10. Skip it and you risk a vest worth 15 to 30 times that.
Wringing or Twisting the Vest After Washing
Your vest comes out dripping wet. You want to wring it out.
Don’t.
Care labels warn: “After washing, do not wring.”
Wringing puts too much stress on twist points:
-
Water weight plus twisting breaks the delicate carbon fiber wires
-
Wires snap at bend points and connector zones
-
Result: cold spots or complete heating failure in twisted areas
Safe water removal: Press the vest flat between clean towels. Push down with your palms to soak up moisture. Repeat with dry towels until water stops dripping.
Tumble Drying on Any Heat Setting
Every heated vest care label says: “Never tumble dry.”
Tumble dryers destroy heated vests:
-
High heat: Even “low heat” (40°C to 55°C / 105°F to 130°F) damages carbon fiber heating parts and melts wire coating
-
Hard impacts: Repeated tumbling flexes wires and solder joints too much
-
Layer separation: Heat pulls heating films away from fabric layers
-
Short-circuit risk: Damaged coating exposes wires
Air dry. Lay flat on a towel or hang on a wide, padded hanger. Expect 6 to 24 hours drying time based on humidity and airflow.
Ironing the Vest
Some people try ironing wrinkles from their heated vest.
Never do this. Makers ban ironing battery-heated clothing.
Iron heat (even on “low” around 110°C / 230°F) causes:
-
Melted wires where the iron touches
-
Broken heating circuits from too much heat in one spot
-
Permanent damage to waterproof coatings and fabric treatments
Your heated vest doesn’t need ironing. Air drying on a hanger stops most wrinkles.
Using Bleach, Dry Cleaning Solvents, or Harsh Chemicals
Regular laundry chemicals attack heated vest parts:
Chlorine bleach and dry cleaning fluids cause damage you can’t fix:
-
Coating breakdown: Solvents eat away the polymer coating that protects heating wires
-
Waterproof layer failure: Chemicals break down protective barriers around heating zones
-
Exposed wires: Damaged coating leaves bare wires open to shorts
Use mild detergent made for delicate or technical fabrics. Skip all bleach, fabric softener, and specialty stain removers.
Leaving Connectors Unprotected During Washing
The battery connector and DC plug need protection from water and detergent:
Best practices:
-
Tuck the connector cable back into the battery pocket before washing
-
Close the battery pocket zipper all the way to keep water out
-
Some advanced models include silicone wash plugs to seal DC ports—use them
Unprotected connectors get:
-
Rust from detergent residue plus moisture
-
Bent or broken pins from drum impacts
-
Poor electrical contact after drying
Storing the Vest Wet or Damp
Washing ends after the vest is clean AND dry—not just clean.
Using or storing a damp heated vest creates serious problems:
-
Rust: Moisture trapped in connector contacts eats away at metal over time
-
Short circuits: Powering the system before full drying can cause sparking at damaged spots
-
Mold growth: Damp padding grows mold and smells bad in storage
Wait for 100% dryness before reconnecting the battery. Touch all fabric layers, thick areas like collars and shoulders too. Feel any dampness or coolness? Give it another 12 hours.
Ignoring Wash-Life Limits and Cycle Rules
Heated vests have limits. Even perfect washing can’t make them last forever.
Maker data:
-
Quality vests last up to 500 washes without losing performance—with proper washing
-
Lab testing shows heating elements work fully after 50+ machine washes under set conditions (gentle cycle, cold water, air dry)
Going over recommended cycles or using harder settings speeds up:
-
Loss of even heat (hot and cold spots appear)
-
Open circuits in heating panels
-
Overall system wear
Follow the care label every wash. Track about how many times you’ve cleaned your vest. After 400 to 500 washes, expect some drop in performance even with perfect care.
Avoid these mistakes and your heated vest keeps working through hundreds of cold days ahead.
How Often Should You Wash Your Heated Vest
Heated vests need a different wash schedule than regular clothes. Wash too often? You’ll shorten the vest’s life and damage the heating system.
The rule is simple: wash when dirty, smelly, or after heavy use. Your heated vest has delicate carbon fiber wires inside. It has electronic connections too. Each wash puts stress on these parts. Yes, even correct washing does this.
Frequency Based on Your Usage Pattern
Your wash schedule depends on how you use the vest:
Daily outdoor use in harsh conditions (construction, trail work, skiing, farm labor):
– Dirt, sweat, mud, and salt build up fast
– Wash every 1 to 2 weeks or after 3 to 5 heavy wears once grime shows
– Air the vest overnight, then check for body odor. Smell it? Time to wash.
Moderate outdoor use a few times per week (weekend hiking, outdoor sports, dog walking):
– Wash about once per month or after you notice dirt or odor
– Spot-clean minor stains between full washes. Use a damp cloth and mild soap.
Occasional or indoor use (commuting, light errands, office wear):
– Wash 1 to 3 times per season
– Wear your vest over clean base layers. It stays fresh longer this way.
– Air it out after each wear. Full washes can wait.
Clear Signs It’s Time to Wash
Don’t guess. Look for these signals:
-
Visible dirt, mud, salt stains, food spots, or oil marks that spot cleaning won’t remove
-
Body odor that stays after the vest airs out for 24 hours
-
Sweat-soaked fabric after hard activities like long hikes or heavy physical work
-
Exposure to contaminants: fuel, smoke, chemicals, or heavy pollution. Wash right away to protect fabric coatings and wiring.
When NOT to Wash
Skip the full wash if:
-
Small, localized stains appear. Spot-clean these areas instead.
-
The vest still looks and smells clean after several light wears
-
You’re washing just to feel productive. Over-washing damages down loft. It strips waterproof coatings. It harms heating wire insulation over time.
Down-insulated heated vests need care. Manufacturers warn: “Avoid over-washing.” Washing strips natural oils from down clusters. This kills the insulation’s loft and warmth. Wash down heated vests when needed. Rely on spot cleaning for routine care.
Factors That Change Wash Frequency
Environment matters:
– Dusty, muddy, salty, or oily conditions ⇒ shorter intervals
– Clean, dry, indoor settings ⇒ longer intervals
Skin contact level:
– Worn over clean base layers you wash often ⇒ vest stays cleaner longer
– Worn against skin or over thin layers ⇒ body oils and sweat transfer faster. You may need more frequent washing.
Fill type:
– Synthetic insulation: handles more frequent washing
– Down fill: wash less often to preserve natural oils and loft
Spot-clean whenever possible. Save full washes for real need. This keeps your heated vest clean, working well, and heating strong for years.
Conclusion
Your heated vest keeps you comfortable and warm. Treat it right during cleaning. This ensures it works well season after season. The basic rules are simple: always remove the battery pack before washing. Choose gentle methods for machine or hand washing. Never skip air drying. These three steps prevent 95% of heated vest damage.
Proper heated vest maintenance protects more than just cleanliness. You’re protecting the carbon fiber heating elements and electrical parts that make your vest work. A well-cared-for heated vest lasts 5+ years. Poor care can cut its life to just one season.
Your next step? Set a reminder to wash your vest every 10-15 wears. Also wash it if you notice smell or visible dirt. After cleaning, do a quick function test. Reconnect the battery. Check all heating zones before your next outdoor trip. Keep your vest’s care label handy for quick checks. Not sure what to do? Hand wash with cold water—it’s always the safest choice.
Stay warm, stay safe, and keep that heated vest working like new.